
Review Block
A great tool if you need to review and edit a document output before sending or saving
The review block can help to ensure that output documents are accurate, complete, and meet the specific needs of each situation. There are several reasons why having a review block, or human in the loop stage, in a Portant workflow can be beneficial:
Quality control: Someone can review the automated documents to ensure that they are accurate, complete, and error-free.
Regulatory compliance: There may be regulatory requirements that require a human to review and approve certain documents before they can be finalised. This is especially true in industries such as healthcare and finance, where compliance is critical.
Style and formatting: The automated process may generate a document that meets all of the required content requirements, but the style and formatting may not be appropriate. A human can review the document and make adjustments to the font, layout, and other elements to ensure that the document is visually appealing and easy to read.
Final approval: In some cases, a human may need to review and approve the final version of the document before it can be distributed or used. This may be necessary in industries such as healthcare or finance, where compliance and accuracy are critical.
While an automated workflow can help to streamline the document creation process, a human is sometimes necessary to do the final 10% of the work.
In this guide, we will cover:
An overview of the Review Block
How to add a Review Block
When you can add a Review Block
How to review documents using the Review Block
How to review documents using the Review Block in HubSpot
An overview of the Review Block
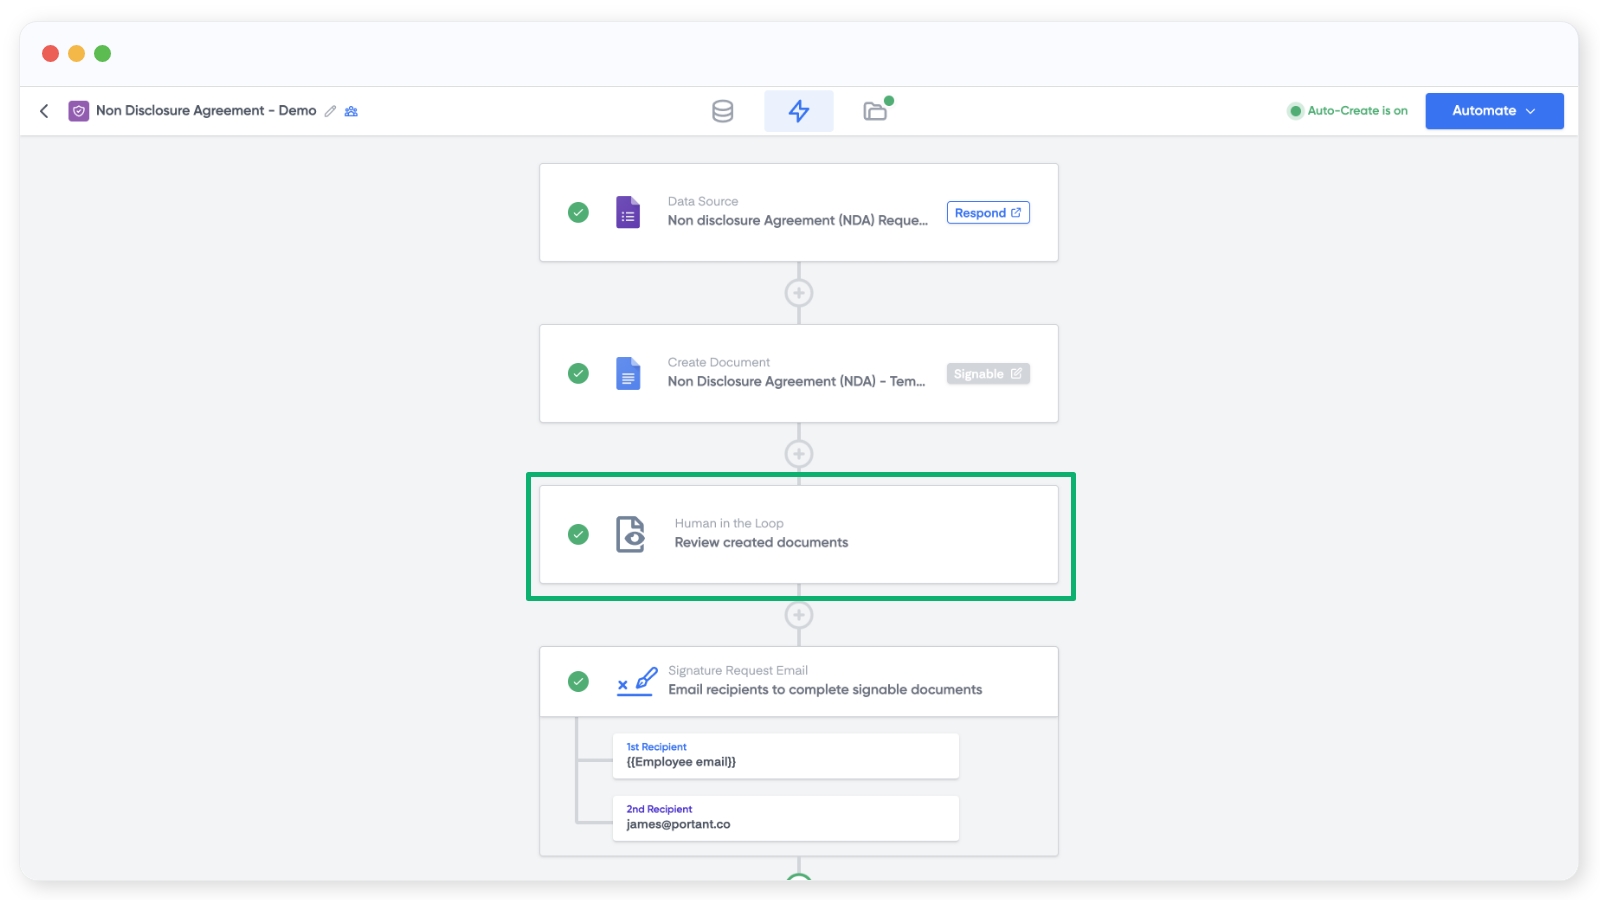
The review block is intended to be used in workflows that need a human's oversight to review or edit a document before the final steps of the workflow are completed. This could be to make sure all the information is correct or to add the finishing content or formatting to a document before it is sent.
How to add a Review Block
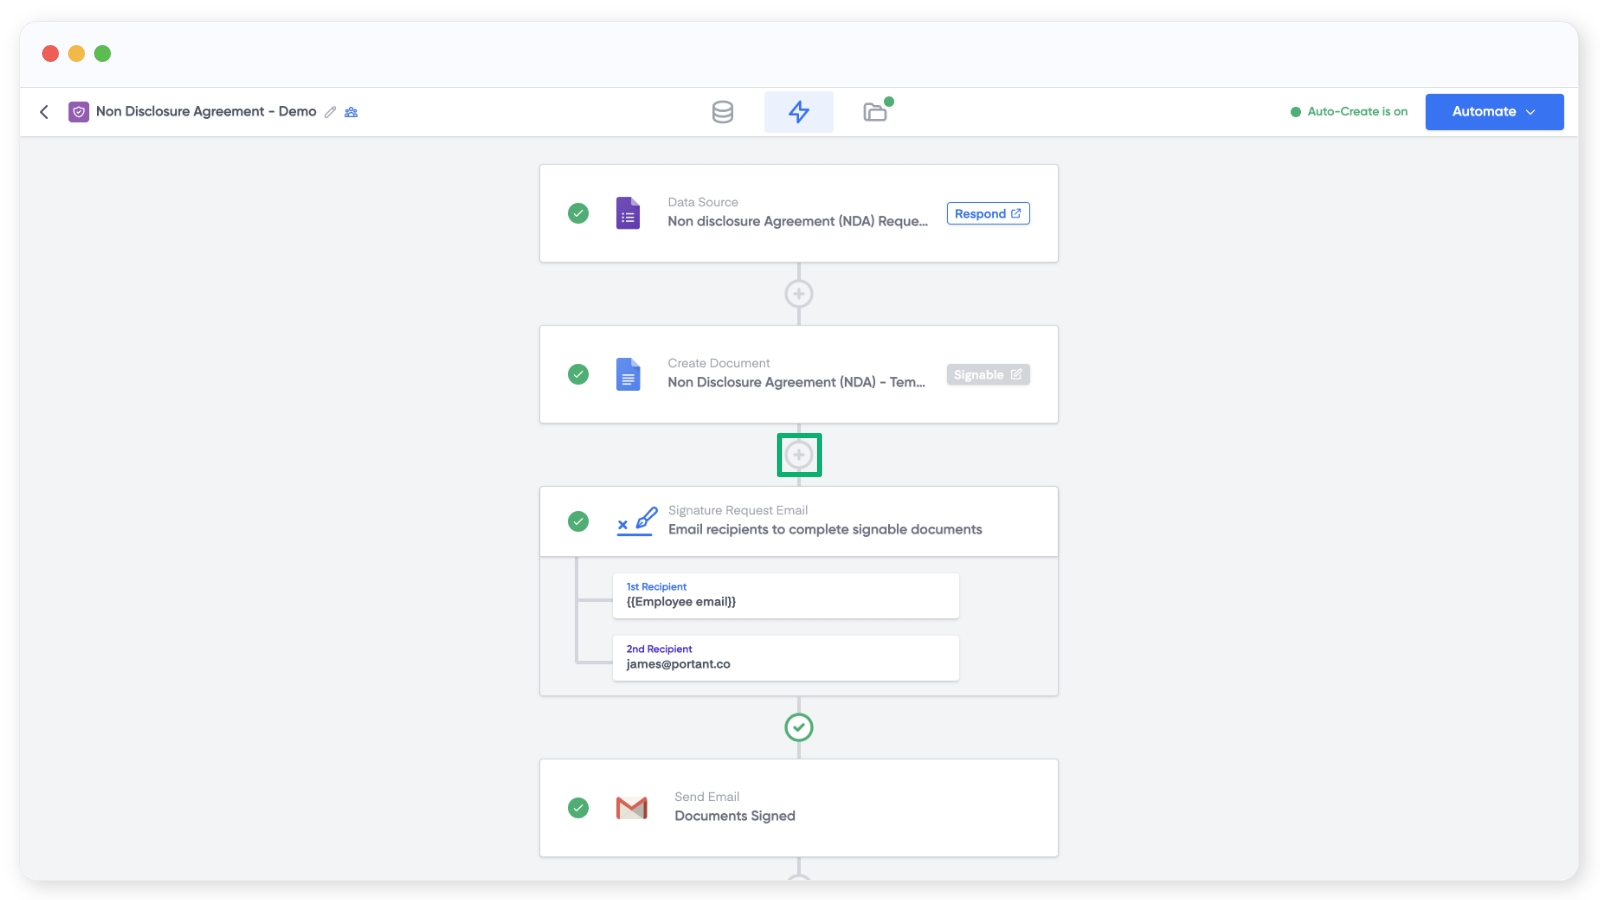
You can add a review block by clicking the plus button after a Document template block here:
Then select the Review block from the modal:
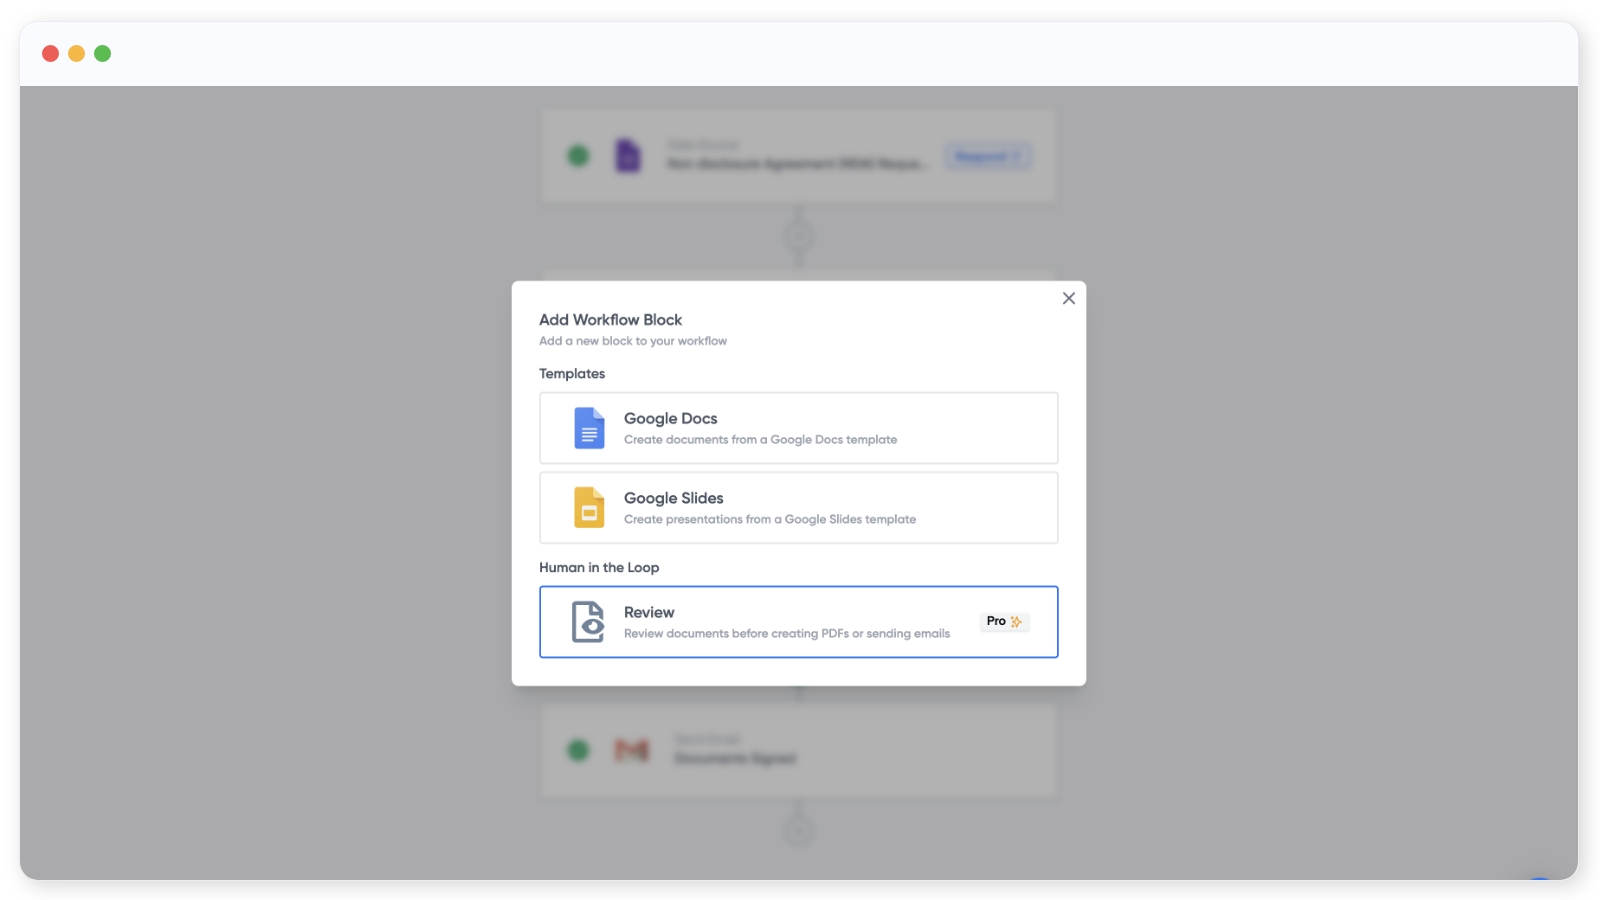
Note: This is a feature only available to Pro users
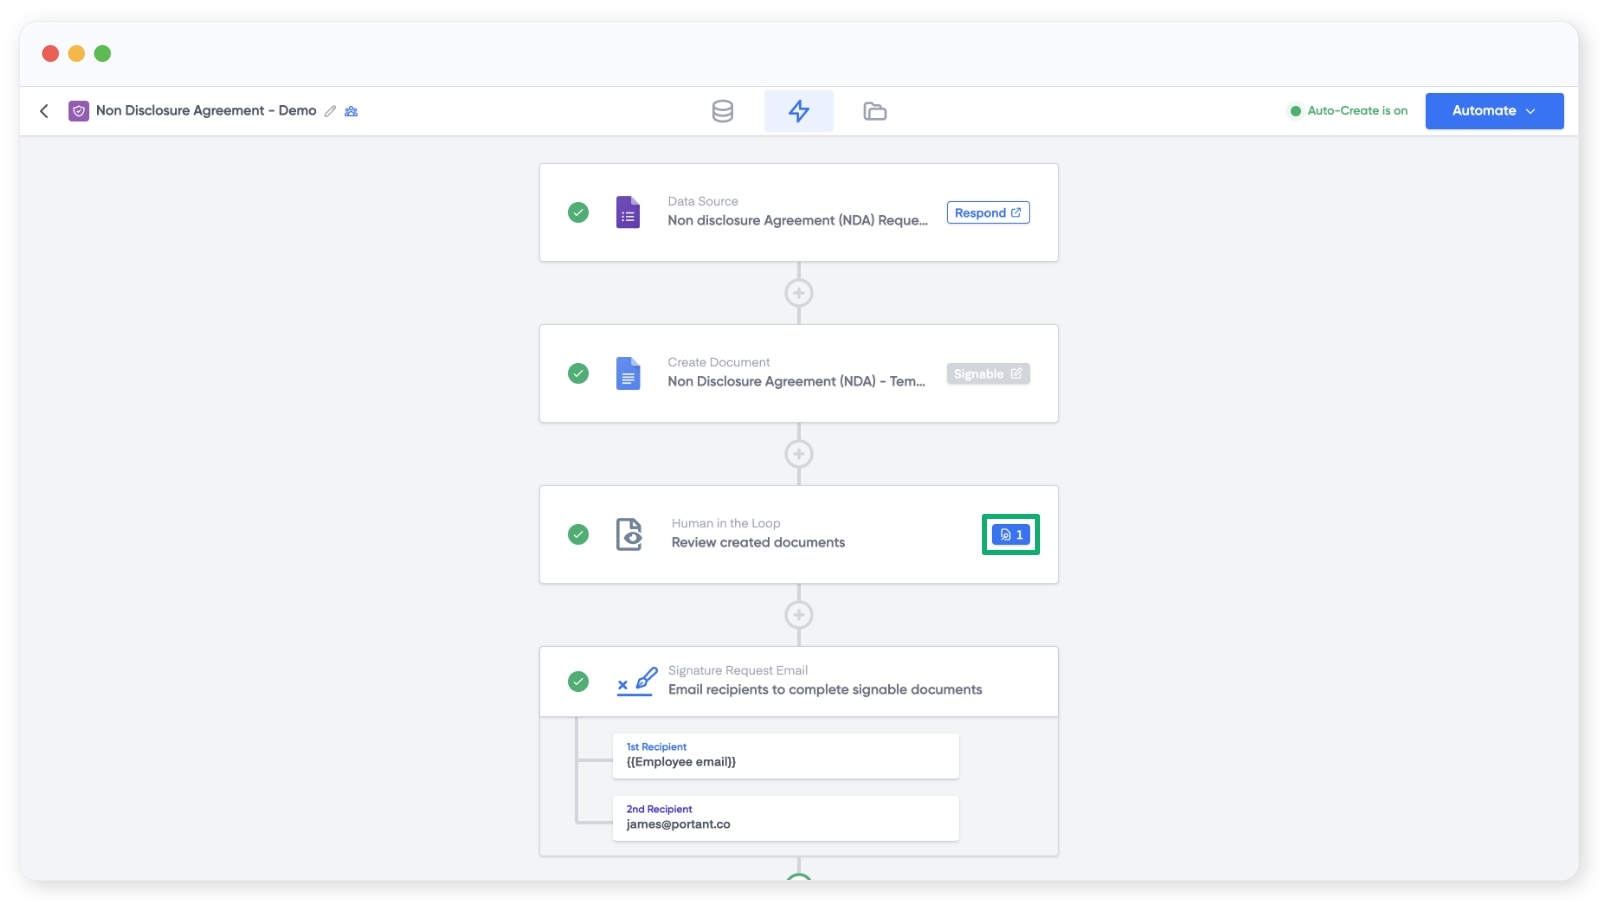
The set-up is now complete. Any time your workflow runs, outputs will be held at this stage until someone logs in and approves the documents to move to the next stage of the workflow.
When you can add a Review Block
You can only add a Review Block after a document block. So if you click the plus icon and you can't see the Review block, please try adding a document block and clicking the plus button after it.
How to review documents using the Review Block
When a workflow has a review block, each time the workflow runs, the documents will be held at the Review block stage. You will be able to see this in the workflow view here:
Also in the output page by the review button next to the output:

When you click either of these buttons, you will be taken to the review section. This is where you can review, edit, and approve all the documents currently held, which looks like this:
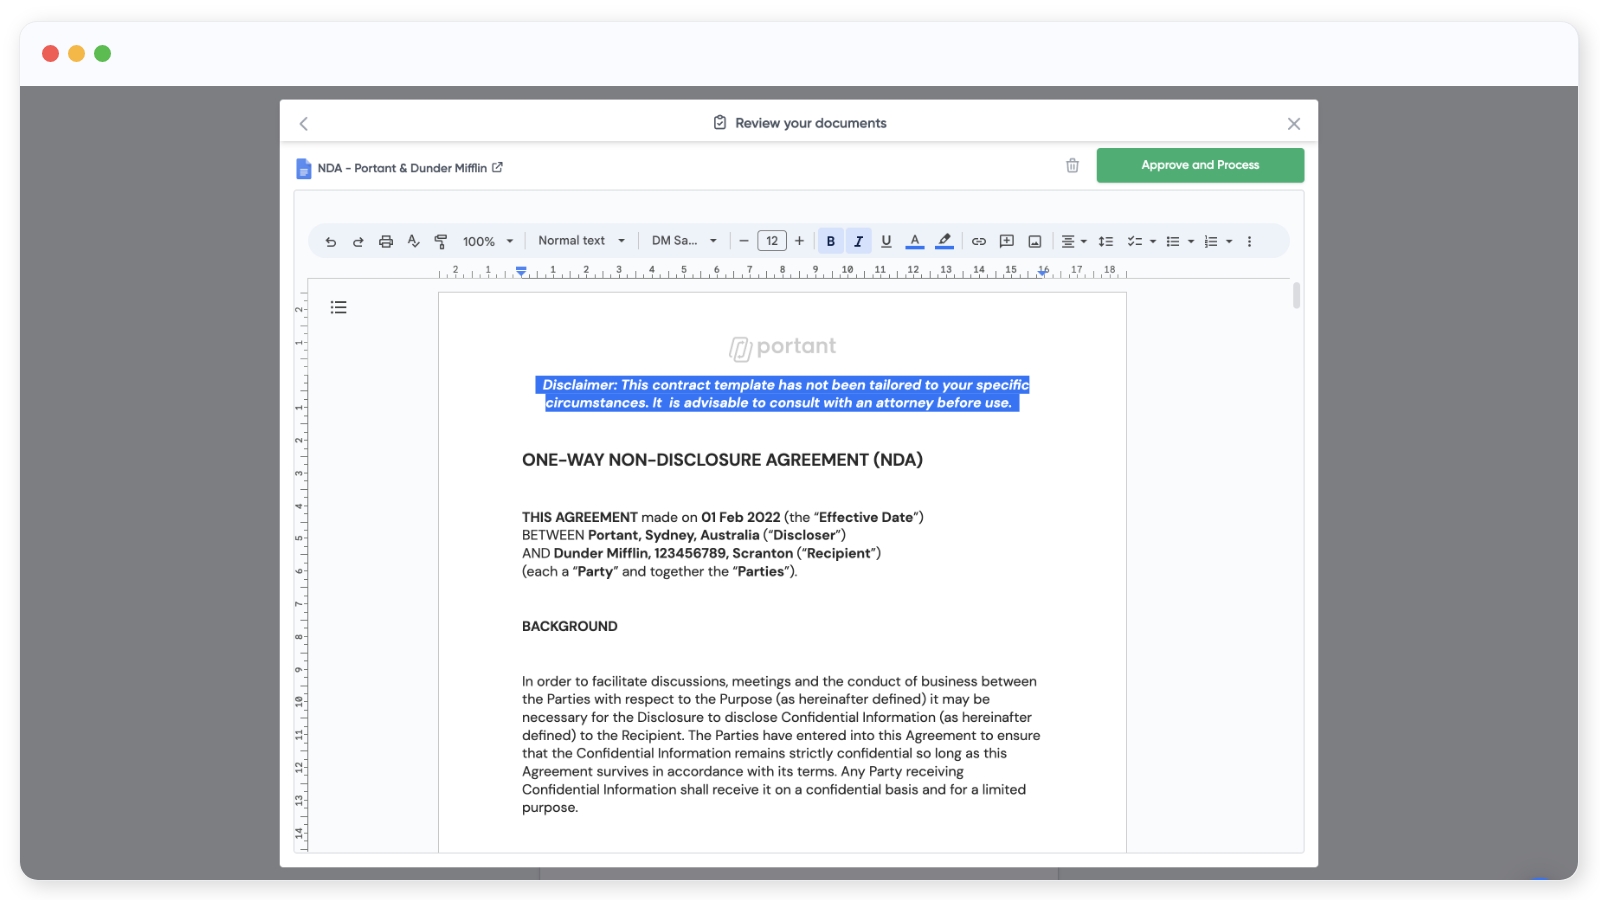
Then when you'd like to Approve and process the document(s), you press the 'Approved and Process' button. When you 'Approve and Process' the documents will move to the next stage of the workflow and complete the next steps.
Note: Portant now displays the names of reviewers for each document in the Outputs tab.

How to review documents using the Review Block in HubSpot
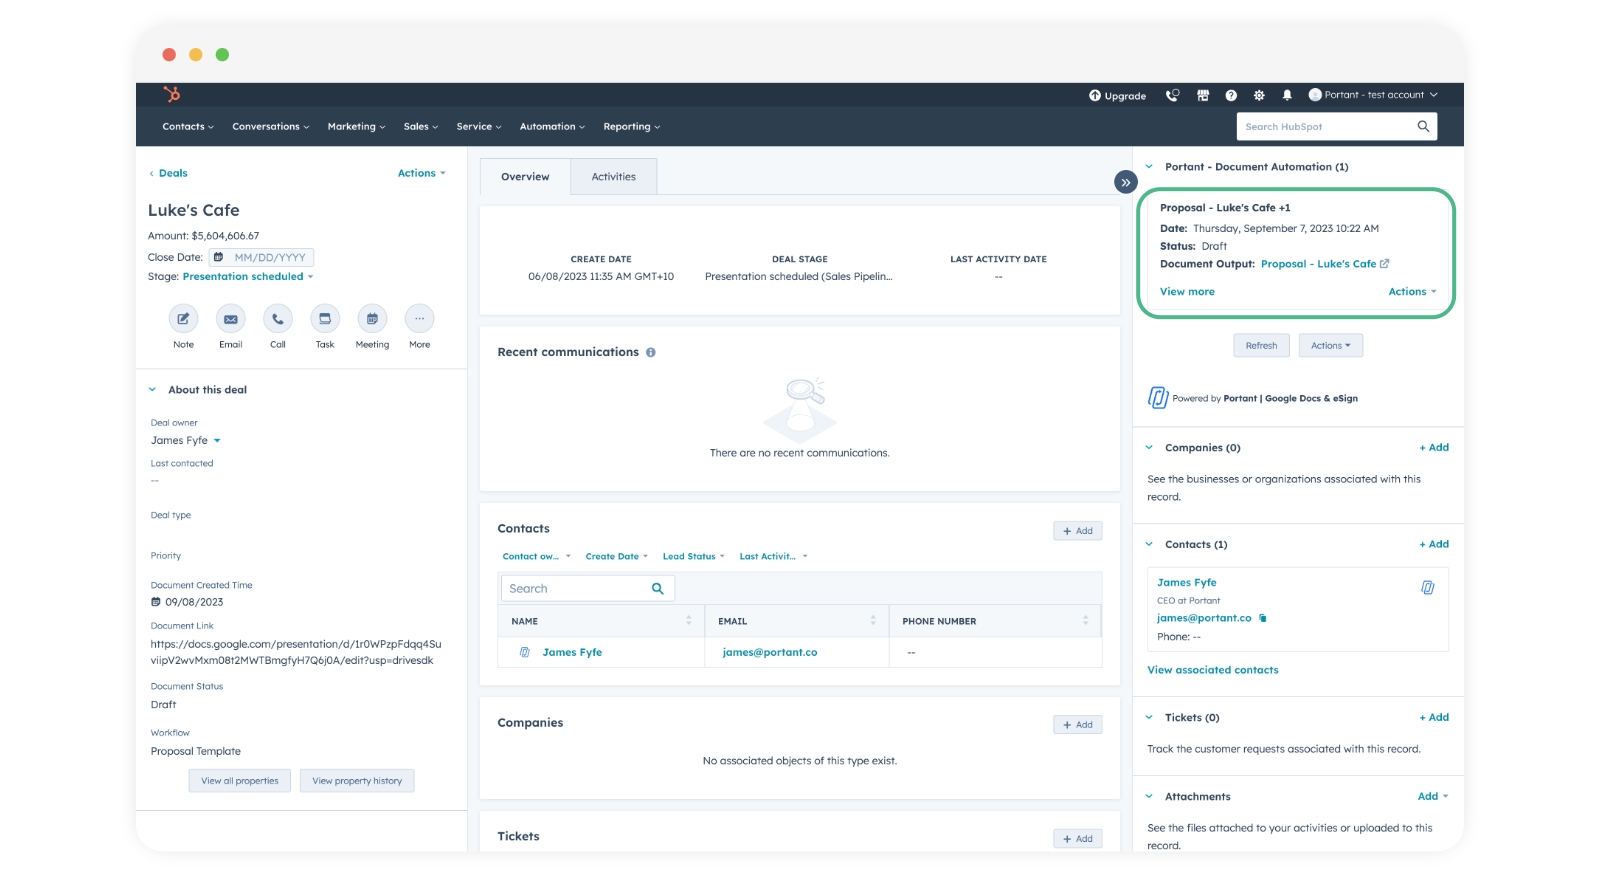
When a workflow with a HubSpot Source has a review block, each time the workflow runs, the documents will be held at the Review block stage. You will be able to see this in the HubSpot here:
Note: When the document is in the Review stage the status is "Draft". This status is also stored as a HubSpot Custom Property created by Portant.
To review the document, click the link within the CRM card, which will open the document in Google Docs or Slides. Then when you have reviewed it and made any changes, you can close the Google Doc/Slides window and click Actions > Approve like this:

When you click approve, the document will move to the next stage of the process and be captured as approved in the Portant Output page, the document status, and the Activities section on the HubSpot deal page.
Note: We now have new App cards available! You can also approve documents pending review directly from the new App card in the right-hand sidebar of HubSpot. To do this, simply click the "Generate/Actions" button and then select "Approve Draft."


If you haven’t added the new App cards to your HubSpot yet, follow this quick guide to easily set them up.
Feedback and feature suggestions
We created Portant in 2021, and the feedback we have received since then has been very helpful and greatly appreciated. If you have any feedback, please feel free to send us an email at [email protected]
Last updated
Was this helpful?