# Workflow Filters
Adding conditions to Portant helps to create a more dynamic and flexible workflow that can adapt to different scenarios and inputs. Conditions allow for branching and decision-making in the workflow, leading to the execution of different actions based on the criteria set. This leads to increased efficiency and accuracy, as the workflow can be designed to handle specific situations and respond accordingly. In short, adding conditions to workflows improves the effectiveness and automation of processes. In this guide, we will cover:
1. An overview of Portant Workflow conditions
2. How to add a condition
3. How to add multiple conditions
4. The difference between AND and OR statements
#### An overview of Portant Workflow filters
Adding conditions to a workflow is useful when you only want to run a workflow when a certain condition is true. However, what about when you want to vary how a workflow reacts based on multiple conditions? The best way to achieve this is to create a different workflow and filter for each variation you need.
For example, if you have one form that is for customer service and you want to route the enquiry to the right department based on the type of enquiry. e.g. Shipping, Finance, Operations or Sales
1. Add a question in your form that can distinguish which department the form response is going to go to.
2. Make a workflow for one department and add a filter that uses the question in step 1.
3. Make another workflow for each department with a different filter
This is how you could use one form for multiple outcomes and reduce the complexity for the person completing the form.
#### How to add a condition
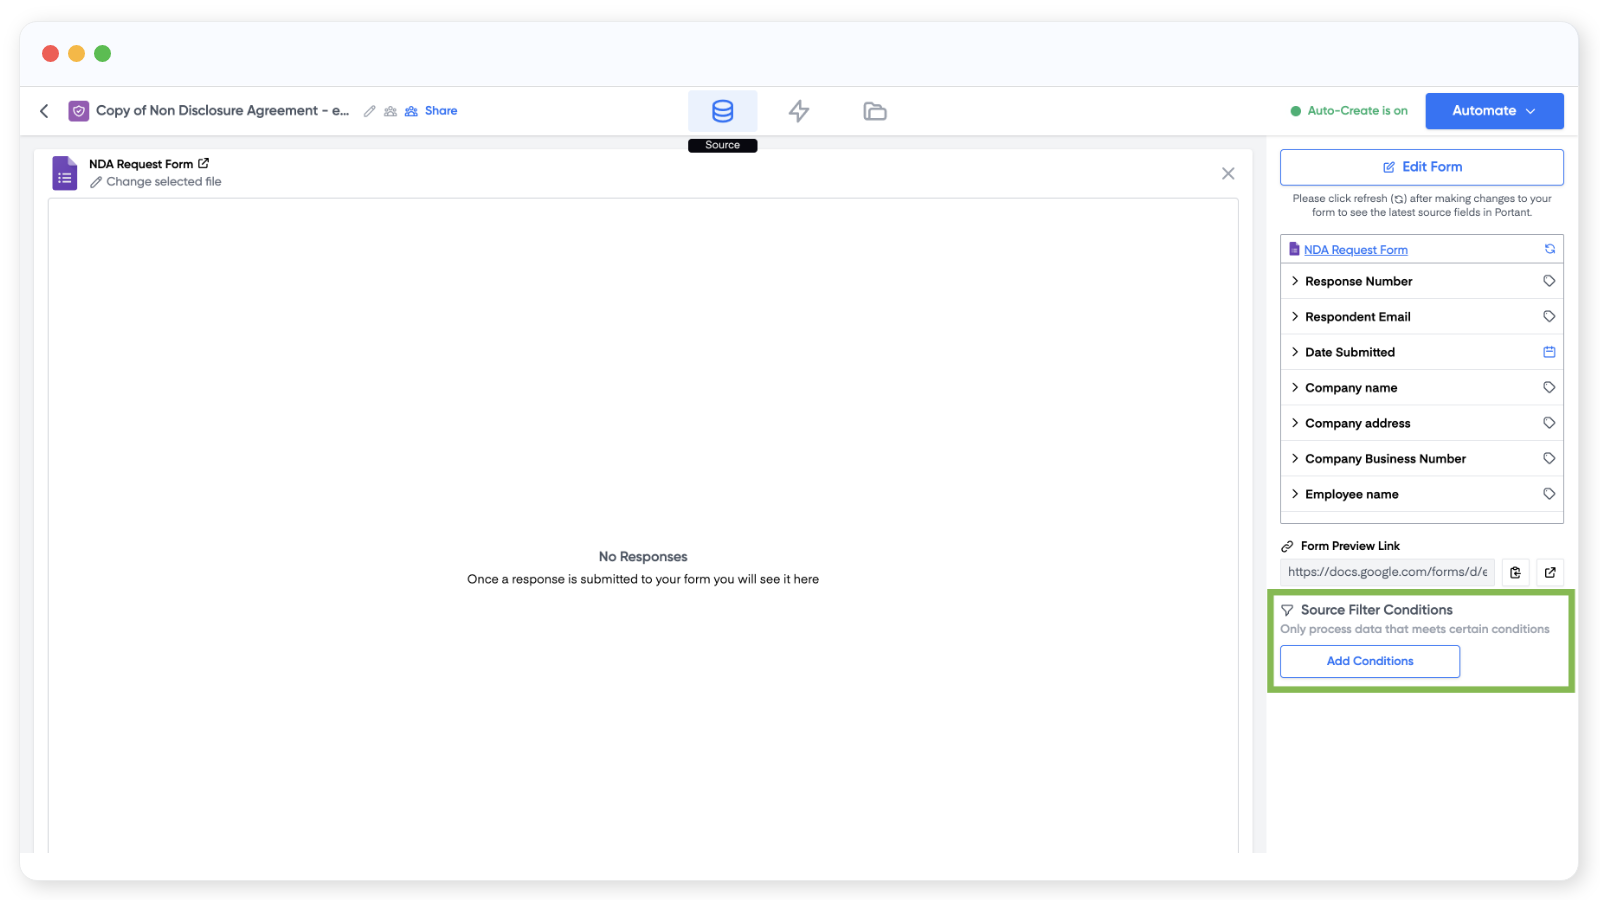
To add a condition to a workflow, you need to open the Workflow's source and click the 'Add Condition' button in the right menu, here:
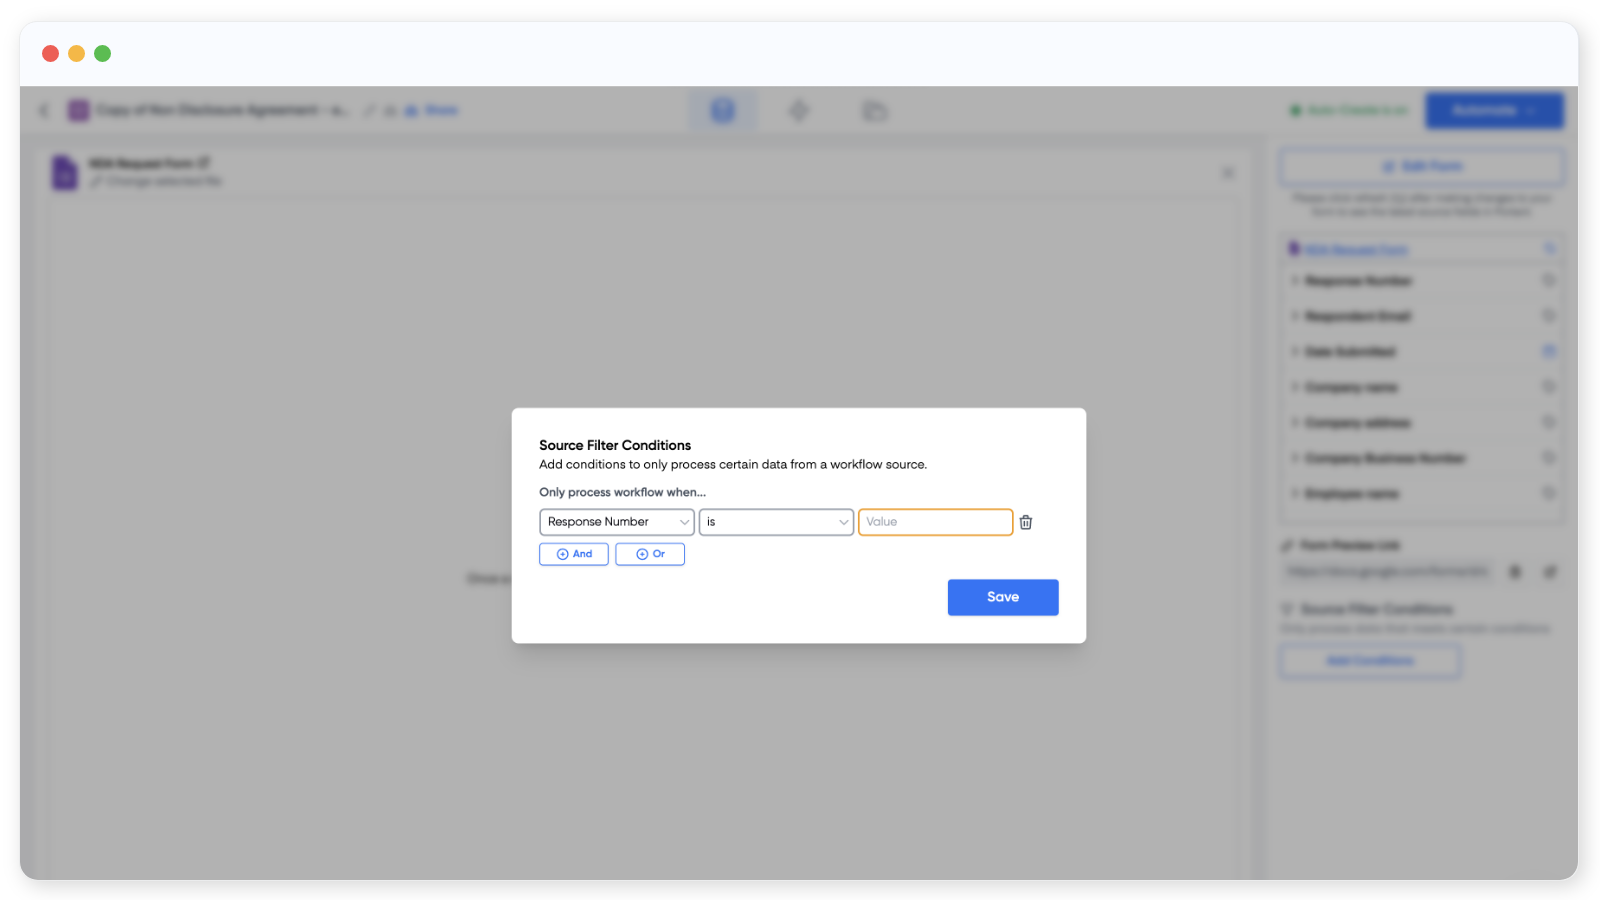
Then when the modal opens, click 'Add condition' and then add your condition.
The first selection is to choose the question that the filter condition relates to. The next option is to choose if the condition operator is IS, IS NOT, IS EMPTY, IS NOT EMPTY
"IS" and "IS NOT" are comparison operators used to compare the value of a variable or expression to a specific value.
The "IS" operator is used to check if two values are equal. For example, if you have a question "x" with a value of 5, the statement "question x IS 5" would be true.
The "IS NOT" operator is used to check if two values are not equal. For example, if you have a column "x" with a value of 5, the statement "column x IS NOT 6" would be true.
"IS EMPTY" and "IS NOT EMPTY" are used to check if a question answer, cell, or field has a value or not.
If you use the "IS EMPTY" operator in a filter, the workflow will run if a variable or expression has no value or is null. For example, if you have a question answer "x" with no value, the workflow would run if the "question x IS EMPTY".
If you use the "IS NOT EMPTY" operator in a filter, the workflow will run if a variable or expression has a value. For example, if you have a question answer "x" with the value 5, the workflow would run if the "question x HAS ANY VALUE".
In summary, "IS" and "IS NOT" compare values, while "IS EMPTY" and "IS NOT EMPTY" check if a value exists or not.
#### How to add multiple conditions
You can add multiple conditions to a filter to further refine the data you are selecting the workflow to run on. You have two options to add another condition, AND or OR, which we go further into in the next section. To add one, click 'AND' or 'OR' and enter your new condition. You can add as many as you like, and you can combine AND and OR operators together.
#### The difference between AND and OR statements
The logical operators "AND" and "OR" are used to combine conditions in a statement to create more complex conditions.
The "AND" operator requires that all conditions in the statement must be true in order for the overall statement to be true. For example, if the statement is "A AND B", it means that both A and B must be true in order for the statement to be true.
The "OR" operator requires that at least one of the conditions in the statement must be true in order for the overall statement to be true. For example, if the statement is "A OR B", it means that if either A or B is true, the overall statement is true.
In summary, "AND" represents a logical conjunction, and "OR" represents a logical disjunction.
🎉 That's it. You now know how to add filters to workflows. As a final step, you should test your filter with some sample data.
#### Feedback and feature suggestions
We created Portant in 2021, and the feedback we have received since then has been very helpful and greatly appreciated. If you have any feedback, please feel free to send us an email at
---
# Agent Instructions: Querying This Documentation
If you need additional information that is not directly available in this page, you can query the documentation dynamically by asking a question.
Perform an HTTP GET request on the current page URL with the `ask` query parameter:
```
GET https://docs.portant.co/portant-docs/automation/workflow-filters.md?ask=
```
The question should be specific, self-contained, and written in natural language.
The response will contain a direct answer to the question and relevant excerpts and sources from the documentation.
Use this mechanism when the answer is not explicitly present in the current page, you need clarification or additional context, or you want to retrieve related documentation sections.