# Google Sheets Auto-create
> **Note** - this is a **✨ Pro feature** only avalaible on paid Portant Subscriptions
You can use Auto-create in Google Sheets source workflows to create automated workflows. These workflows can be triggered when a new row is added, or when data in a row is changed. In this guide we will show you how to:
1. Turn on Auto-create
2. How often does Auto-create run?
3. Auto-create when data in a row changes
4. Auto-create when a specific value changes e.g. Status
#### Turn on Auto-create
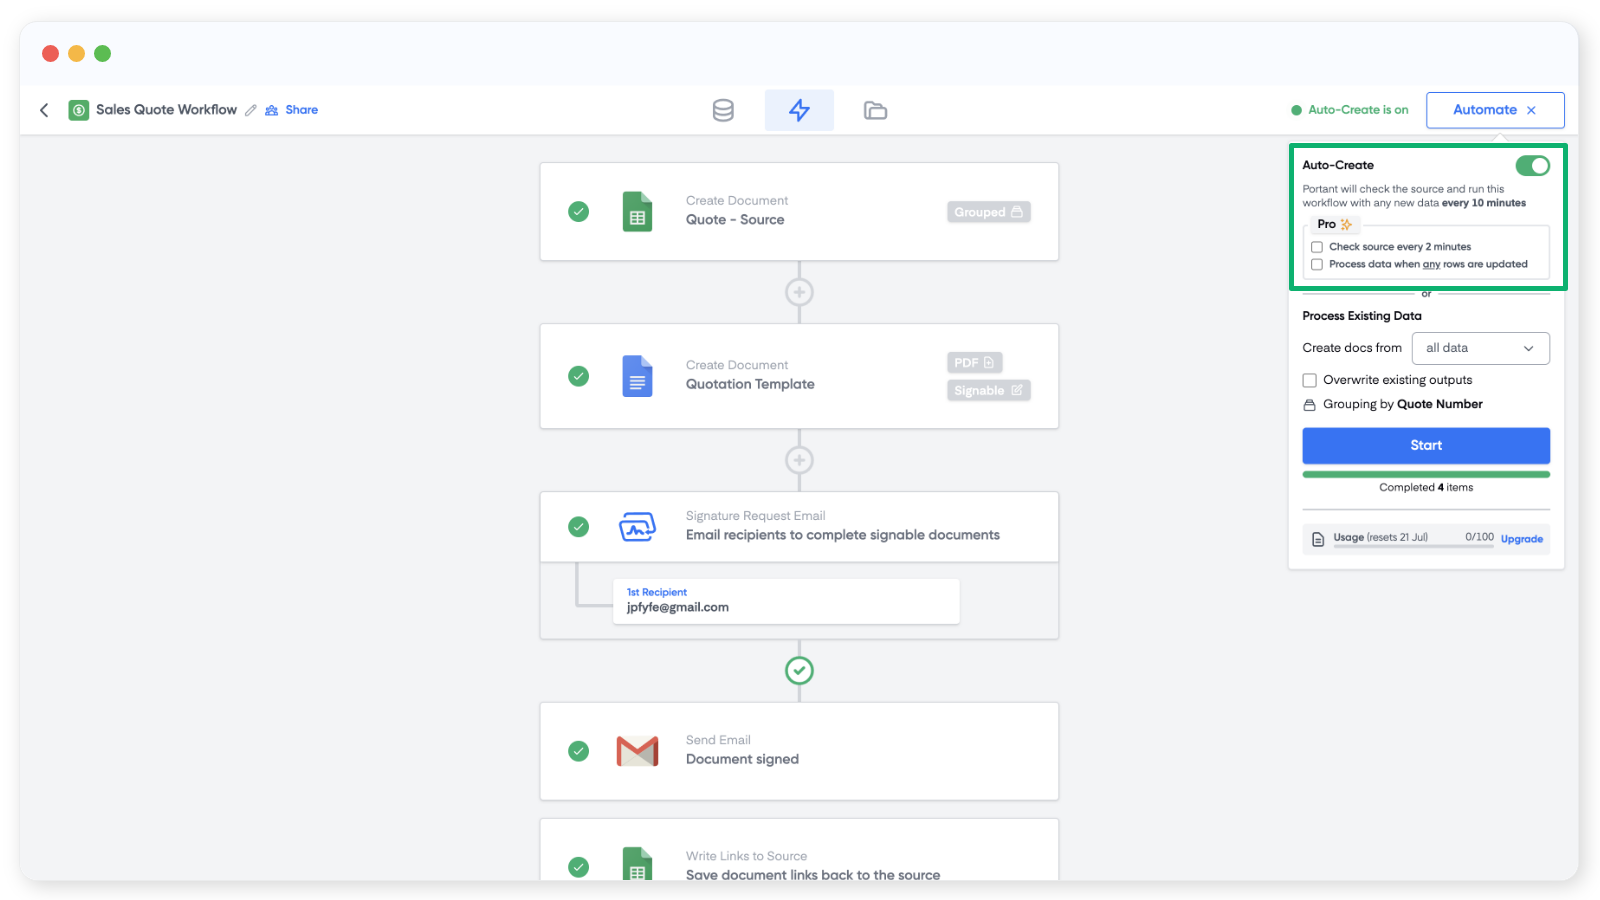
When you have created a workflow with Google Sheets as the source, you can turn on Auto-create in the top right corner. When you turn on Auto-create you will see the following options:
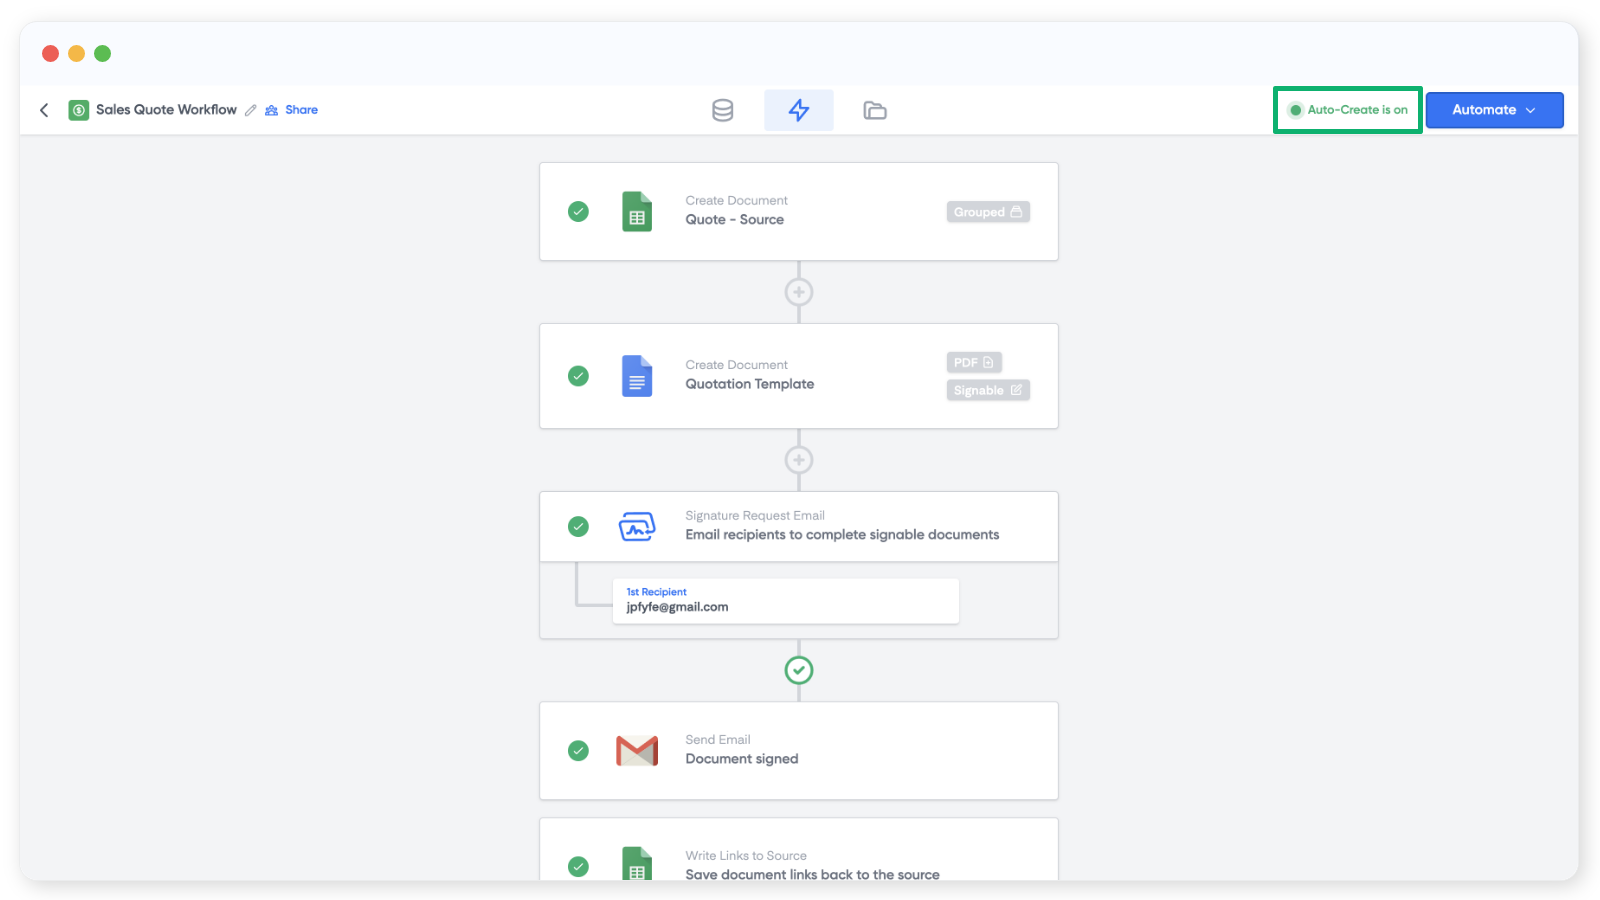
When you tun on Auto-create an Auto-create status will always be displayed in the top right corner here:
If you can't see this status, Auto-create is not on.
When Auto create is turned on, it will process any new rows of data added to the bottom of the spreadsheet table from the point in time it is turned on.
> Note: Auto-create does not process any rows of data already stored in the spreadsheet. Only new rows of data added to the bottom of the spreadsheet will be processed
#### **How Auto-create works**
When Auto-create is turned on, Portant counts how many rows of data are in the spreadsheet. Then when Auto-create is ON, and a row of data is added after the last row, it will be processed by the workflow automatically.
If you want to have a spreadsheet with a formula in one of the columns, we recommend wrapping the formula in an IF Statement, to display nothing if there is nothing in the row, like this:\
\&#xNAN;**=IF(A17="","",(\*\******Your Formula*****\*\*))**
****\
If you don't do this, then Portant will only process rows added below the the last row with a formula in it. For example:
####
#### Auto-create when row data changes
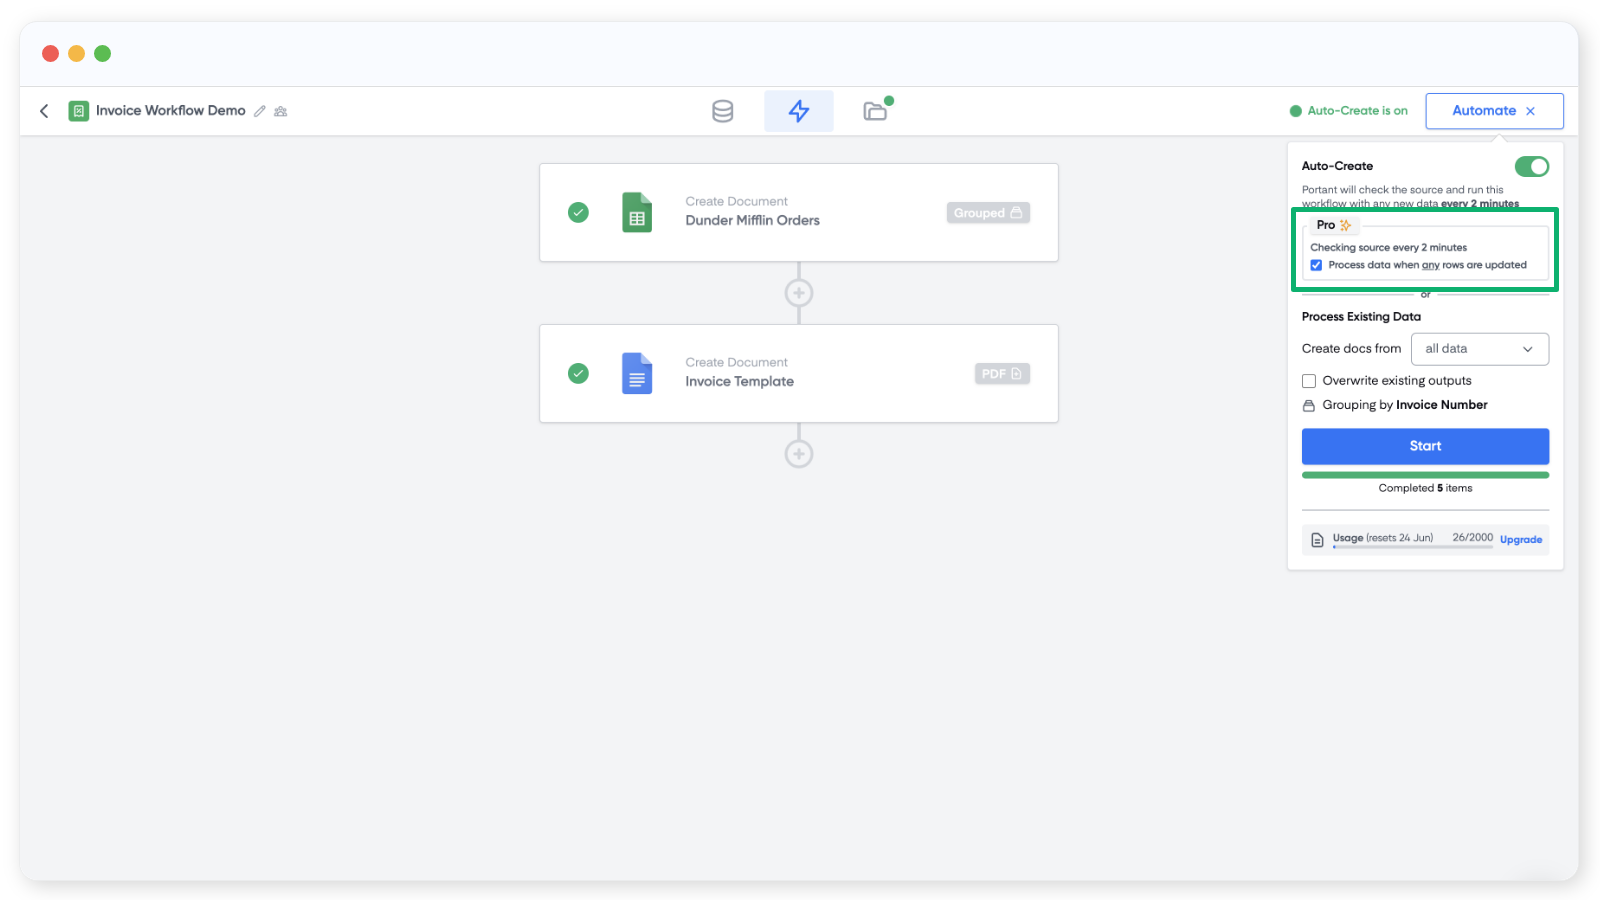
Sometimes you might want to run auto-create when data in a row changes. Portant takes a snapshot of the data in your spreadsheet at the time this feature is turned on. Then whenever a change in the data is detected, Auto-create will process the row with the changed data. To turn on this feature, you can select the check box in the Automation panel here:
#### Auto-create when a specific value changes e.g. Status
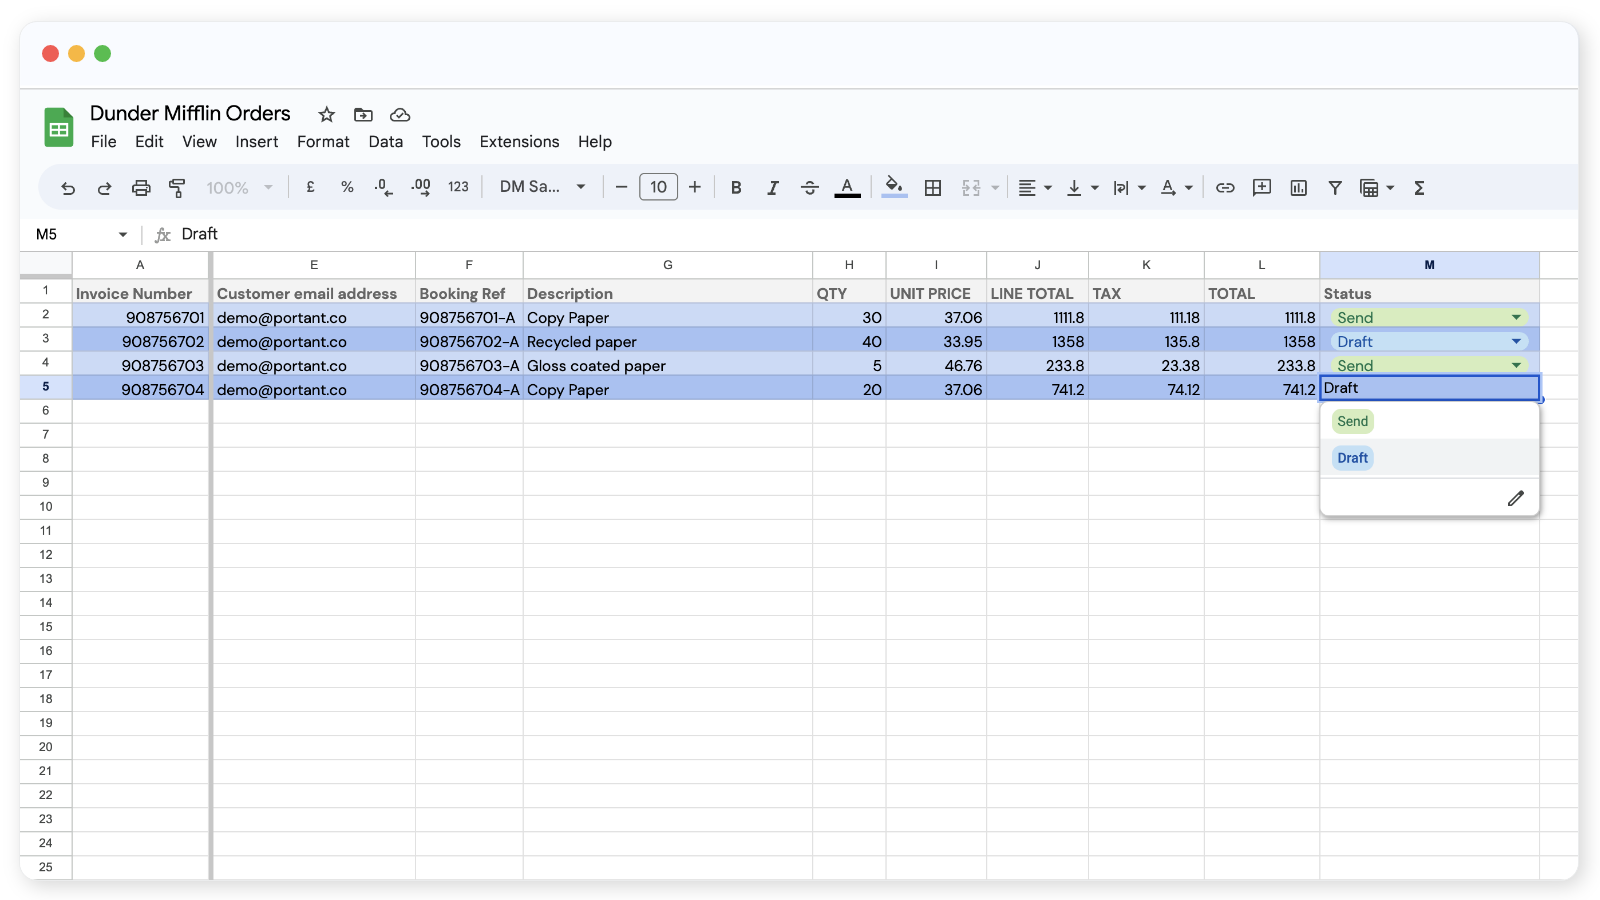
You can combine this feature with a [workflow filter](https://www.portant.co/guide-article/how-to-use-workflow-filters) that enables you to only process rows when a status is true. For example, you could have a status in a Spreadsheet that is either '**Draft**' or '**Send**'. Then when you want to process the row of data, you change the status to '**Send**' like this:
To build this, you would turn on Auto-create when a specific value changes and then add a [workflow filter](/portant-docs/automation/workflow-filters.md) to only process data when the '**Status**' is '**Send**'
> This can also be a great solution to prevent partially completed rows to be processes by Auto-create.
#### Feedback and feature suggestions
We created Portant in 2021, and the feedback we have received since then has been very helpful and greatly appreciated. If you have any feedback, please feel free to send us an email at
---
# Agent Instructions: Querying This Documentation
If you need additional information that is not directly available in this page, you can query the documentation dynamically by asking a question.
Perform an HTTP GET request on the current page URL with the `ask` query parameter:
```
GET https://docs.portant.co/portant-docs/sources/google-sheets/google-sheets-auto-create.md?ask=
```
The question should be specific, self-contained, and written in natural language.
The response will contain a direct answer to the question and relevant excerpts and sources from the documentation.
Use this mechanism when the answer is not explicitly present in the current page, you need clarification or additional context, or you want to retrieve related documentation sections.