Manage and select HubSpot properties
Choose which HubSpot properties (standard or custom) are available to use as tags inside your templates. This page covers how to pick those fields, how to use association labels for related contacts, and how to reference labelled contacts in templates and emails.
For a full reference of every standard property, see Full list of available HubSpot properties.
Manage HubSpot properties from a workflow
This guide assumes you've already set up a workflow with HubSpot as the source. If you haven't, start with the HubSpot overview.
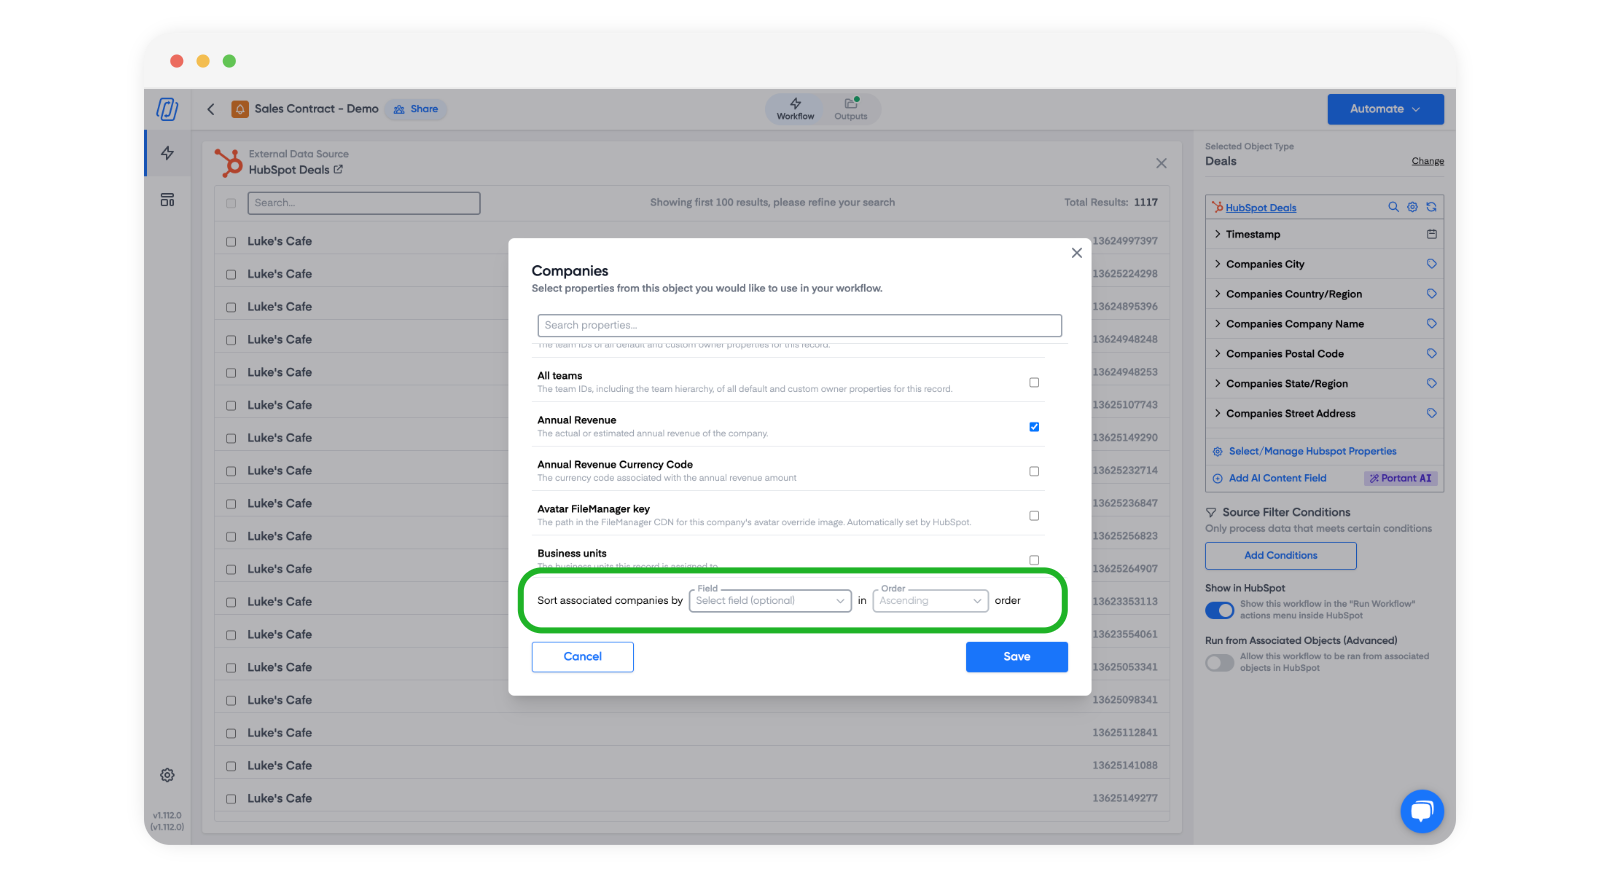
In your workflow's Source block, click Manage HubSpot Fields.
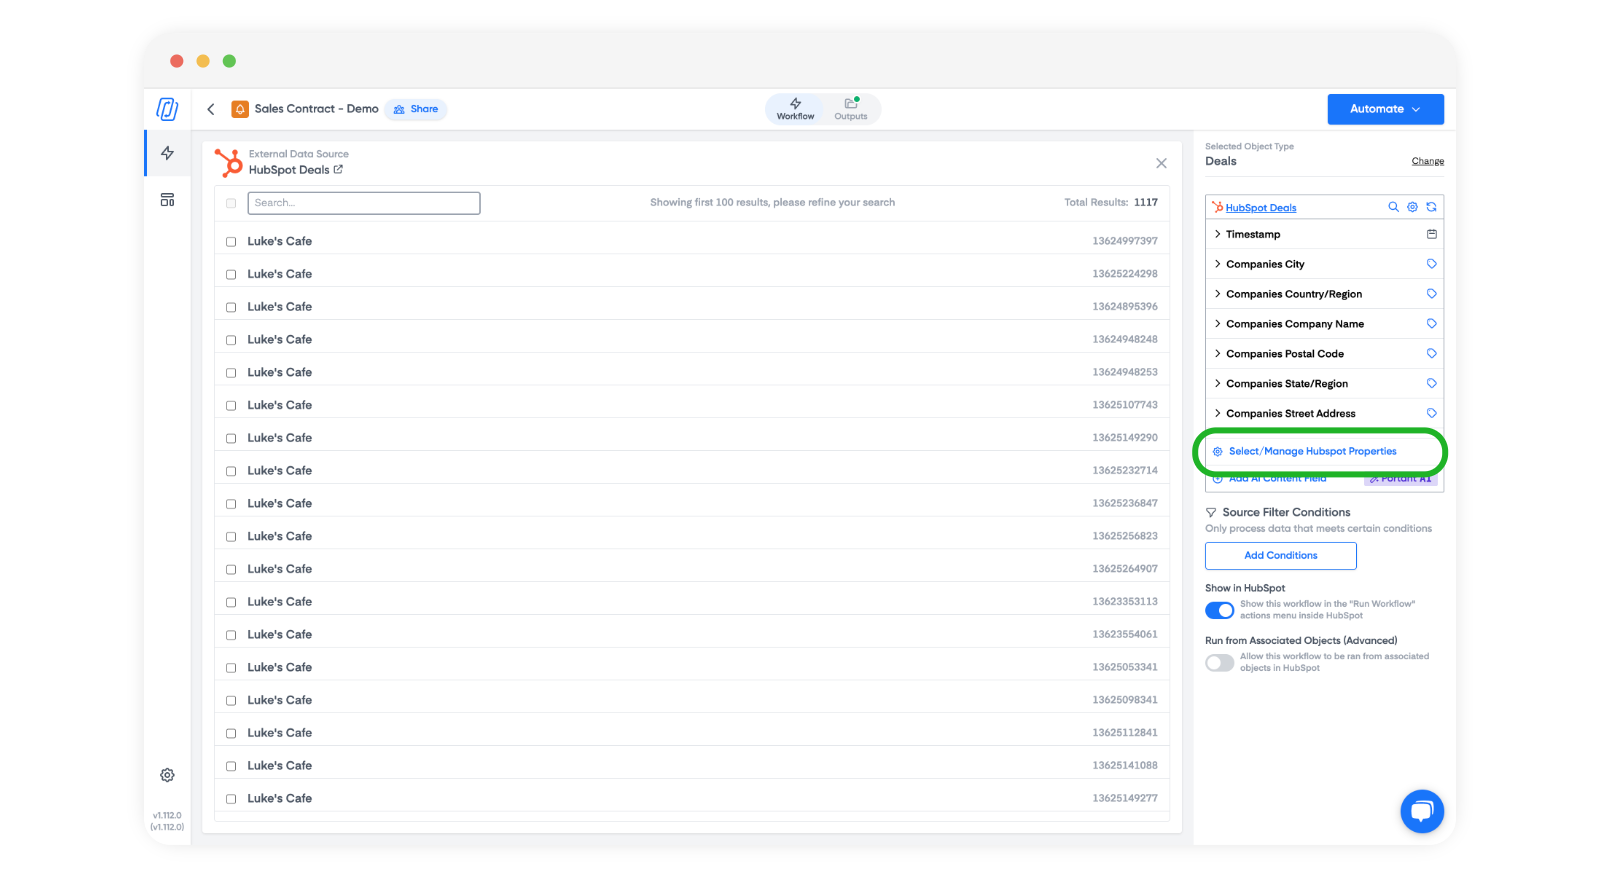
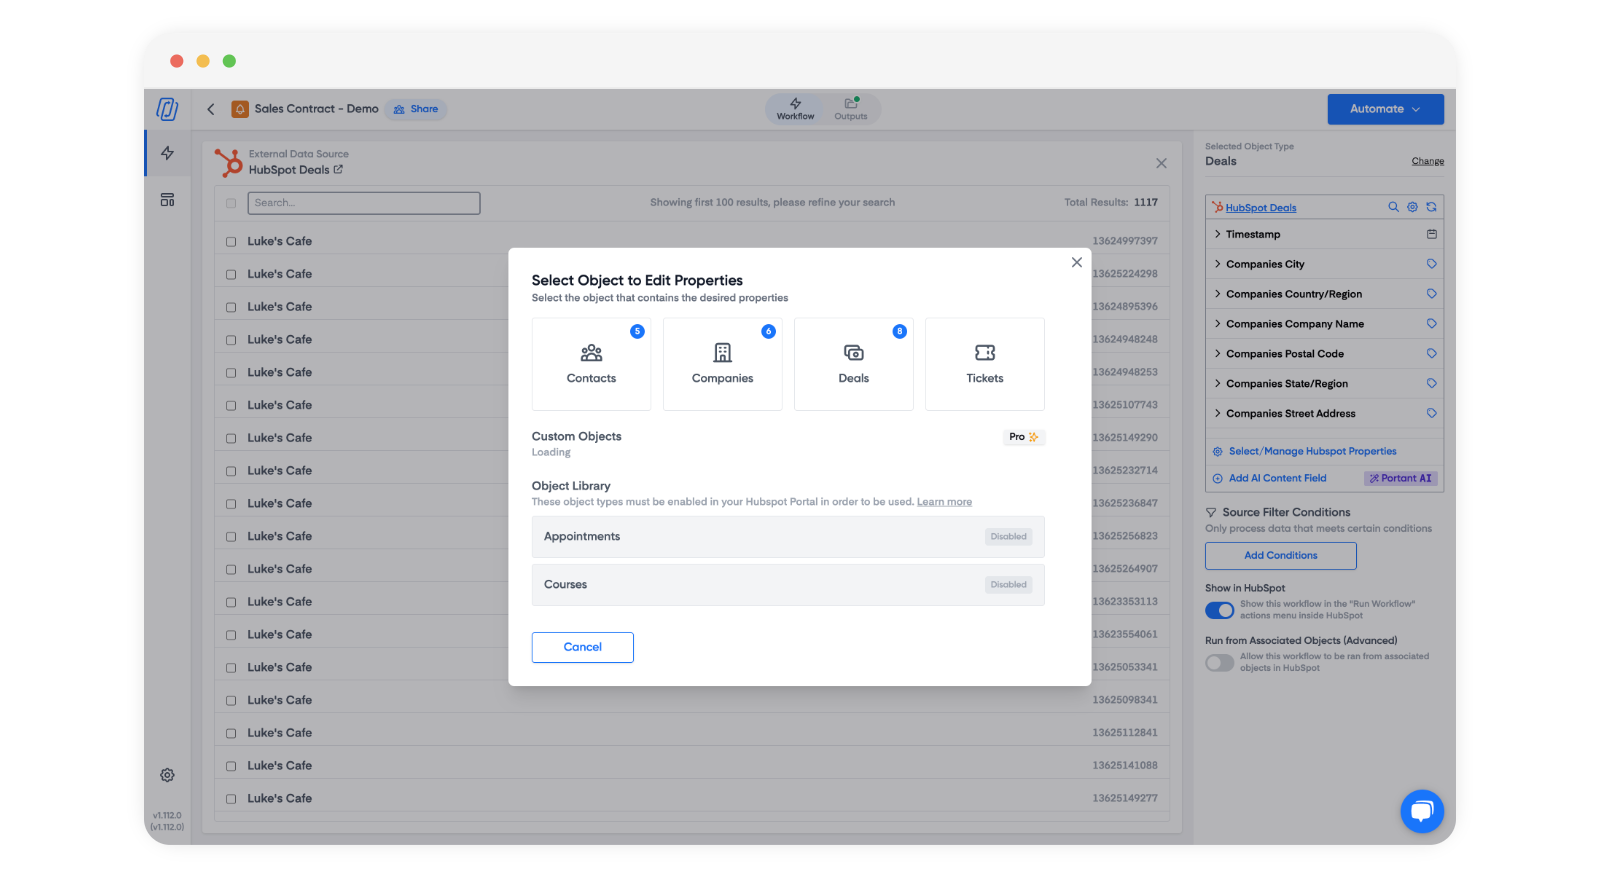
A modal opens with every object connected to your HubSpot account. Select the object you want to add properties from.
Click the dropdown to see all the properties on that object. Use the search box if the list is long.
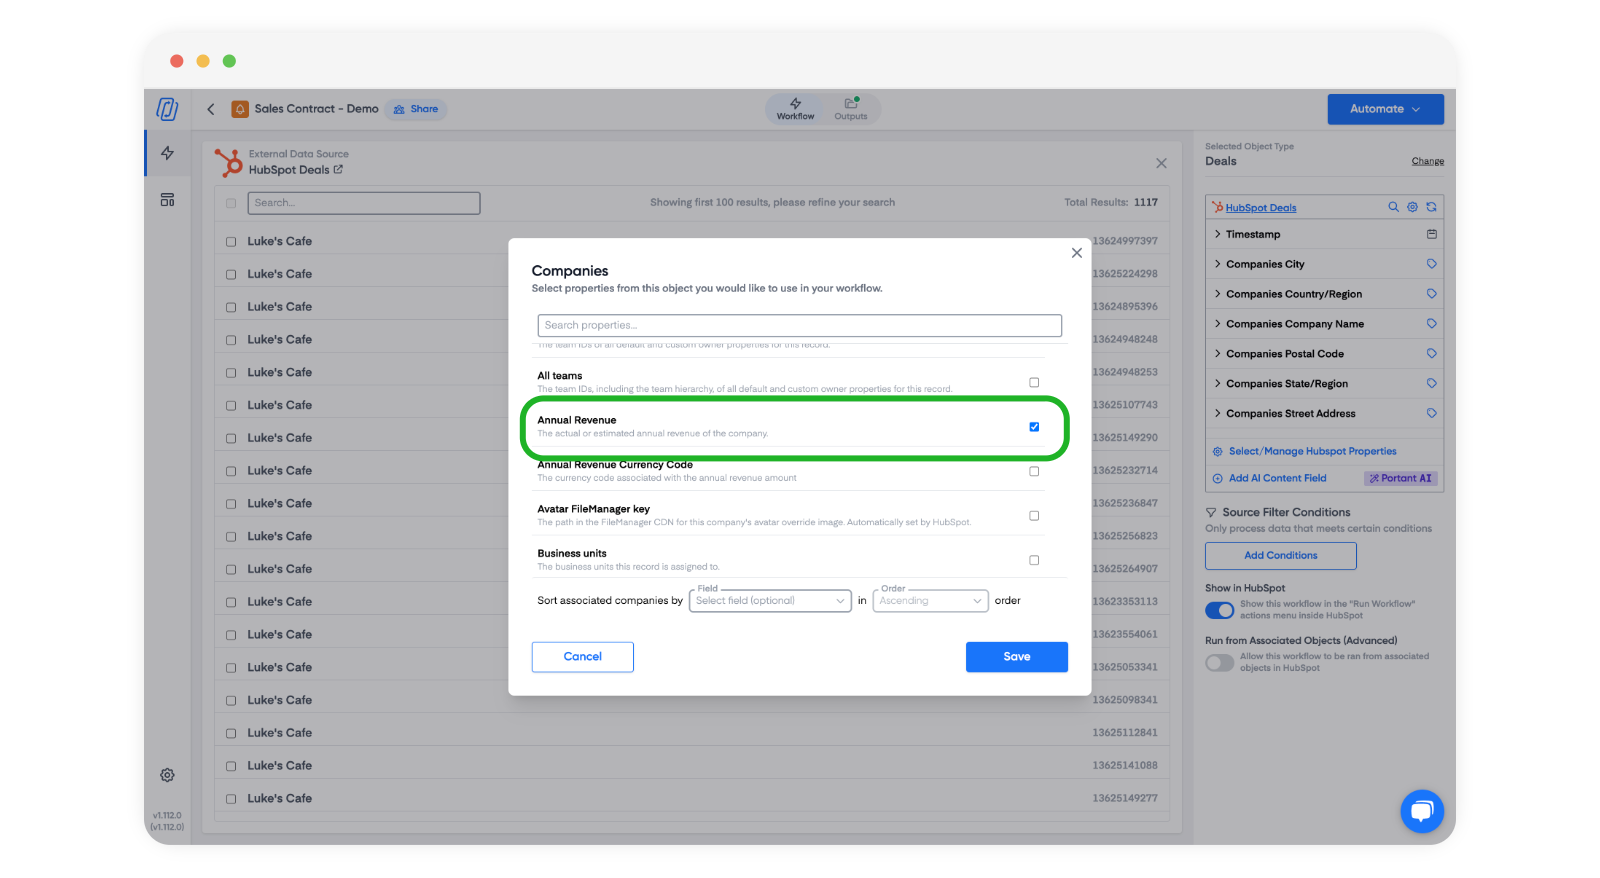
Tick the properties you want, untick the ones you don't, then click Save.
Note: You can also sort associated objects by field and order, which is useful when you're building repeating tables for line items. The sort options live at the bottom of the property list for each object.
Insert data from labelled contacts (or any associated object)
Association labels work for any connected objects in HubSpot, not just contacts.
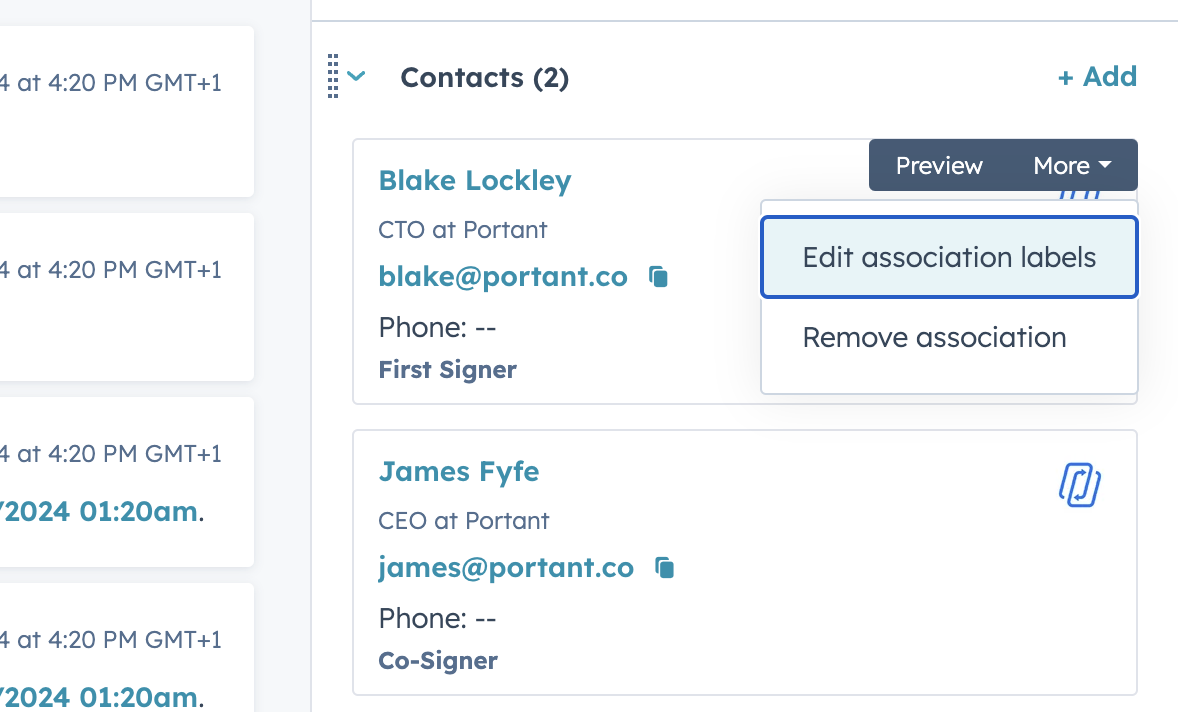
If a deal, ticket or company has more than one contact attached, you can use HubSpot association labels to tell them apart. Labels make it easy to put the right contact's details in the right spot in your template (for example, a "First Signer" and a "Co-Signer").
For how to set them up in HubSpot, see HubSpot's Create and use association labels.
Use labelled contact tags in a template
To pull in a labelled contact's details, use a tag in this format:
{{Label: Contact First Name}}
Where Label is the association label on the contact.
Important: there must be a space after the colon, before the property name.
Wrong:
{{Label:Contact Last Name}}Right:
{{Label: Contact Last Name}}
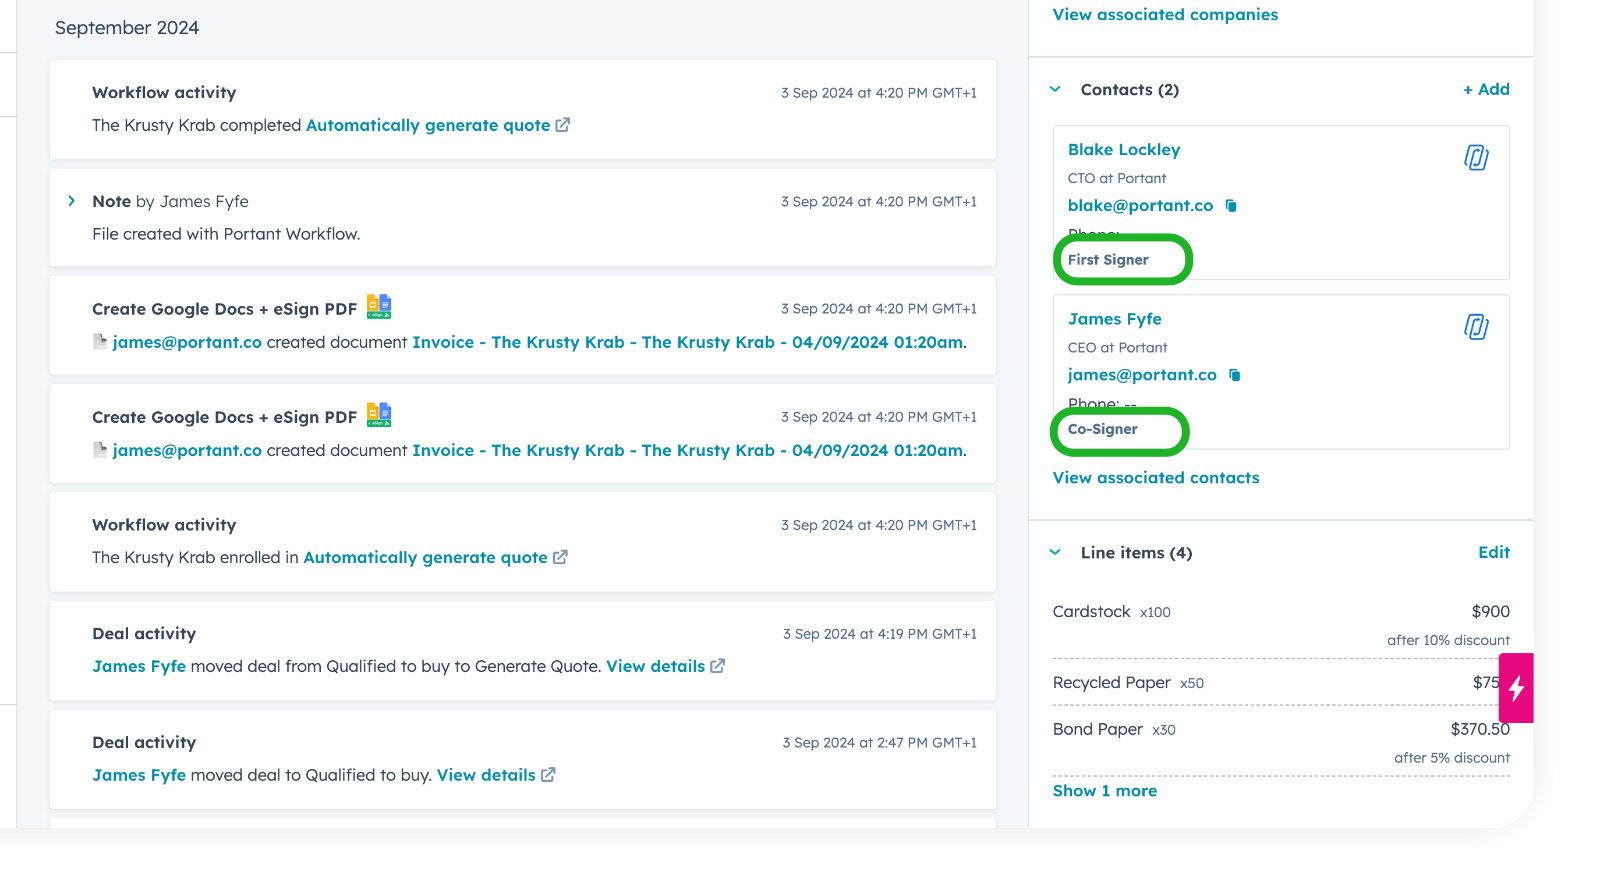
For contacts labelled "First Signer" and "Co-Signer", the tags would be:
{{First Signer: Contact First Name}}{{First Signer: Contact Last Name}}{{Co-Signer: Contact First Name}}{{Co-Signer: Contact Last Name}}
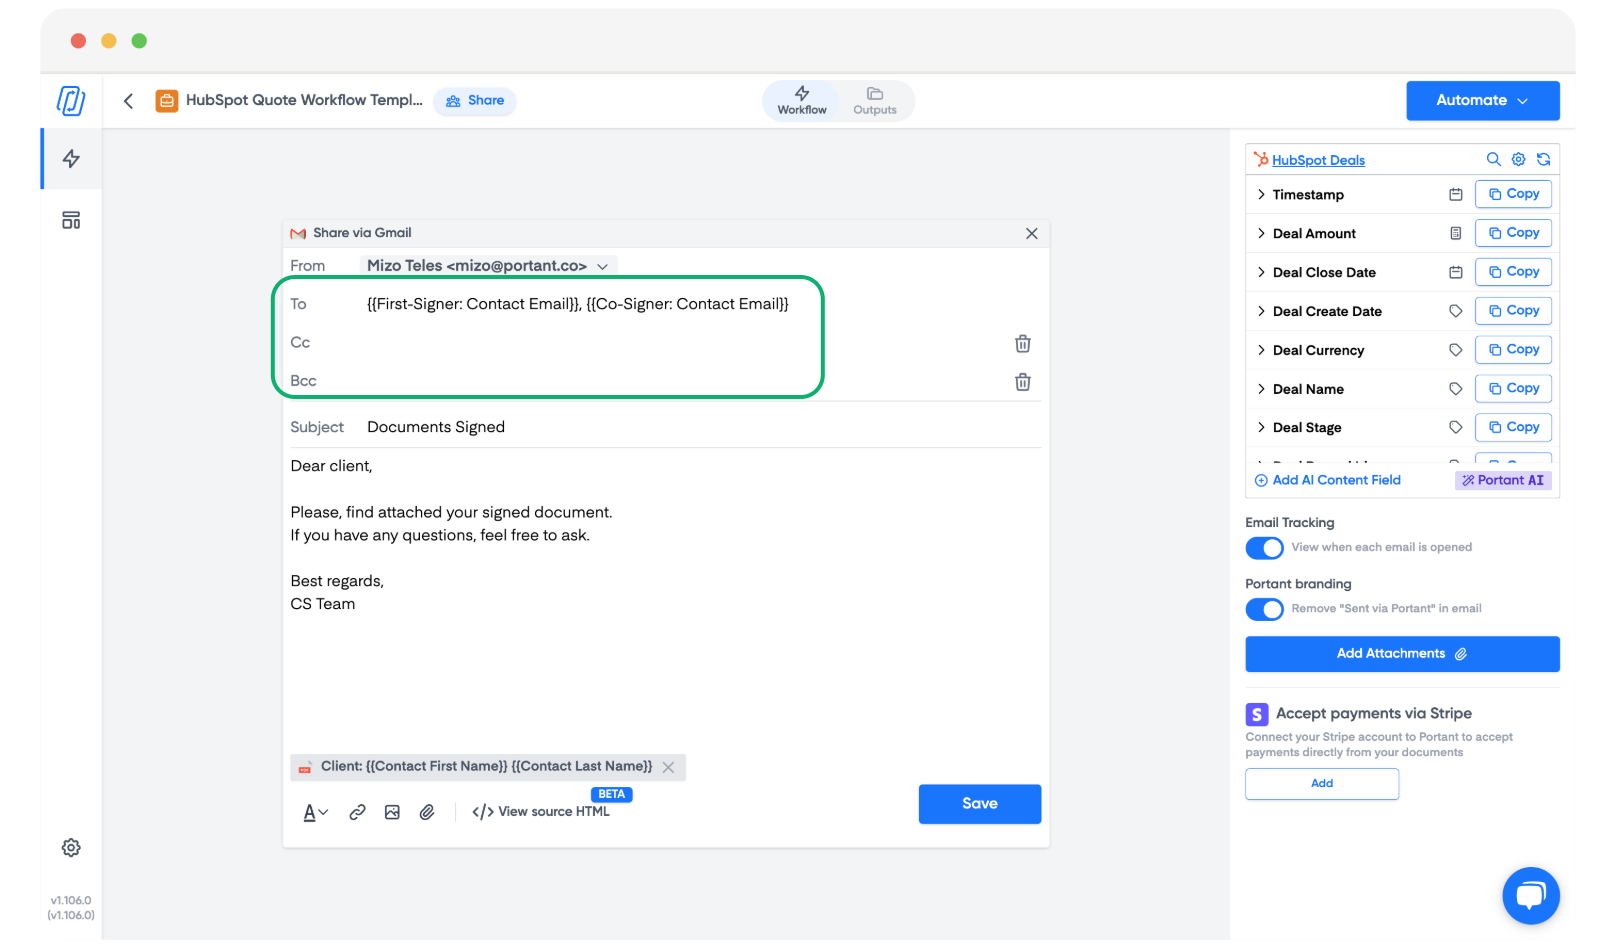
Use labelled tags in an email block
The same labelled tags work in the TO, CC and BCC fields of the email block, so each signer automatically gets a copy of the signed document.
For example:
{{First Signer: Contact Email}}{{Co-Signer: Contact Email}}