Add a Portant action to a HubSpot workflow
Run a Portant workflow as a step inside a HubSpot workflow, so documents are generated automatically when a HubSpot trigger fires (a deal stage change, a property update, an event, anything HubSpot can listen for).
In this guide:
- Set up a HubSpot workflow
- Add a Portant action to it
For more on HubSpot workflows in general, see HubSpot's workflow documentation.
Looking to do the opposite, trigger a HubSpot workflow from a Portant action? See Trigger HubSpot workflows from Portant.
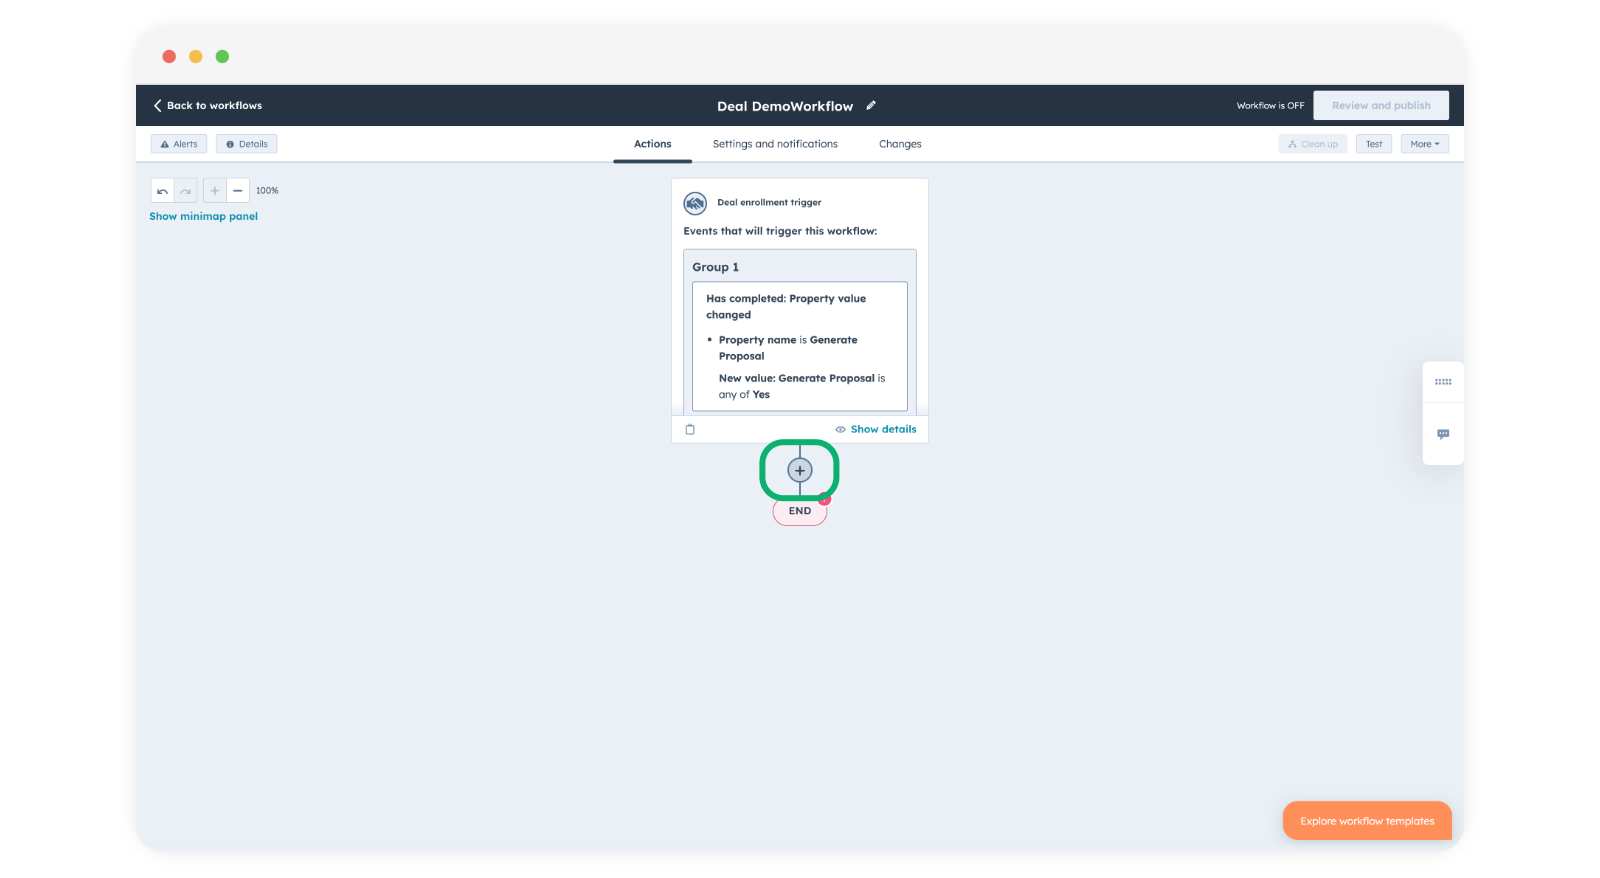
Create a HubSpot workflow
There are several ways to create a workflow in HubSpot. The official guide is here: Create workflows. The example below builds a basic workflow from scratch.
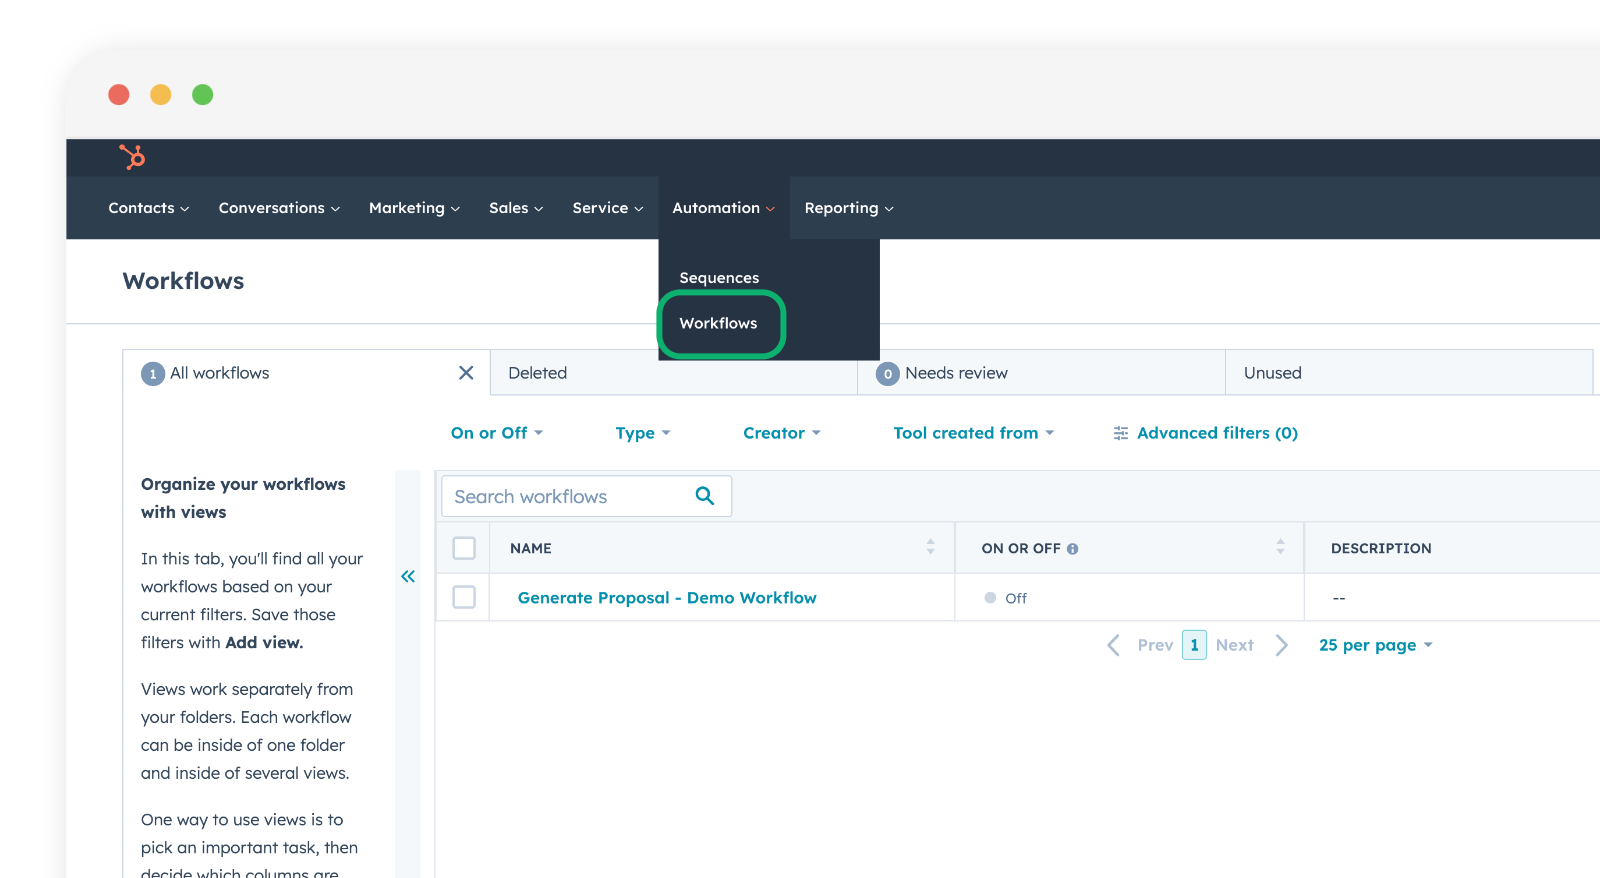
In the top menu, go to Automation → Workflows.
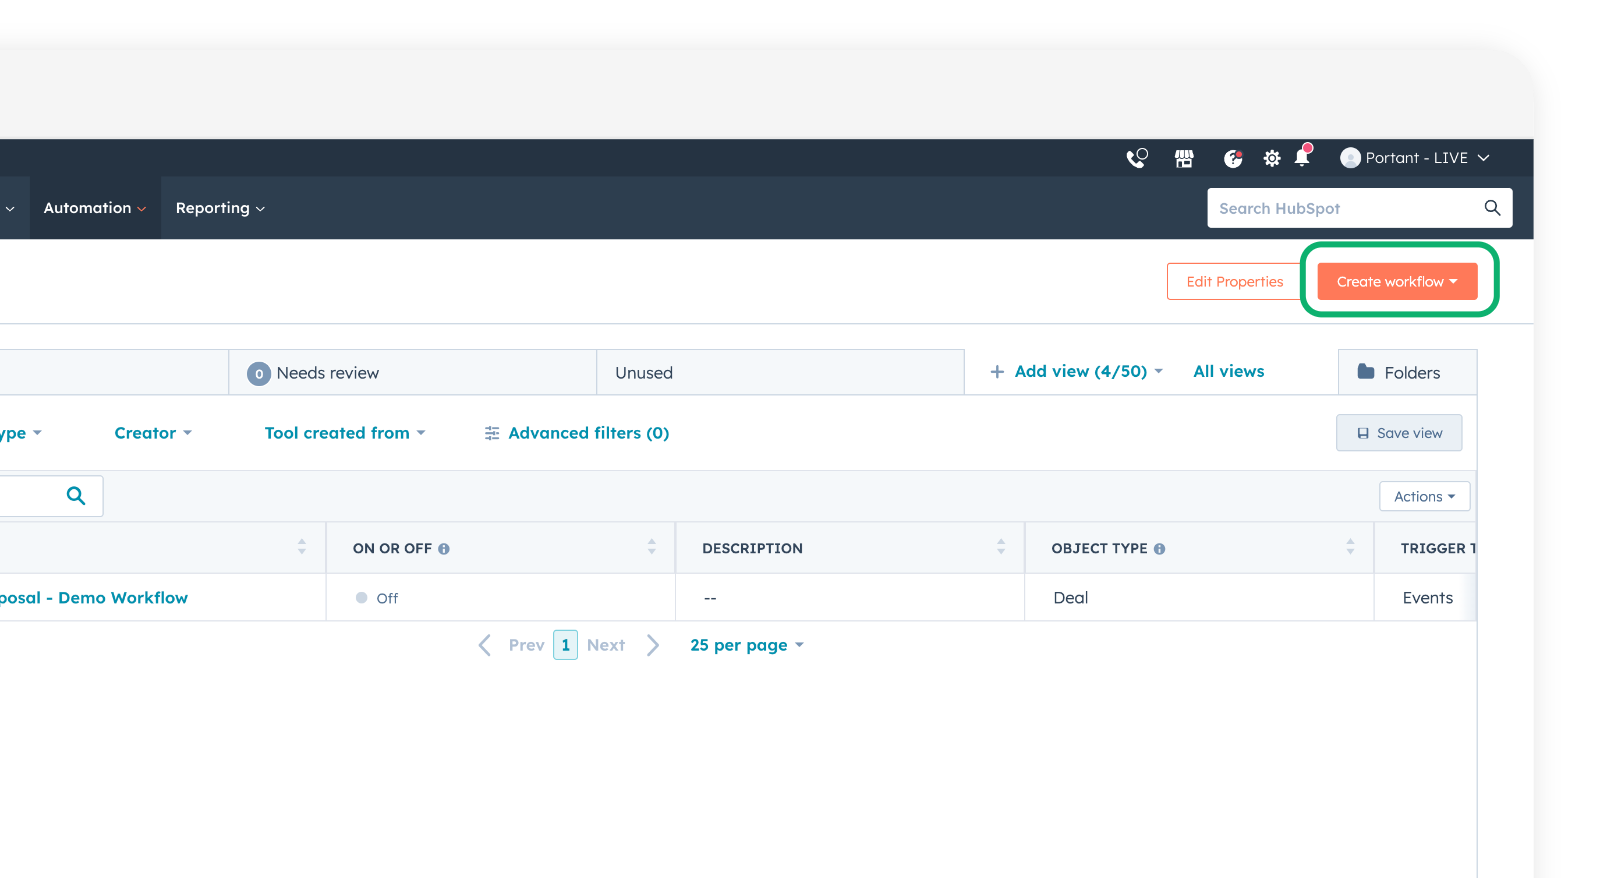
Click Create workflow.
Click From Scratch.

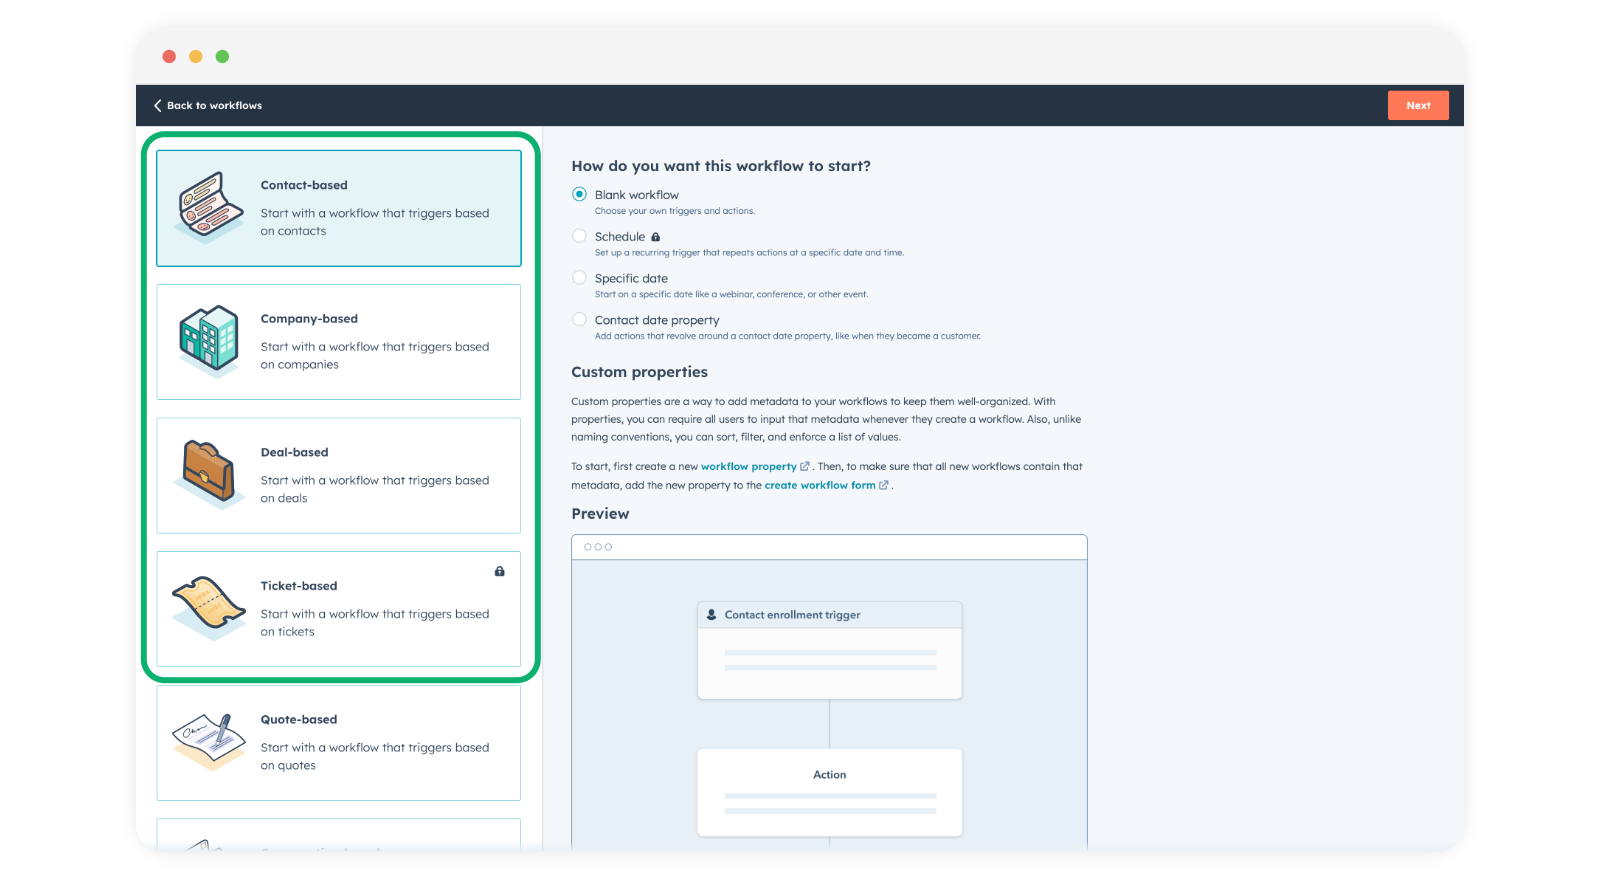
Pick the HubSpot object type the workflow runs on:
- Contact-based - triggered by fields on a contact
- Company-based - triggered by fields on a company
- Deal-based - triggered by fields on a deal
- Ticket-based - triggered by fields on a ticket
Make sure the type matches the primary object in your Portant workflow.
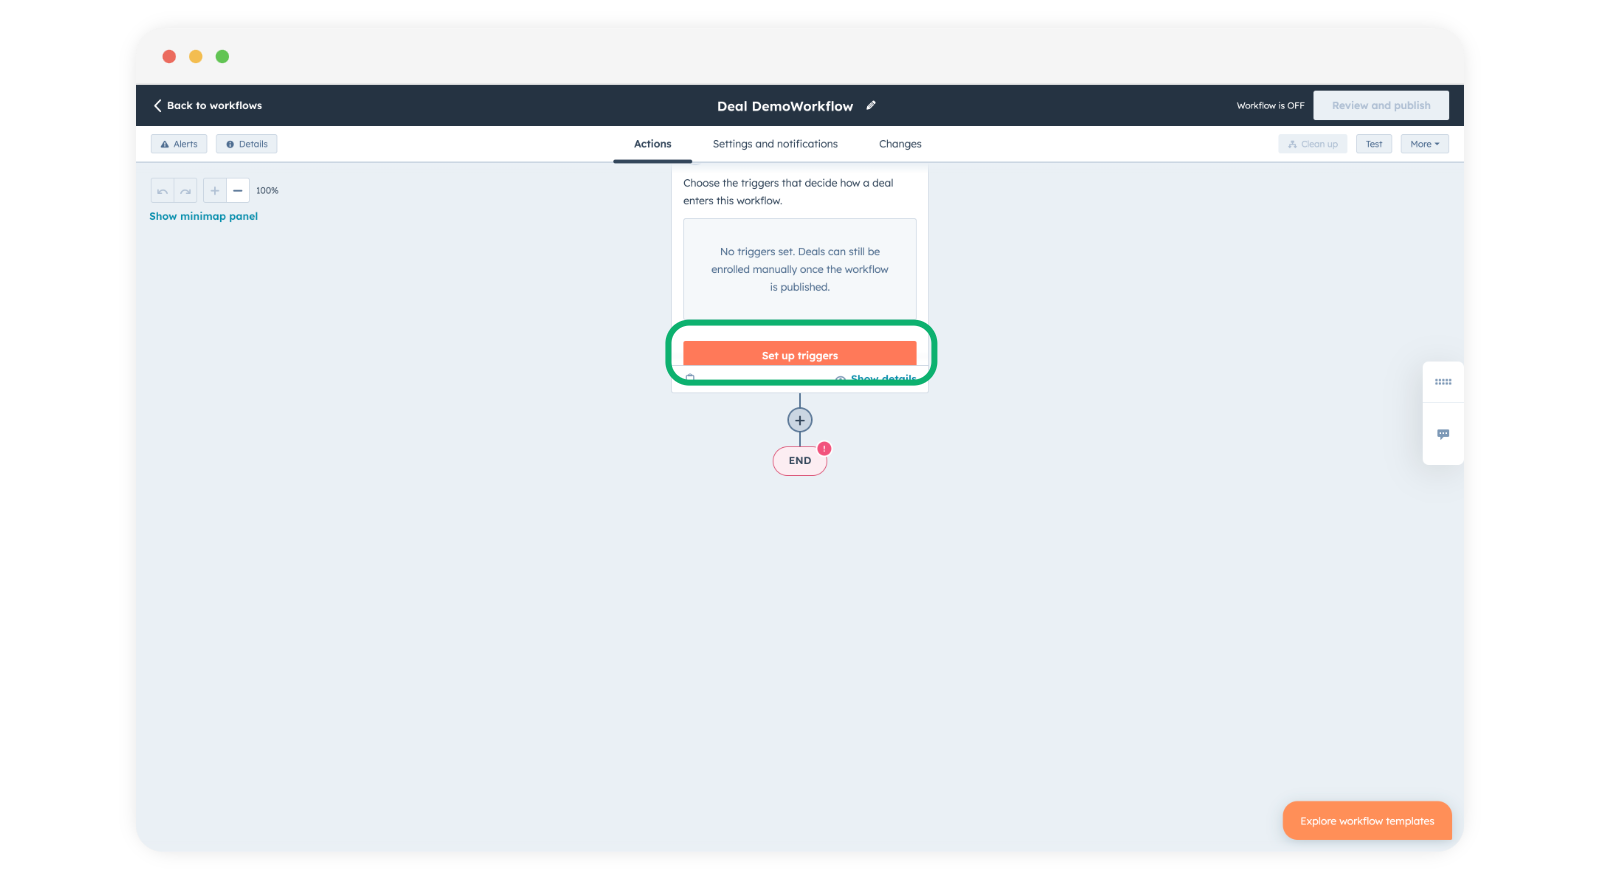
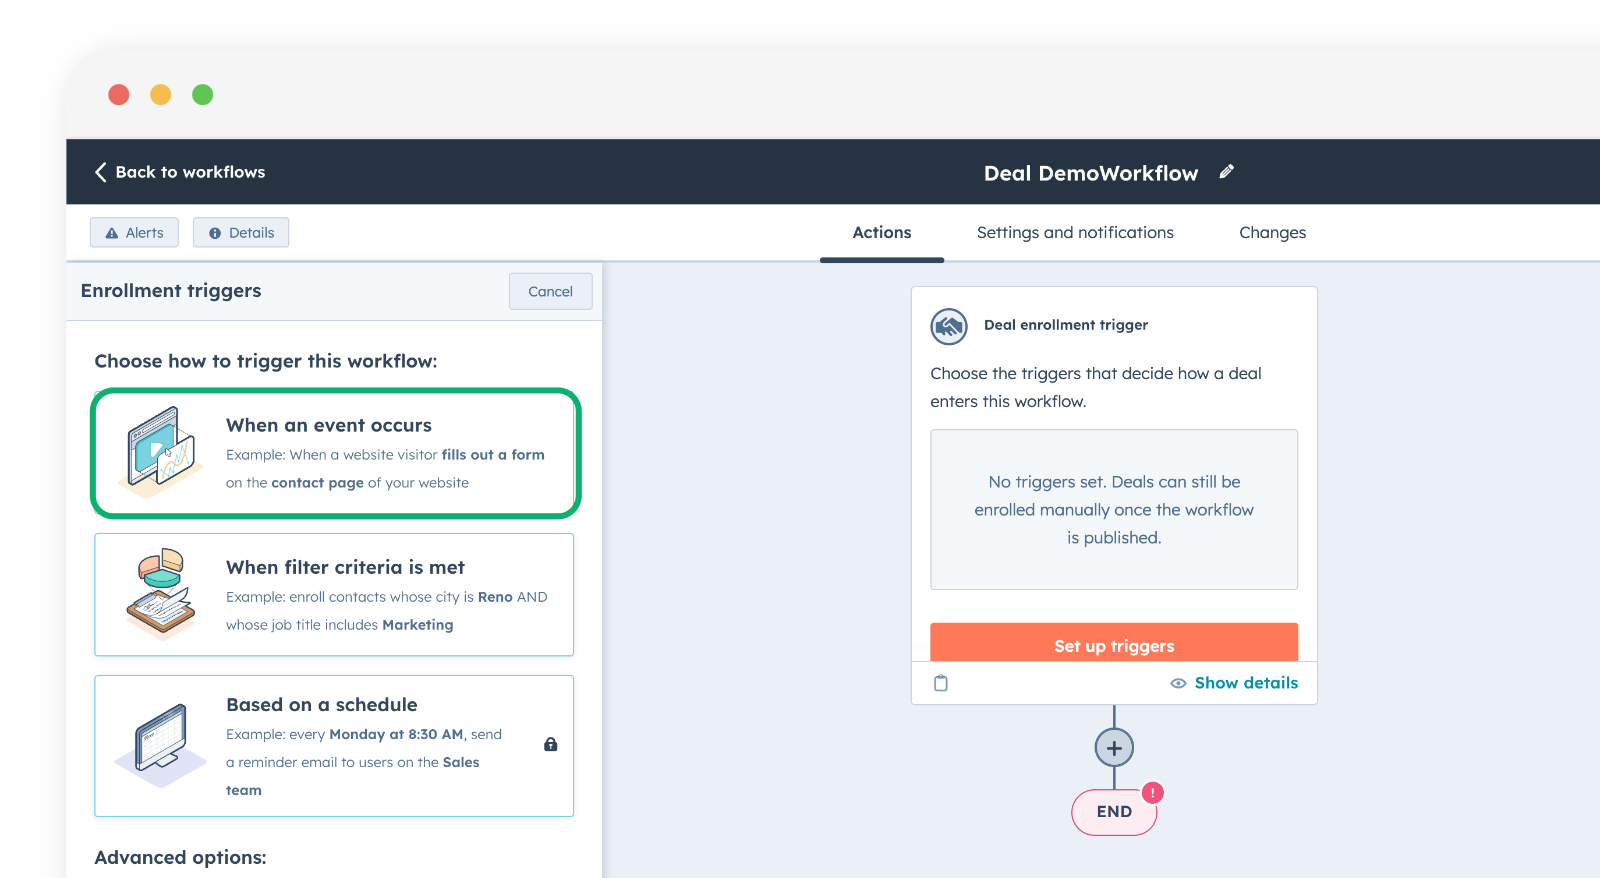
Pick a trigger. In this example we'll trigger when a deal property called "Generate Proposal" is set to "Yes". Click Set up triggers.
Click When an event occurs.
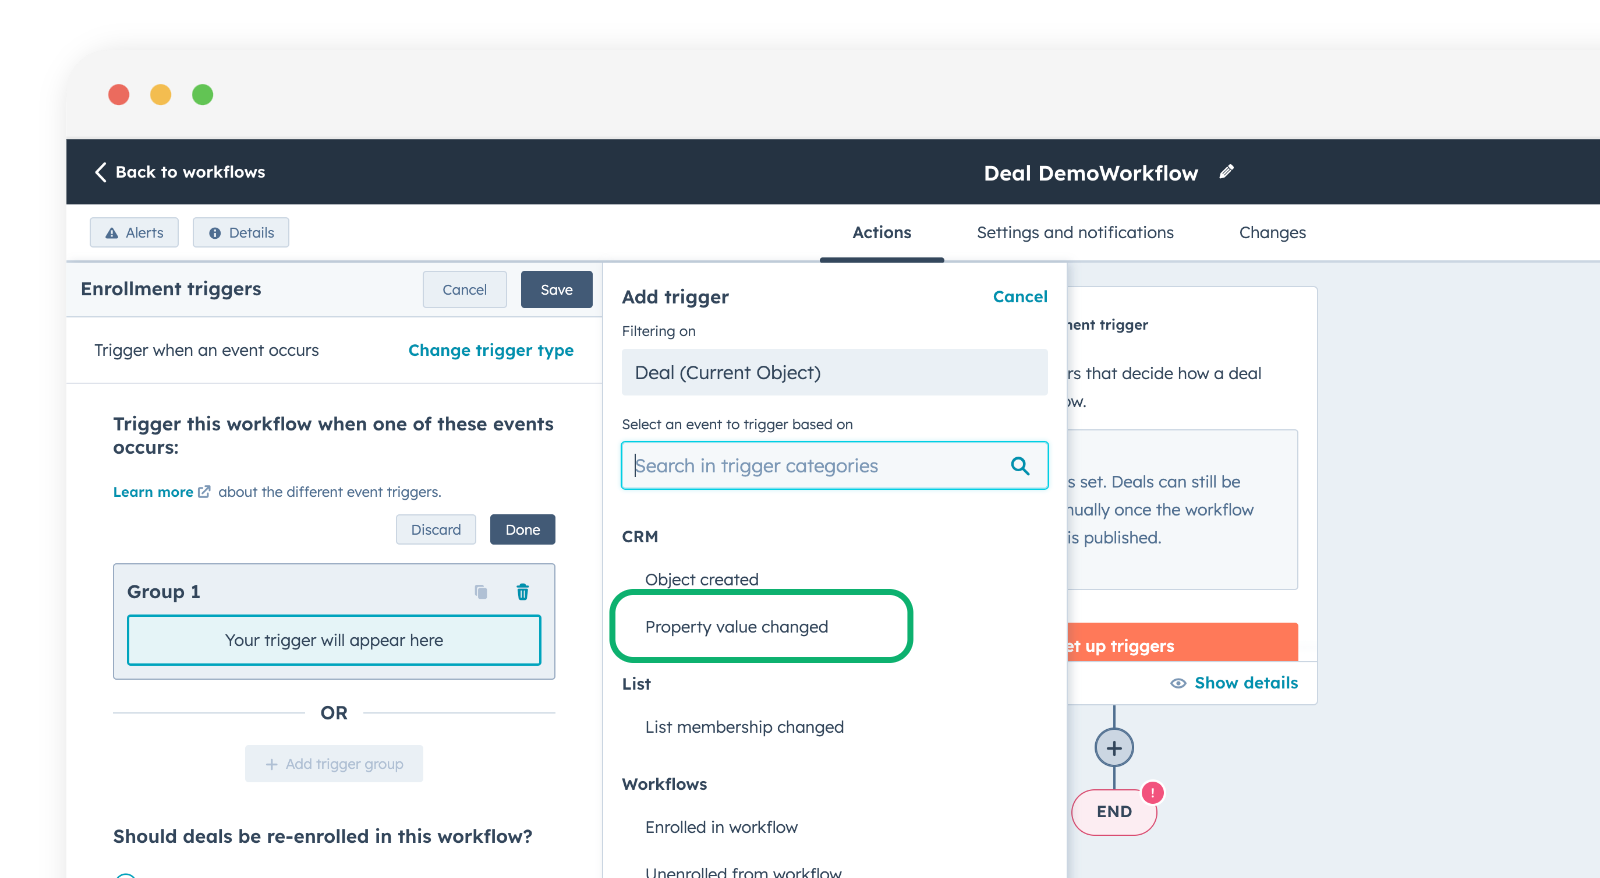
Pick Property value changed.
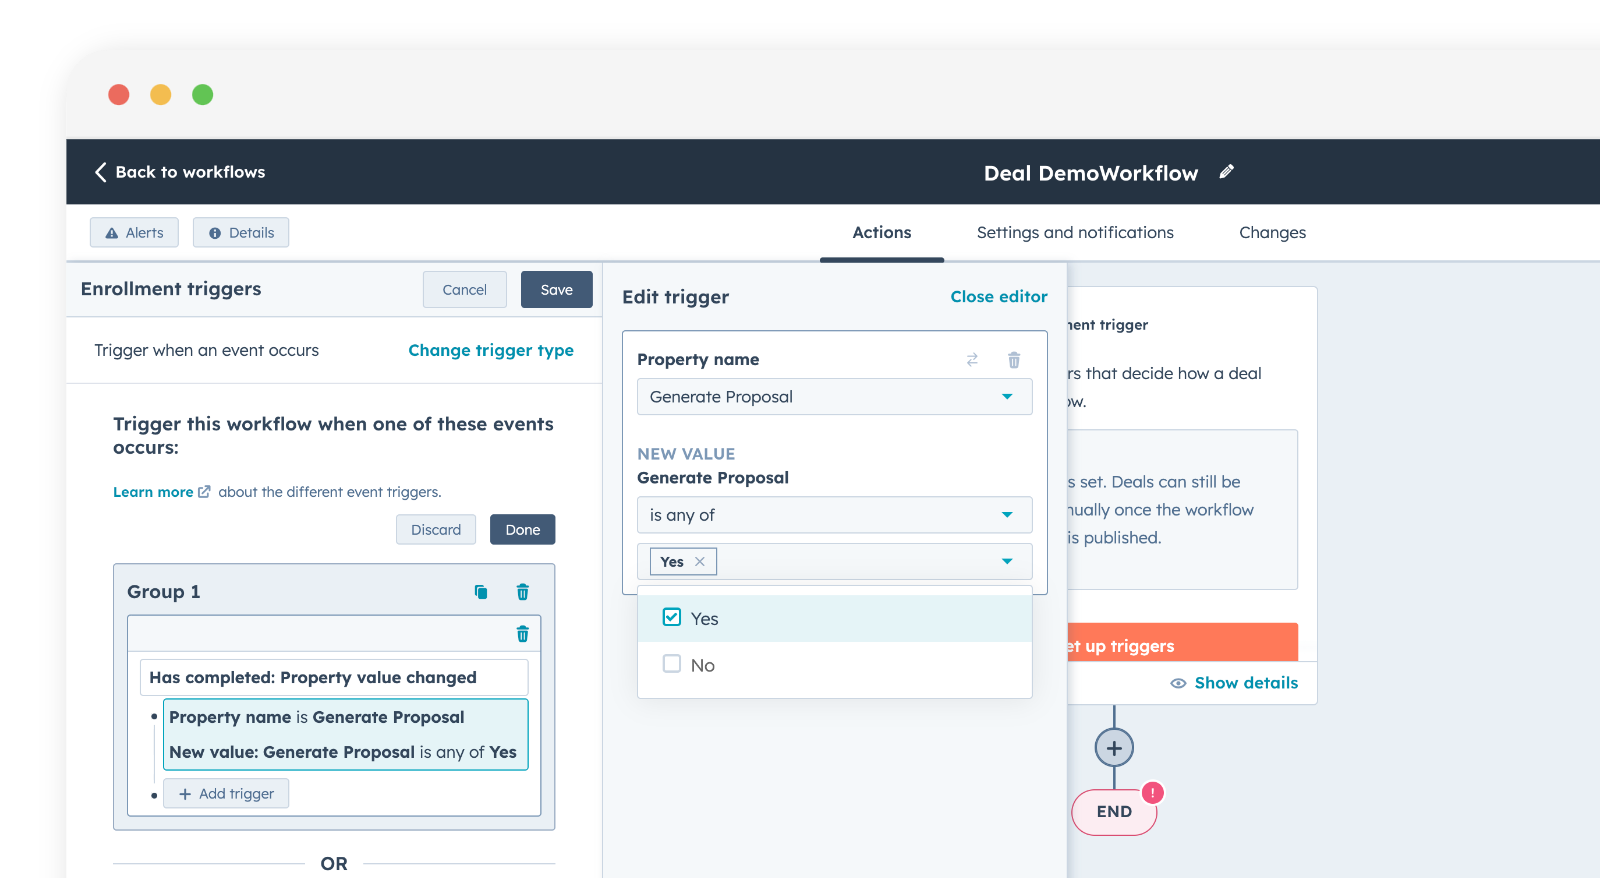
Choose the property and value. In this example, the custom property "Generate Proposal" changes to "Yes".
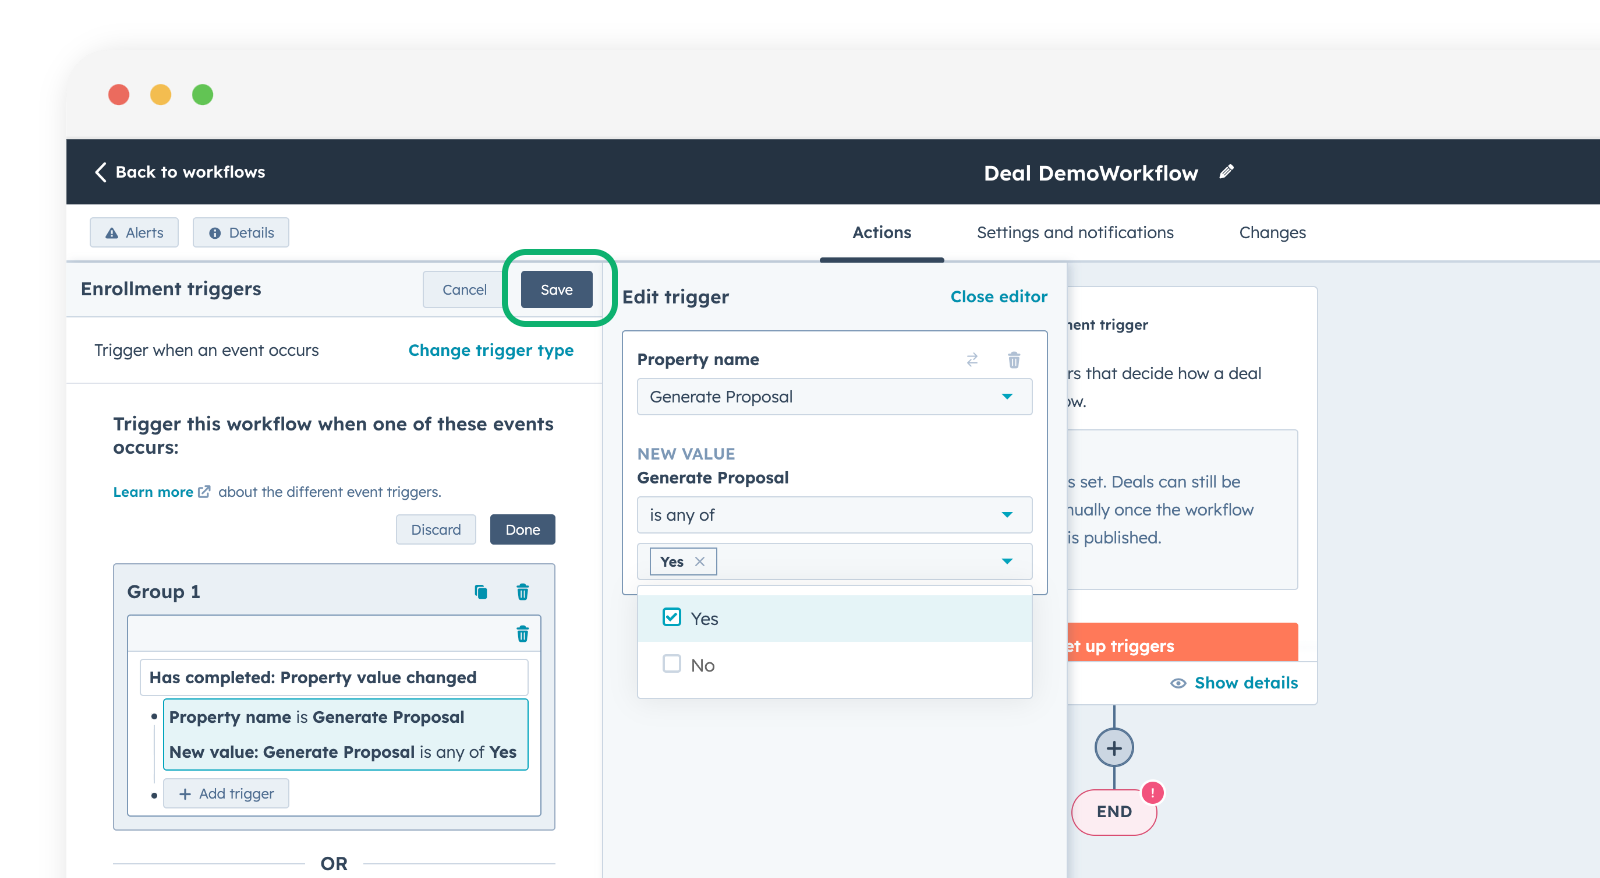
Click Save.
Add the Portant action
Click the + button below your workflow to add a step.
Portant appears in the menu on the left.
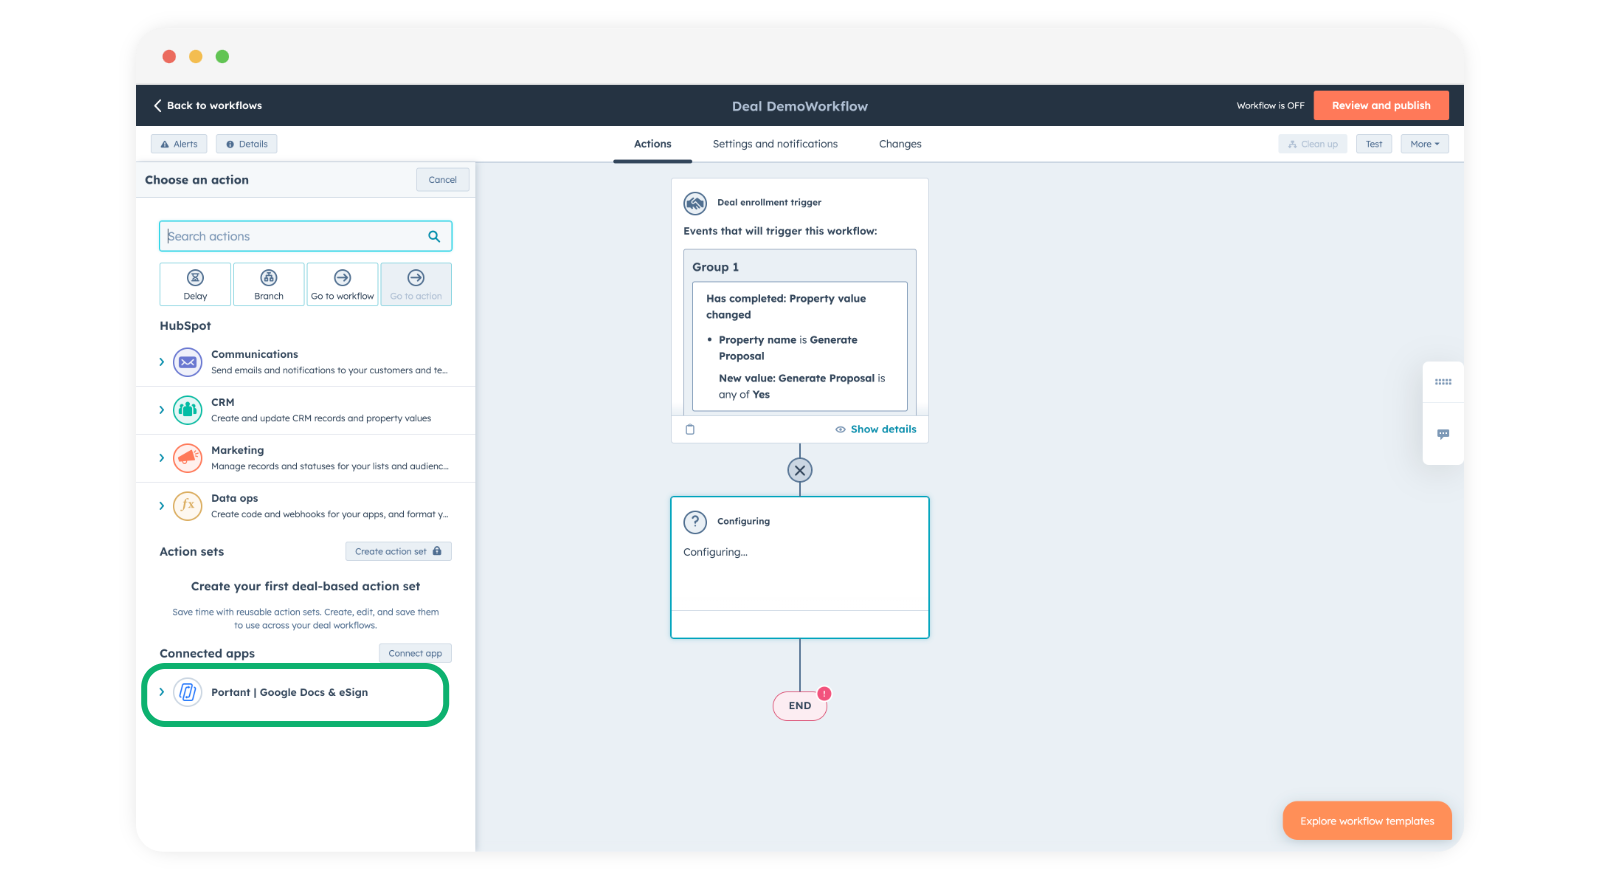
Note: If you don't see Portant here, it usually means the app wasn't installed with Super Admin permissions. There's a quirk in HubSpot where Super Admin is required to enable an app to interface with workflows. See the install guide for the details.
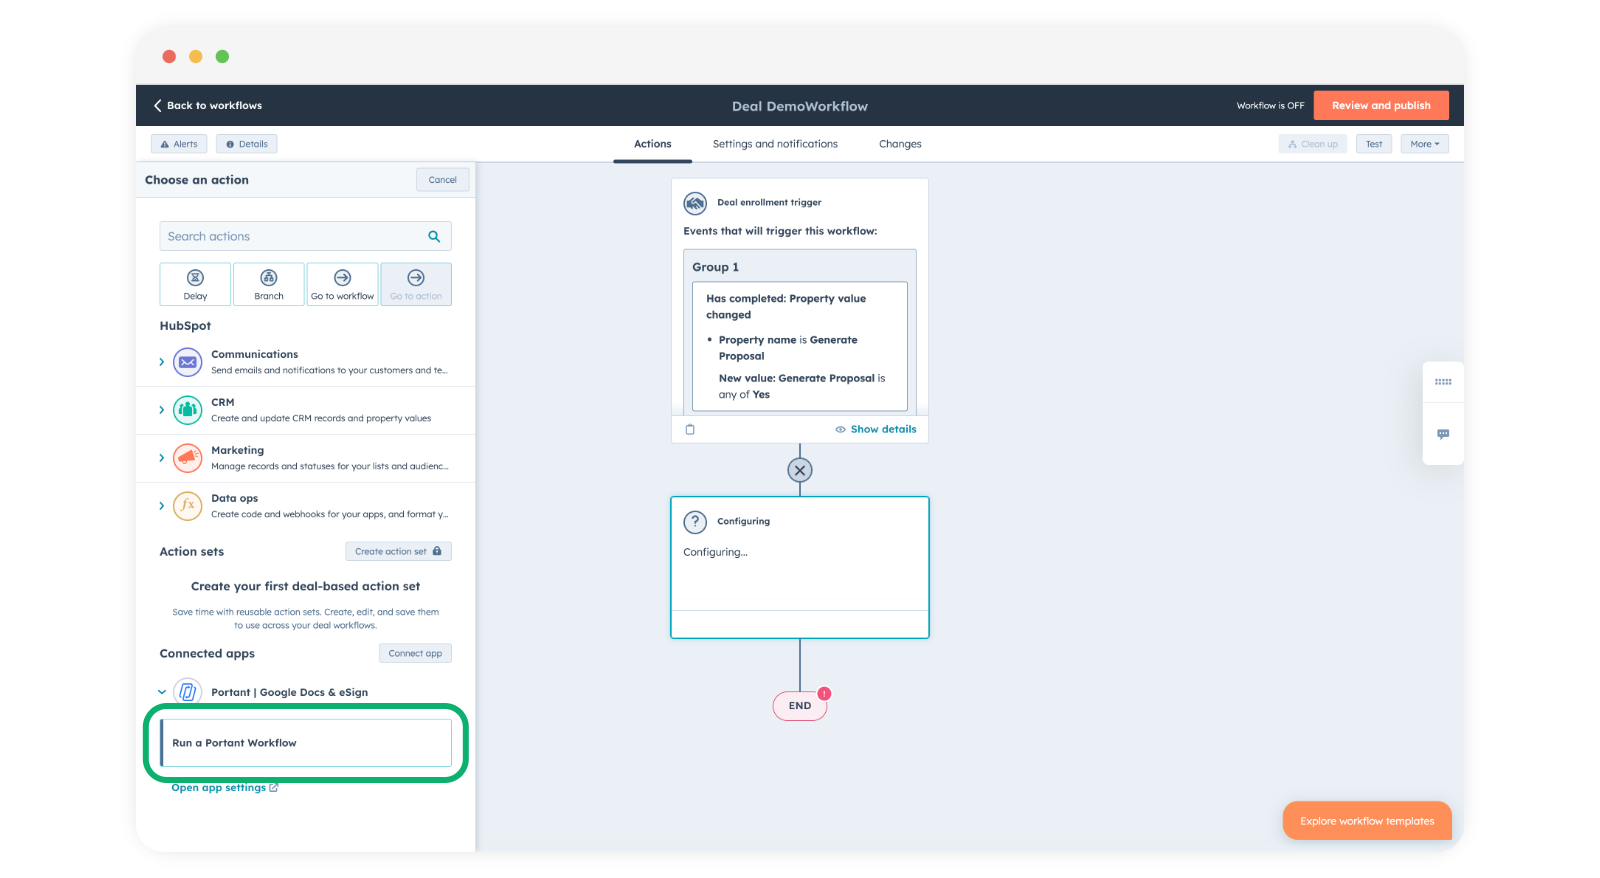
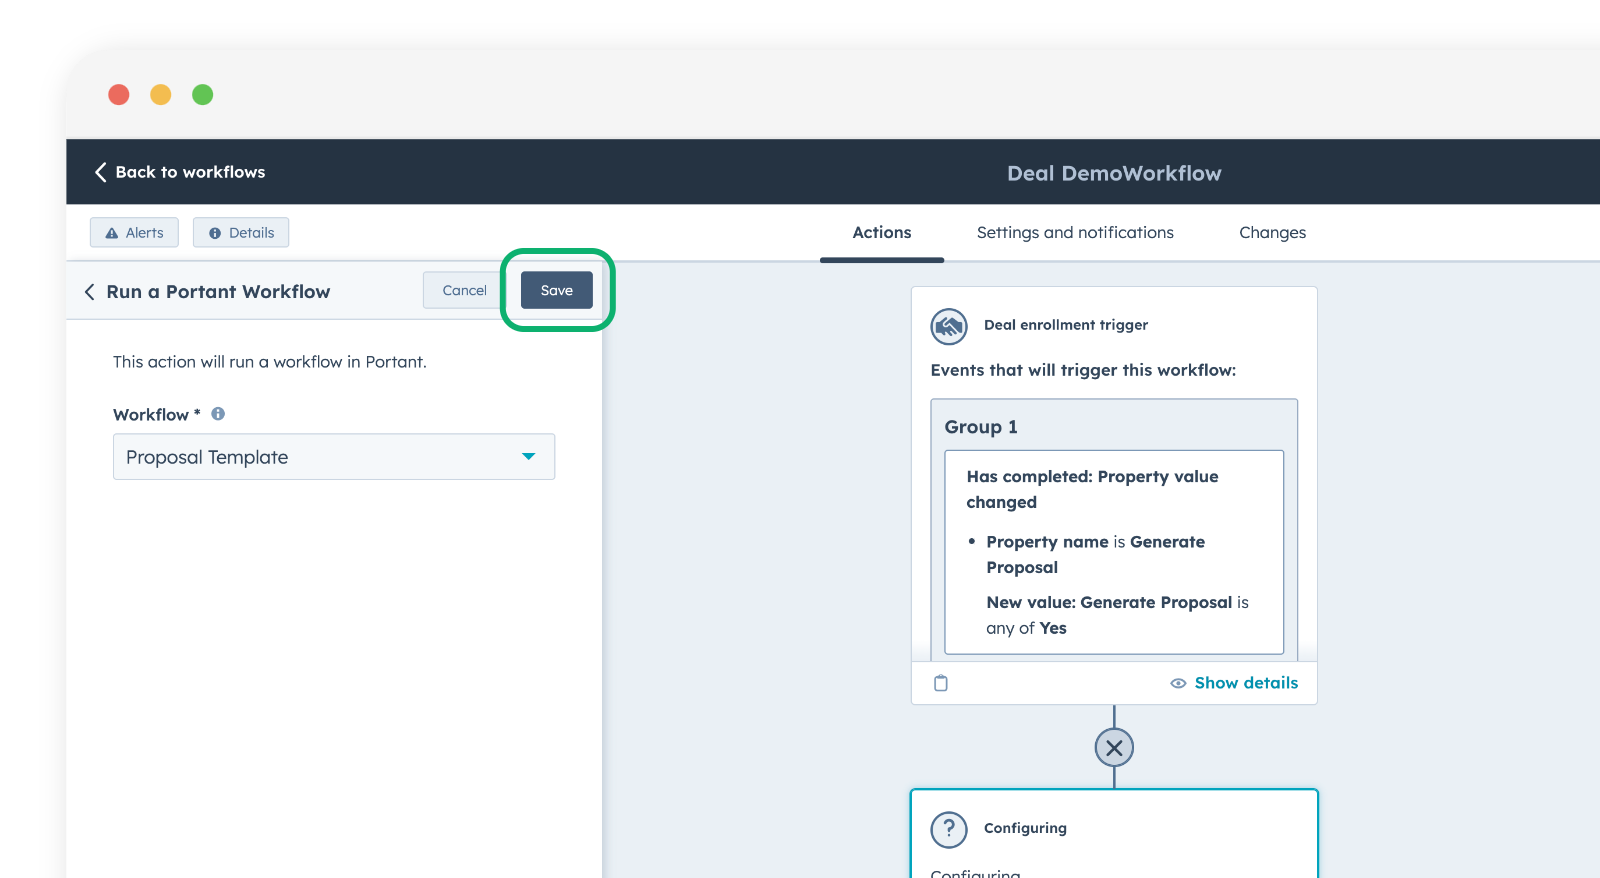
Pick Run a Portant Workflow.
Select the workflow you want to run. The dropdown only shows Portant workflows whose primary object matches the HubSpot workflow trigger.
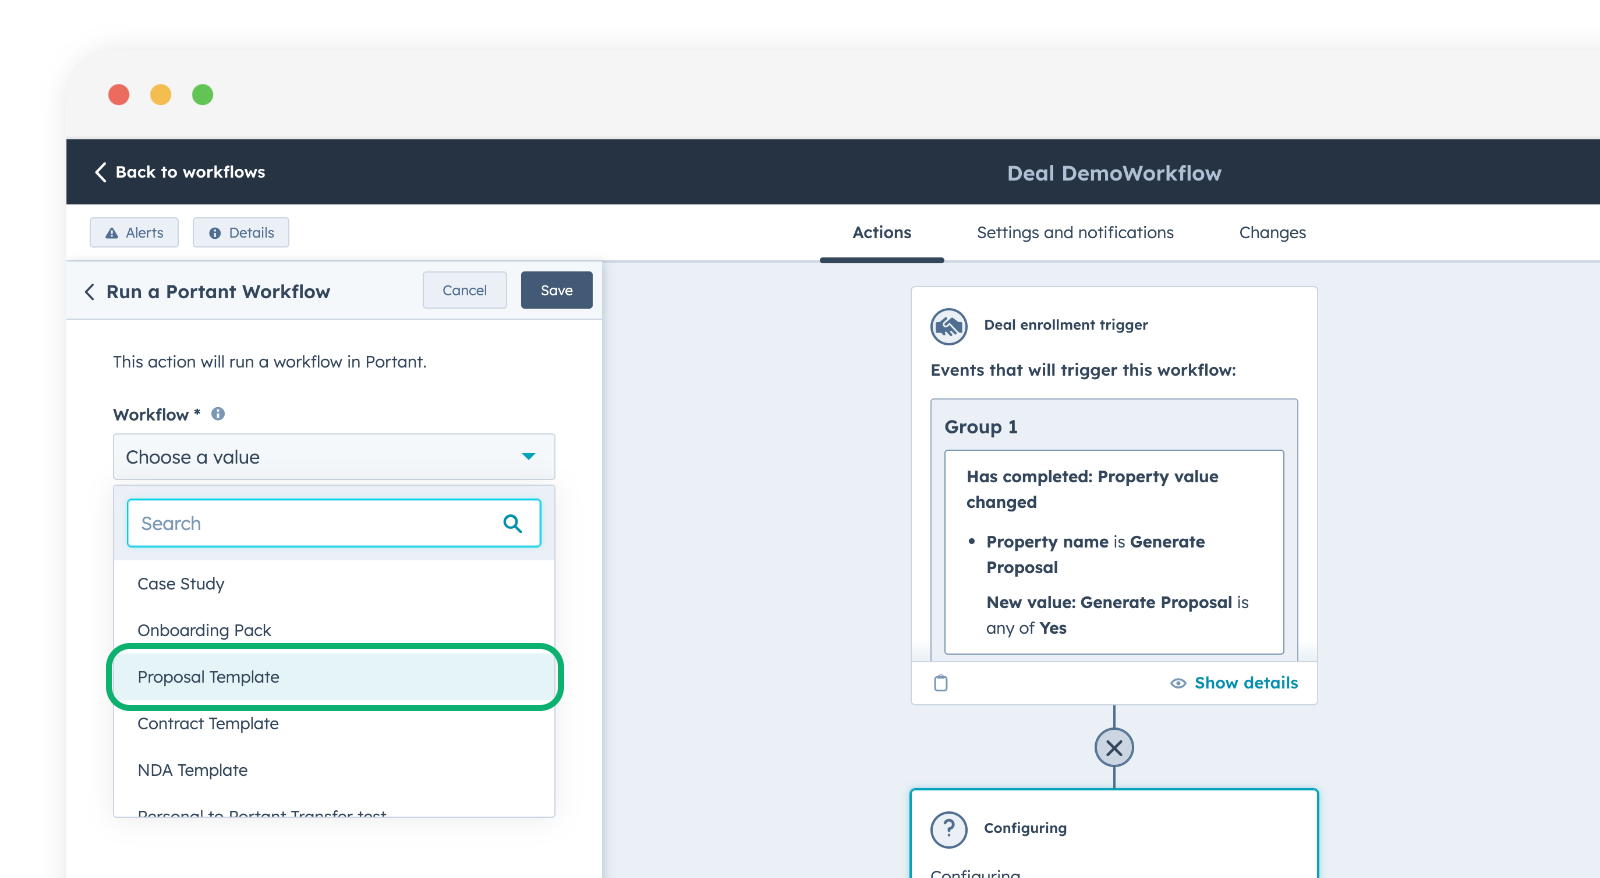
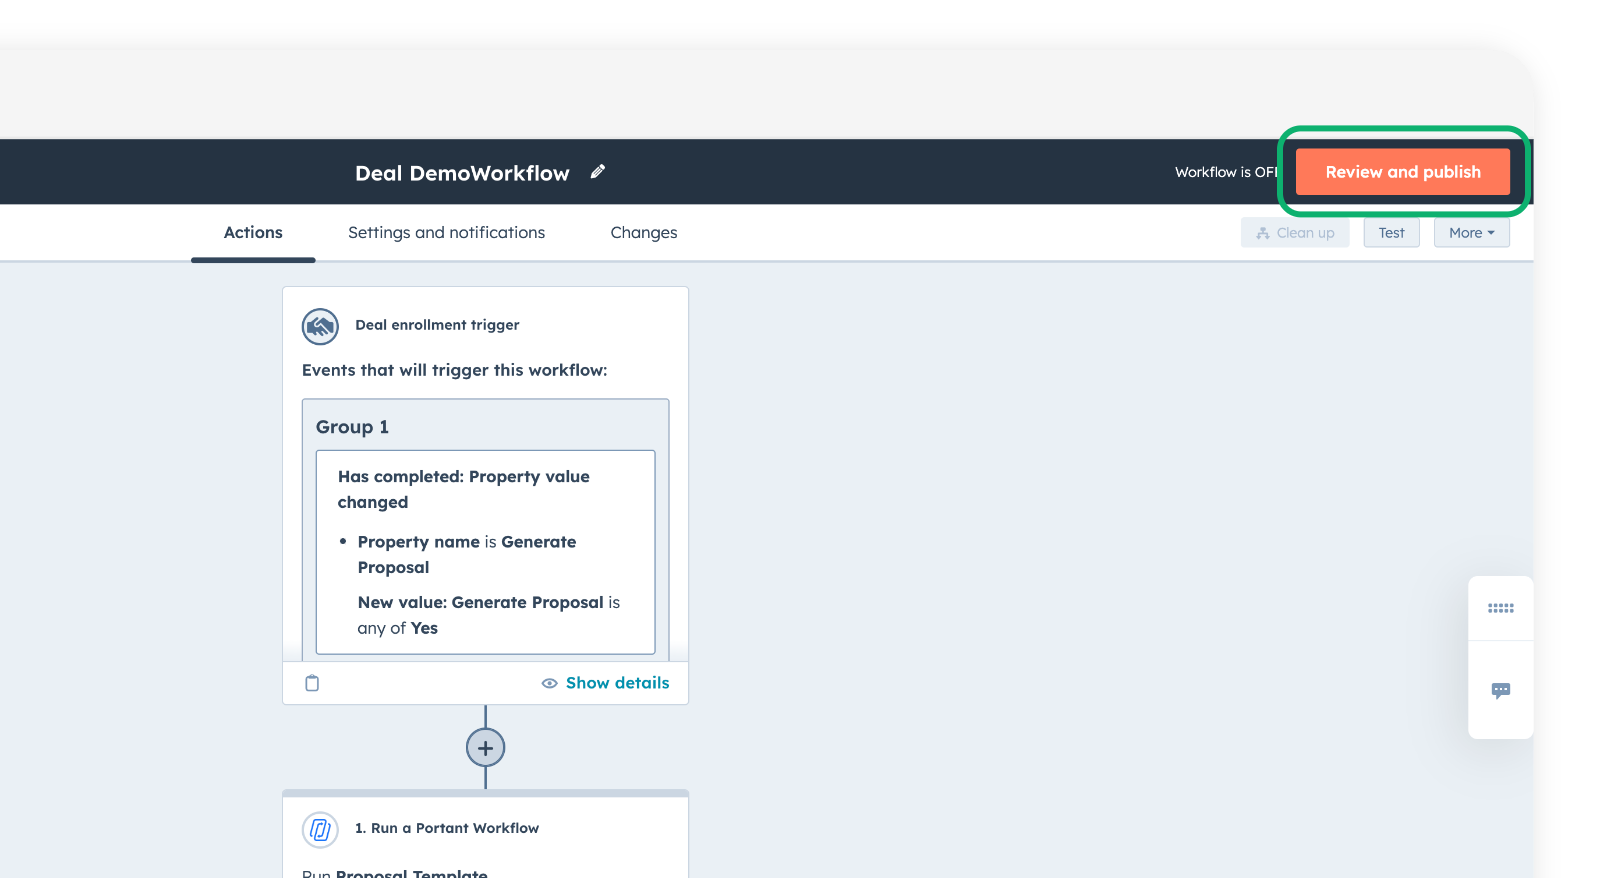
Click Save, then Review and publish to turn the workflow on.
For more on the publish step's settings, see HubSpot's own workflow guides.
When to use a Portant action
A few good fits for this pattern:
- Trigger documents from mobile: the HubSpot mobile app doesn't support app cards, so a workflow action is the easiest way to fire a document from a phone.
- Beyond deal stages: in the Portant app, auto-create only triggers off deal stage. A HubSpot workflow can trigger off any property or event you like.
- Other object types: generate documents automatically from changes on contacts, companies, tickets or custom objects, not just deals.