Data grouping with webhooks
If your webhook payload contains an array of objects, Portant can place each object as a row in a table inside your document. This is how you turn webhook data into invoices, quotes, purchase orders or any document with line items.
For the canonical guide, see line items > data grouping. This page covers the webhook-specific setup.
Step 1: structure the payload
The array you want to group on must:
- Be at the top level of the payload (an array depth of one).
- Contain objects (not strings or numbers).
Here's an example payload with one such array:
{
    "city": "Vancouver",
    "csNo": "QZ2257",
    "narrative": "Test report for testing purposes. ",
    "siteName": "Wanda & Sons Snoopy Landing",
    "clearTime": 1720005608143,
    "onsiteTime": 1720005084713,
    "reportNumber": "R24-113100",
    "responseTime": 24.23,
    "rrAlarmDate": 1720003631000,
    "rrAlarmType": "BURGLARY",
    "siteAddress1": "Unit 36 - 1055 Albert Place",
    "siteAddress2": null,
    "rrInitialZone": 18,
    "rrConfirmedBurg": false,
    "rrConfirmedFire": false,
    "rrPoliceFileNo": [
        {
            "imageLink": "https://drive.usercontent.google.com/download?id=1Hv5r4MMu9_uDf-HyvZcckBRJ-xCRjOGL",
            "imageName": "image_one"
        },
        {
            "imageLink": "https://drive.usercontent.google.com/download?id=1LJhk_pdFtxsnnjyHN0u67kNuWxkYwcL_",
            "imageName": "image_two"
        },
        {
            "imageLink": "https://drive.usercontent.google.com/download?id=11spBeKnsr7oHPZTsJye5fwkJ8SCcQouV",
            "imageName": "image_three"
        }
    ],
    "rrPoliceAttended": false,
    "rrTechnicalIssue": false,
    "rrInitialZoneDesc": "SE Side Patio Door ( new edition room)",
    "rrTechnicalIssueDesc": null
}
In this example, rrPoliceFileNo is the array Portant can group on.
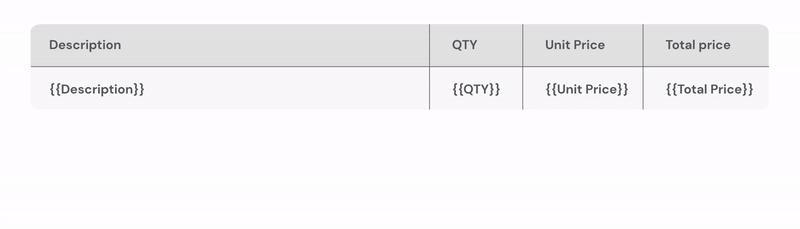
Step 2: add a table to the document
Open the document block and insert a table (Insert > Table). Add the tags for the grouped fields into a single row of the table. Portant will repeat that row for every object in the array.
You can also use data grouping with Google Slides templates.
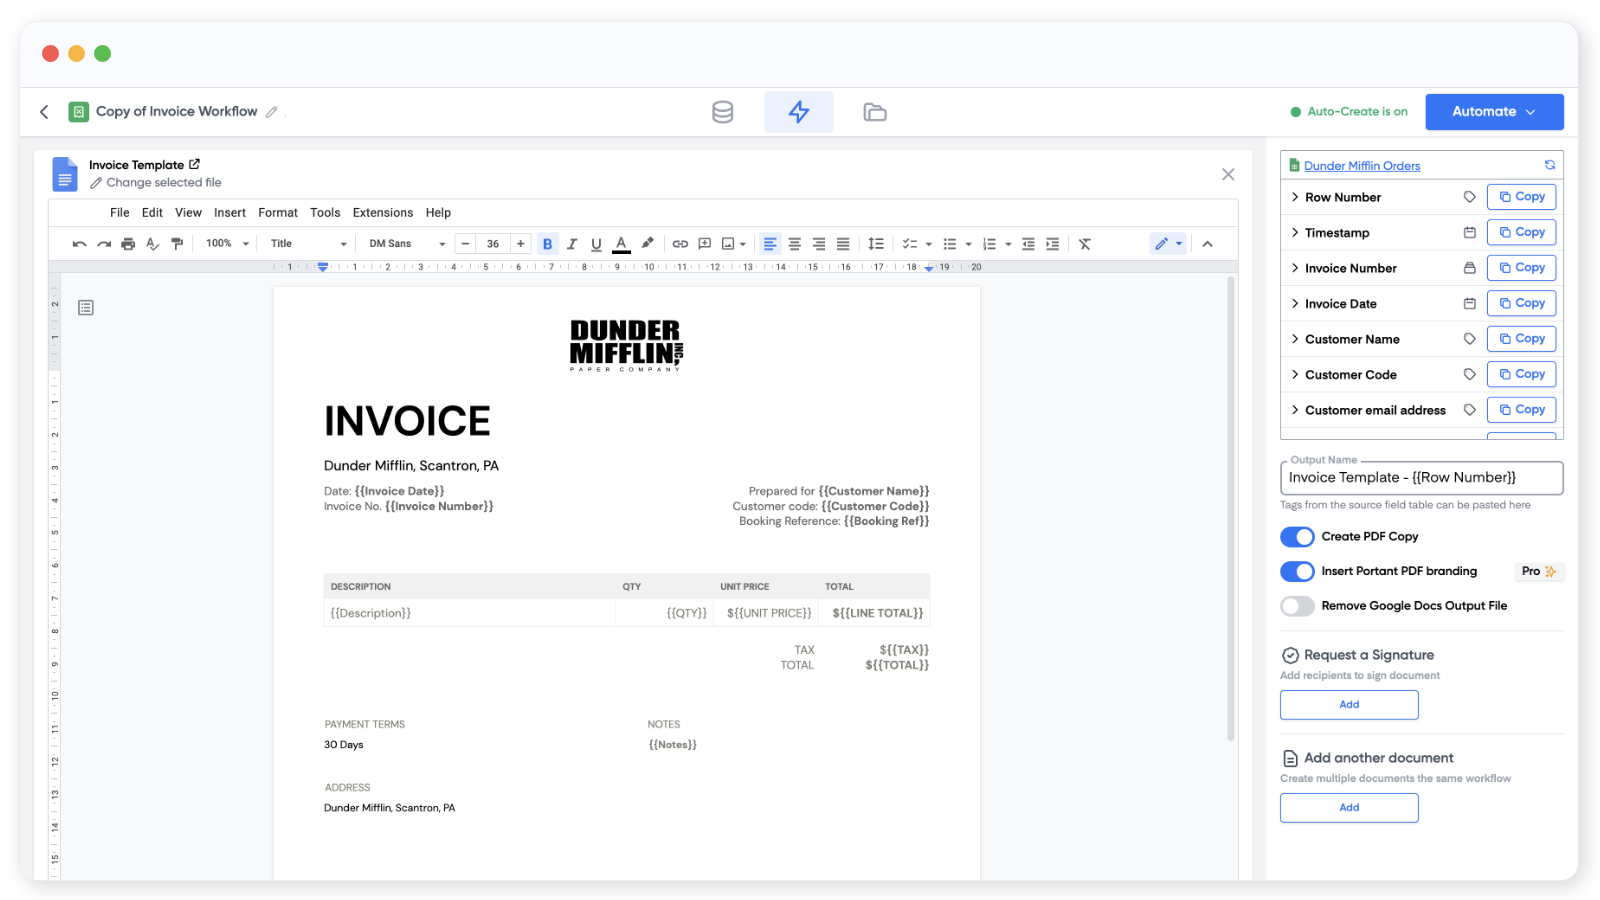
Optional: add header and footer rows above and below the tag row. They'll appear once per group, with the repeating rows in between.
Step 3: run the workflow
Once the document settings are in place (file name, PDF, email, etc.), click Create Documents. Each output will include a table with one row for every object in the array.