# Convert Form Responses to PDFs
This article will show you how to set up a workflow that produces PDFs every time a Google Form response is submitted. Google Forms is the perfect source if you would like to create a workflow that creates documents every time someone completes a form.
**In this article you’ll learn how to:**
1. Create a new workflow
2. Select a Google Form as the source for your workflow
3. Customise a document with the form answers
4. Turn on the workflow
#### Create a new Workflow
The first step is to create a new workflow by clicking the 'Add Workflow' button in the top right hand corner
#### Select a Google Form as the source for your workflow
When you add a workflow, the first step is to pick a Source or document template for your workflow. In this example we are going to start from a Form source (but you could also start from the PDF template).
Then select a Google Form from your drive or create a new Google Form:
After you have picked your Google Form or created a new one, Portant will display the form responses. If there are no responses yet, Portant will not display anything in this section. From this view you can open the form to edit the questions or appearance, or you can copy the public link. Or you can even click the '✎ Change selected file' under the form name to select a new Google Form
#### Customise a document template with the Form answers
The next step is to select the PDF template. To connect a template, click the 'Connect' button on the right hand side.
You can choose to use Google Docs or Slides as your PDF template. Then you can select to create a new google Doc/Slide or select an existing one.
> You can also select to generate an email from the form response
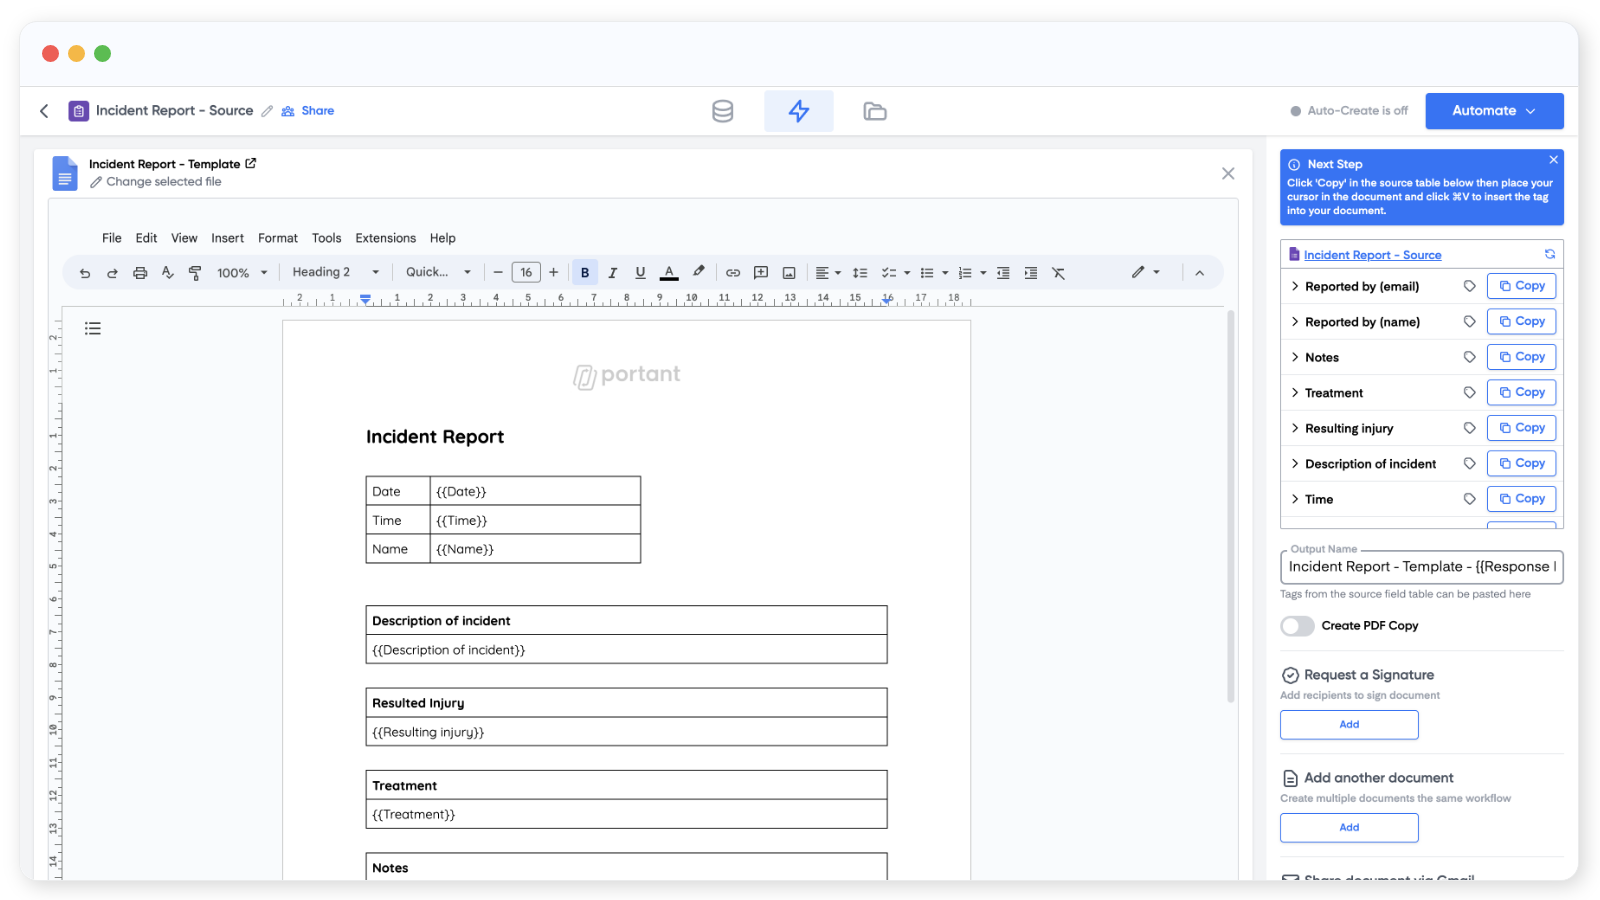
When you have selected your document, Portant will open it and you will be able to customise the document with Form answers.
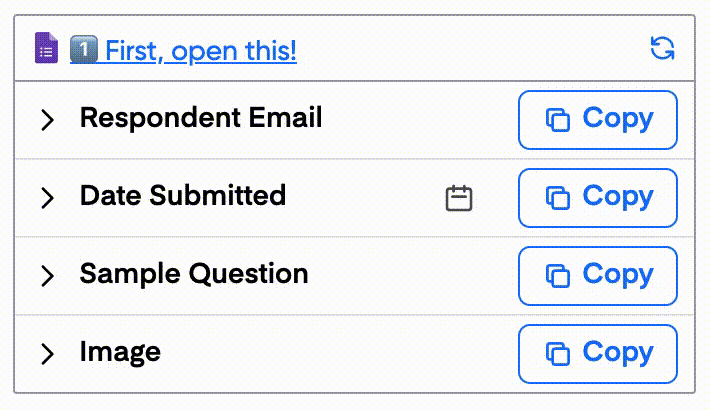
In the top right of the page is a table containing all the questions in your form (we call this the Sources Table).
If you want to place a form question answer into the document, click copy and the paste the {{tag}} in your document.
You can also [add image tags to documents and presentations](http://www.portant.co/guide-article/image-tags), and customise tags by clicking on the row.
When you have customised the document, you can then format how each output document will be named, by placing tags in the 'Output Name' field here
Below the Output name field there is the option to save the documents as PDF\
> If you have a free account, a Portant watermark will be added in the PDF footer. You can remove this watermark by [upgrading to Pro or Teams](https://app.portant.co/settings/billing)
This is the final step to customise your document. After completing this you can then turn on your workflow.
#### Turn on the workflow (and test)
When you have finished setting up your workflow, click the 'Automate' button in the top right corner and toggle the Auto-create button ON. This means that any form response that is submitted will be passed through the workflow and generate documents.
> In this section you can also process old Form responses by using the 'Process Existing Data' feature. With this you can process all the responses or a selection by choosing 'Custom range' from the drop down.
After this, open your form and submit a response to check it is working correctly. If it is, documents should be created in your 'Outputs' tab
Voila! You've just created your first workflow 🎉
#### Feedback and feature suggestions
We created Portant in 2021 and the feedback we have received since then has been very helpful and greatly appreciated. If you have any feedback please feel free to send us an email at
---
# Agent Instructions: Querying This Documentation
If you need additional information that is not directly available in this page, you can query the documentation dynamically by asking a question.
Perform an HTTP GET request on the current page URL with the `ask` query parameter:
```
GET https://docs.portant.co/portant-docs/use-cases/convert-form-responses-to-pdfs.md?ask=
```
The question should be specific, self-contained, and written in natural language.
The response will contain a direct answer to the question and relevant excerpts and sources from the documentation.
Use this mechanism when the answer is not explicitly present in the current page, you need clarification or additional context, or you want to retrieve related documentation sections.