# Webhooks
If you need to use a source we haven't integrated with yet, you can use webhooks to source data from almost any application on the internet. If an app can send data to a Webhook, you can integrate it with Portant. For instance, you can add the Portant Webhook to Tally or Typeform, so that any time a form in these applications receives a submission, a Portant workflow will be triggered.
**In this article, you’ll learn how to:**
1. Select a Webhooks as a workflow source
2. Generate your webhook address
3. Add your webhook address to your other application
4. Webhook Data Format
5. Create a test submission
6. Format your document
7. Finish your workflow
#### Select a Webhooks as a workflow source
The first step is to select a Webhook as the source for your workflow. So click '**New Workflow**', enter your workflow name icon and colour, then select '**Use a webhook**' as the source.
#### Generate your webhook address
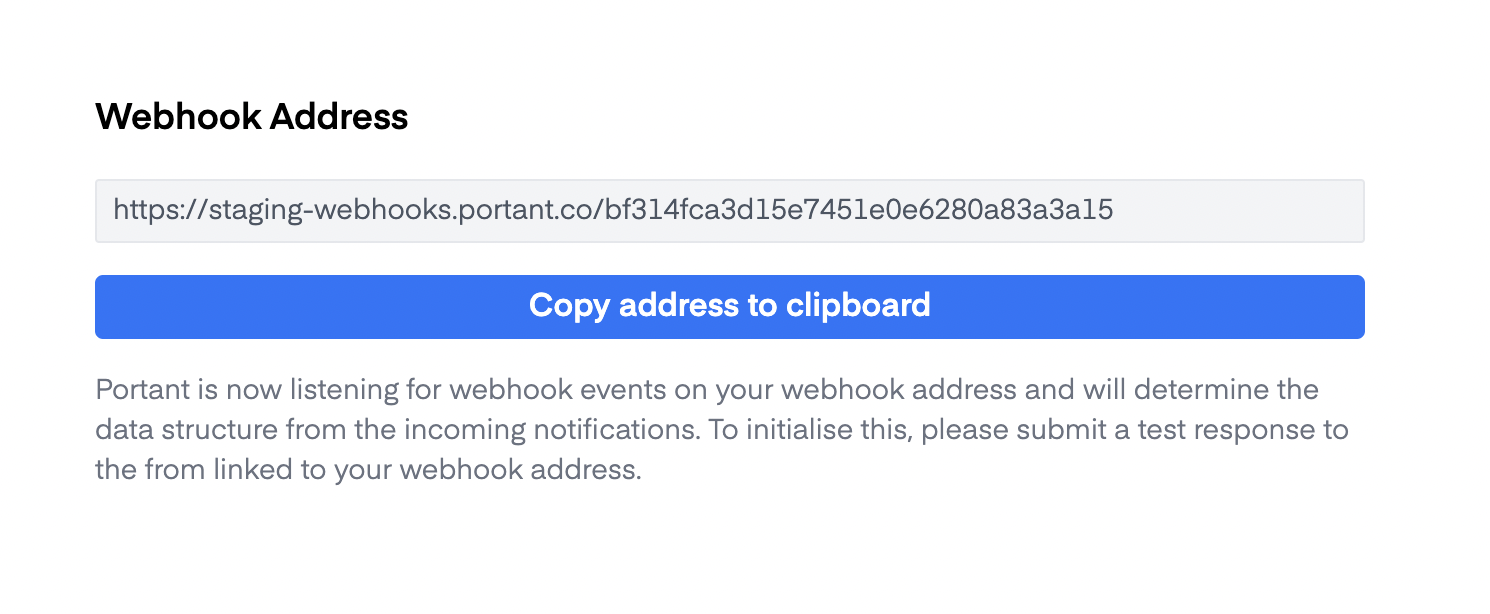
After you have selected a webhook as the source, Portant will automatically generate a unique webhook address:
Copy this address to your clipboard and then open your application's webhook section and paste the link in the webhook field.
#### Add your webhook address to your other application (e.g. Tally, Typeform, etc)
After you have copied your webhook address, open your other application, navigate to the webhook section, and paste it into the relevant section.
To learn how to add a webhook to [Tally](https://tally.so/), visit this page:
To learn how to add a webhook to [Typeform](https://www.typeform.com/), visit this page:
#### Webhook Payload Structure
When sending data to Portant via webhooks, payloads should be structured in a key-value format.
Here’s an example payload of how we expect data to be structured for an article:
```json
{
"article_id": "12345",
"title": "Understanding Webhooks: A Guide to Key-Value Payloads",
"author": "Jane Doe",
"published_date": "2024-10-29T10:30:00Z",
"content": "This article provides an in-depth look at how to use key-value pair payloads in webhooks...",
"category": "Tech Guides",
"url": "https://example.com/articles/webhooks-key-value-payloads",
"summary": "An introductory article about key-value pairs in webhook payloads, intended for developers.",
"nestedArray": [
{
"nestedFieldName1": "nestedValue1",
"nestedFieldName2": "nestedValue2"
},
{
"nestedFieldName1": "nestedValue3",
"nestedFieldName2": "nestedValue4"
}
]
}
```
{% hint style="info" %}
This example also demonstrates how to structure data for table grouping in your document by utilizing[ webhook data grouping](/portant-docs/sources/webhooks/webhook-data-grouping.md)
{% endhint %}
#### Create a test submission
It is important to send a test submission to Portant after you have set up your webhook because this is how Portant sets it up as a source table. The source table is how you add {{tags}} into your documents/presentations/emails in order to customise them.
You can either use your application's 'Test submission' functionality. Or you can manually process the data to simulate future submissions.
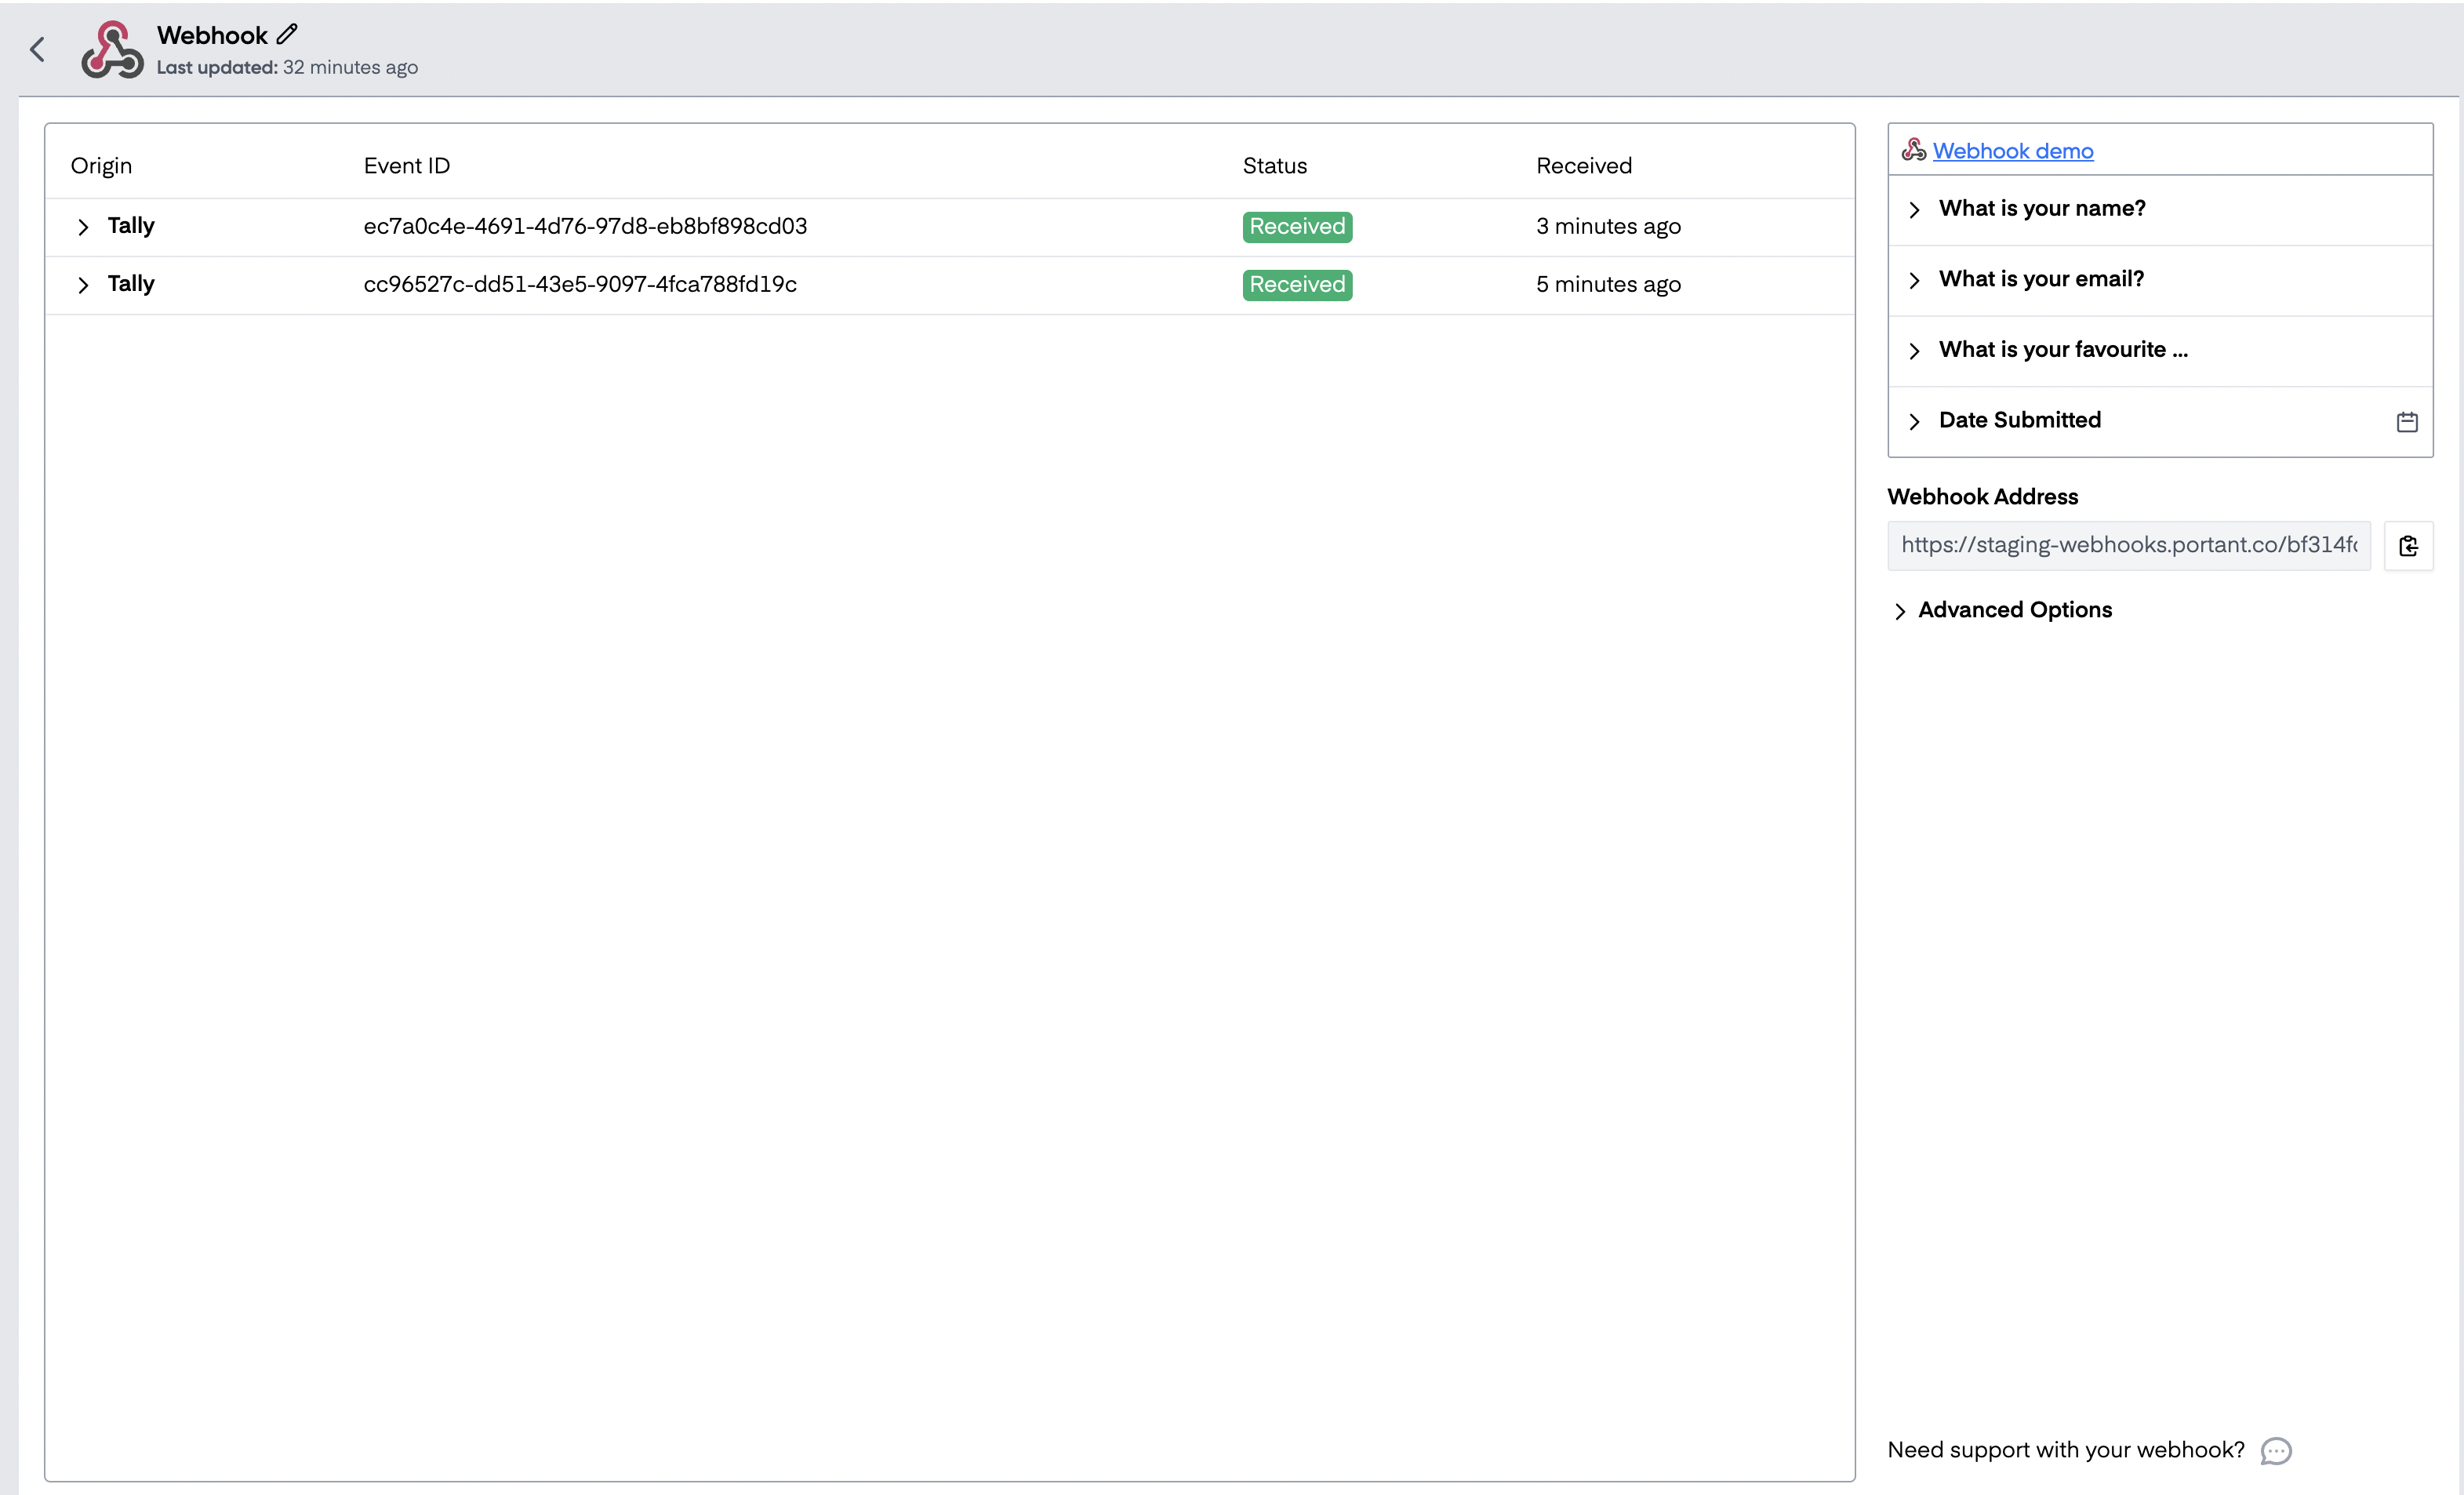
After you have created a test submission, Portant's webhook block will look like this (with submissions on the left and the fields on the right)
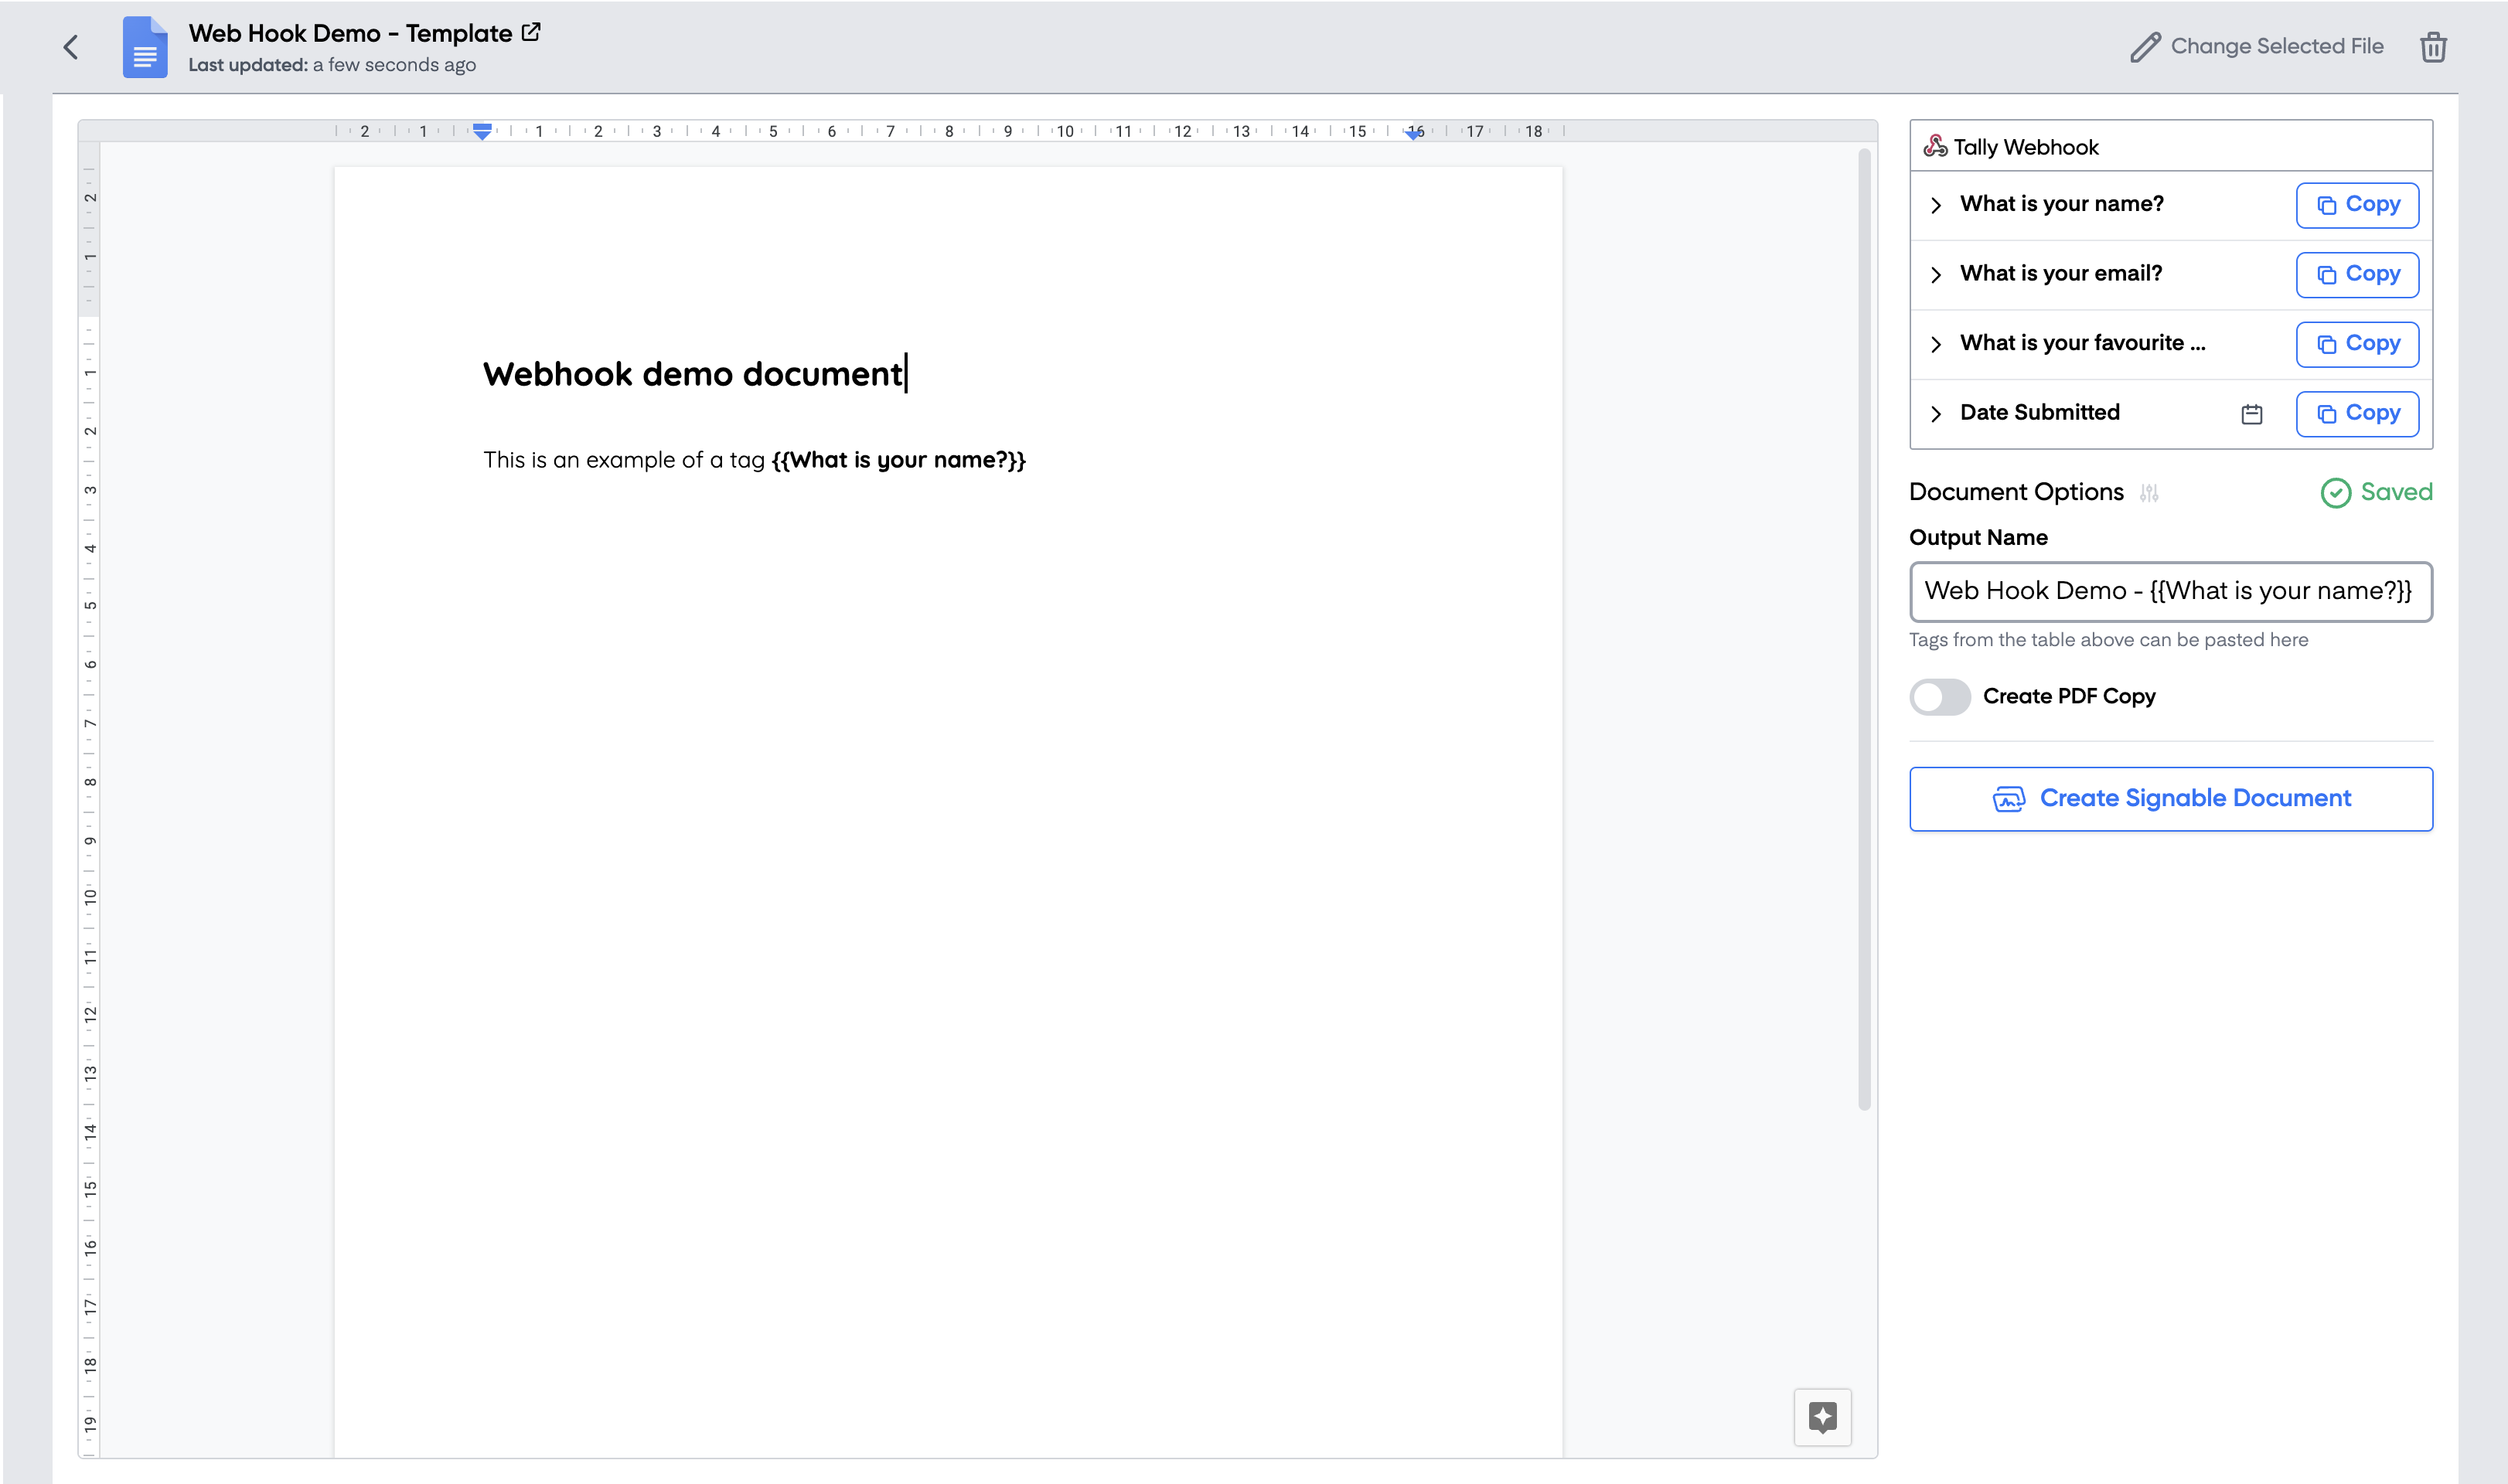
#### Format your document
You can now add a document/presentation/email block to your workflow and use the fields captured in the webhook to customise the document.
#### Finish your workflow
After you've set up the rest of your workflow, we recommend sending one more test to ensure if it is all formatted correctly.
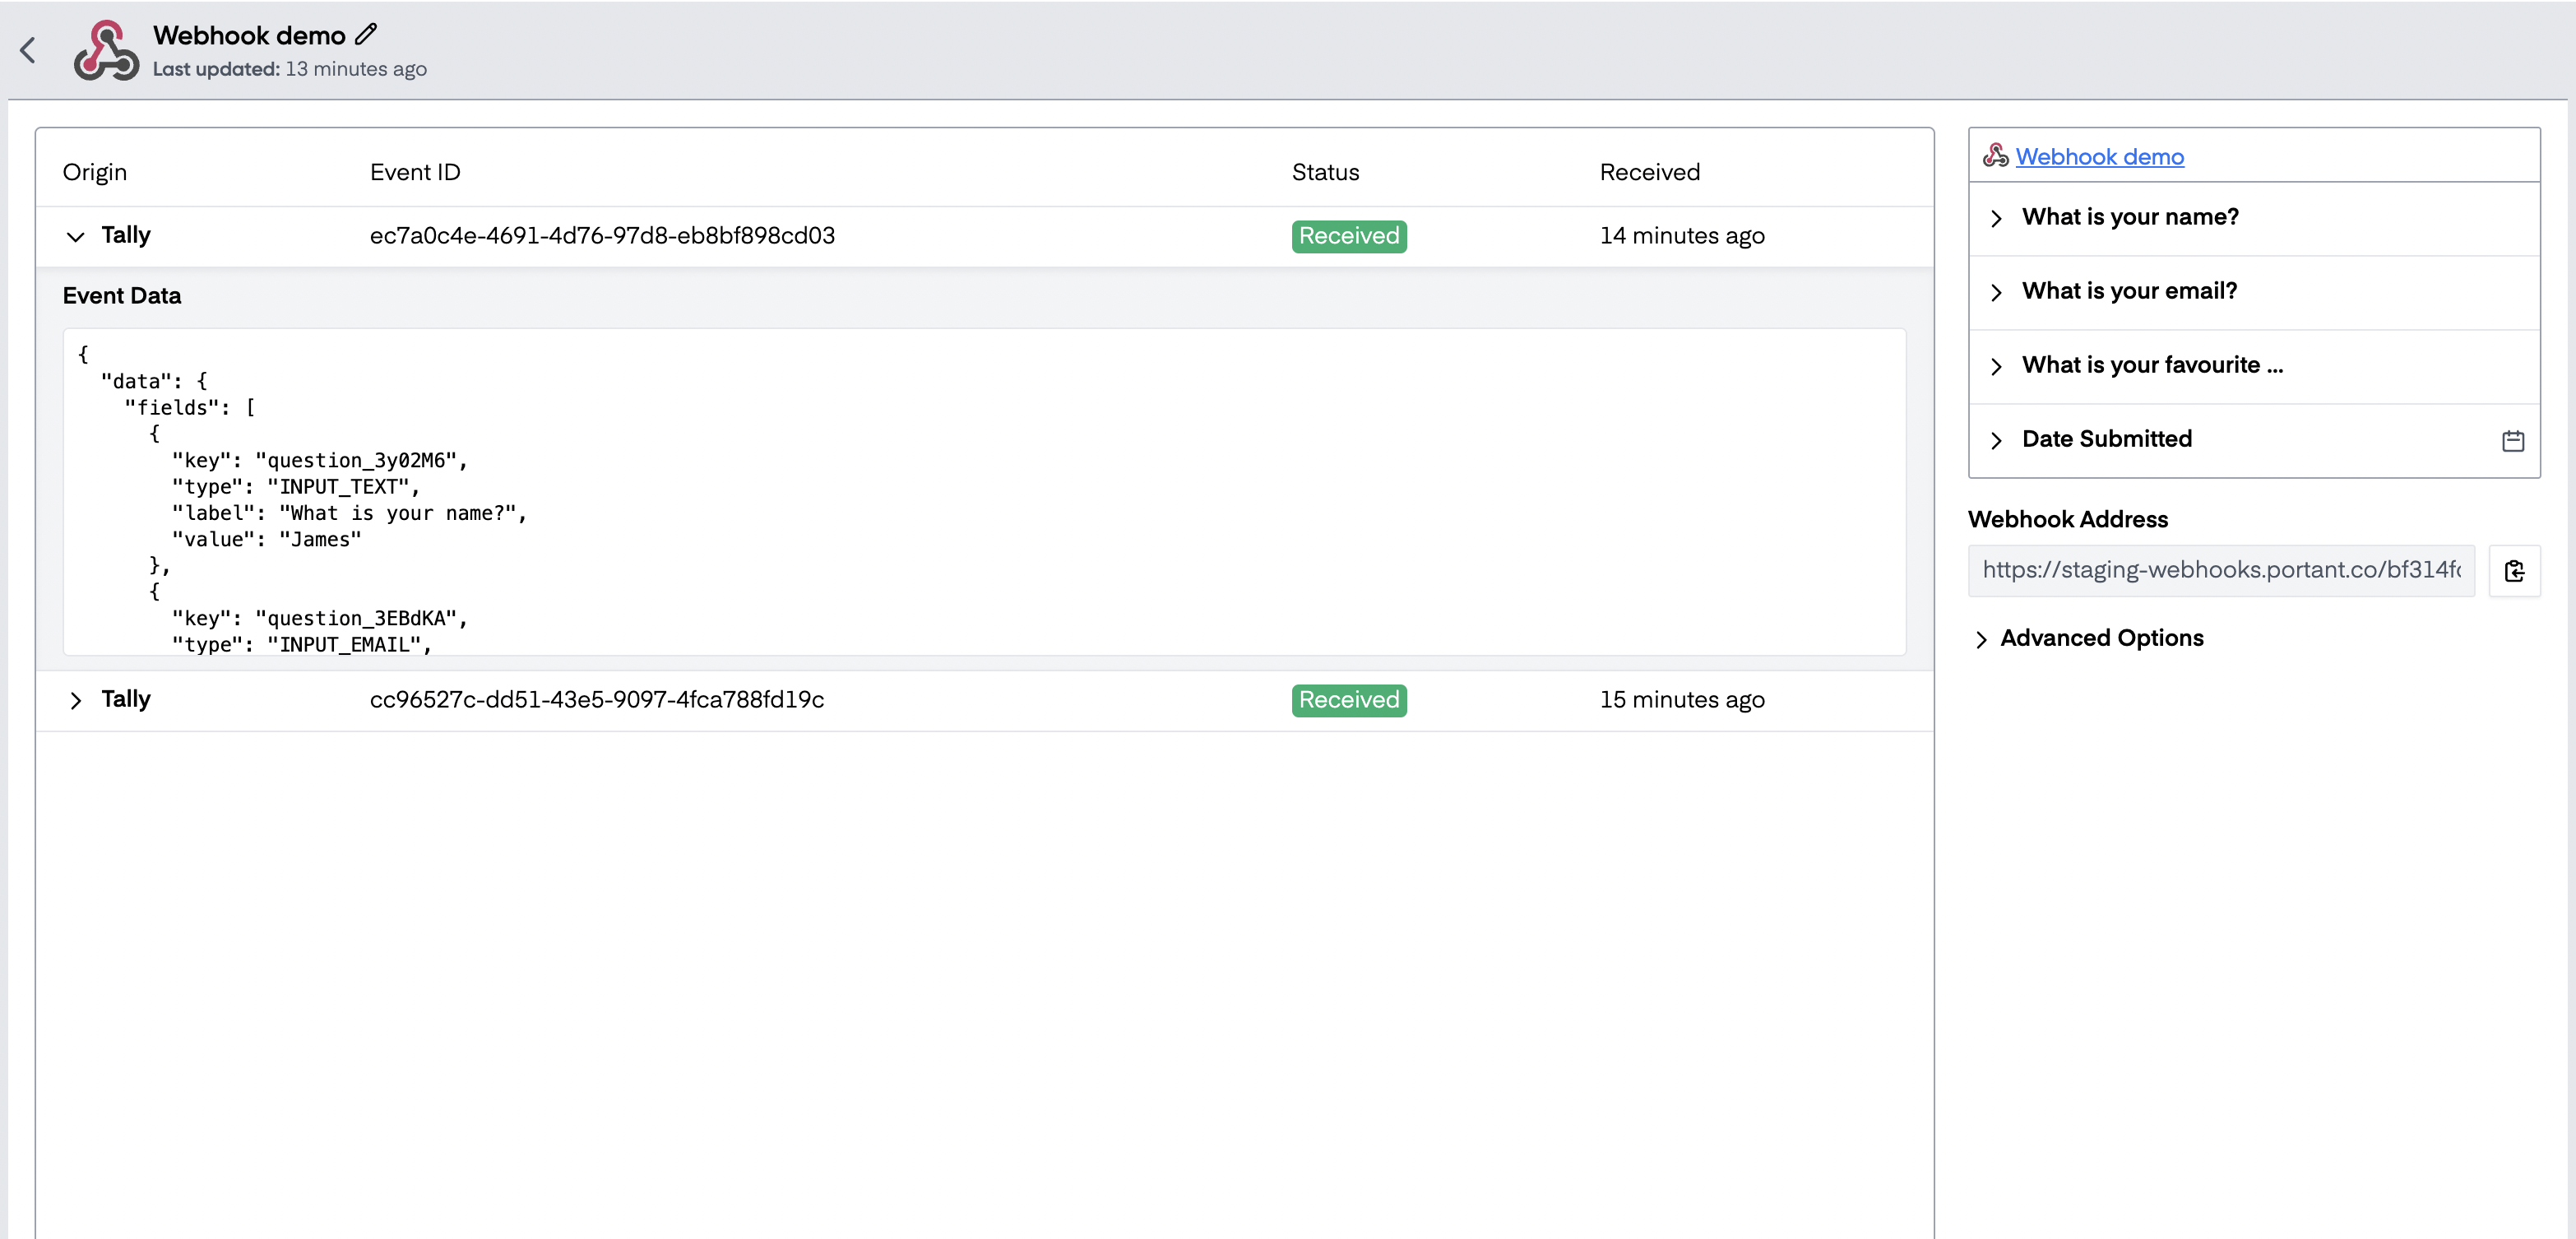
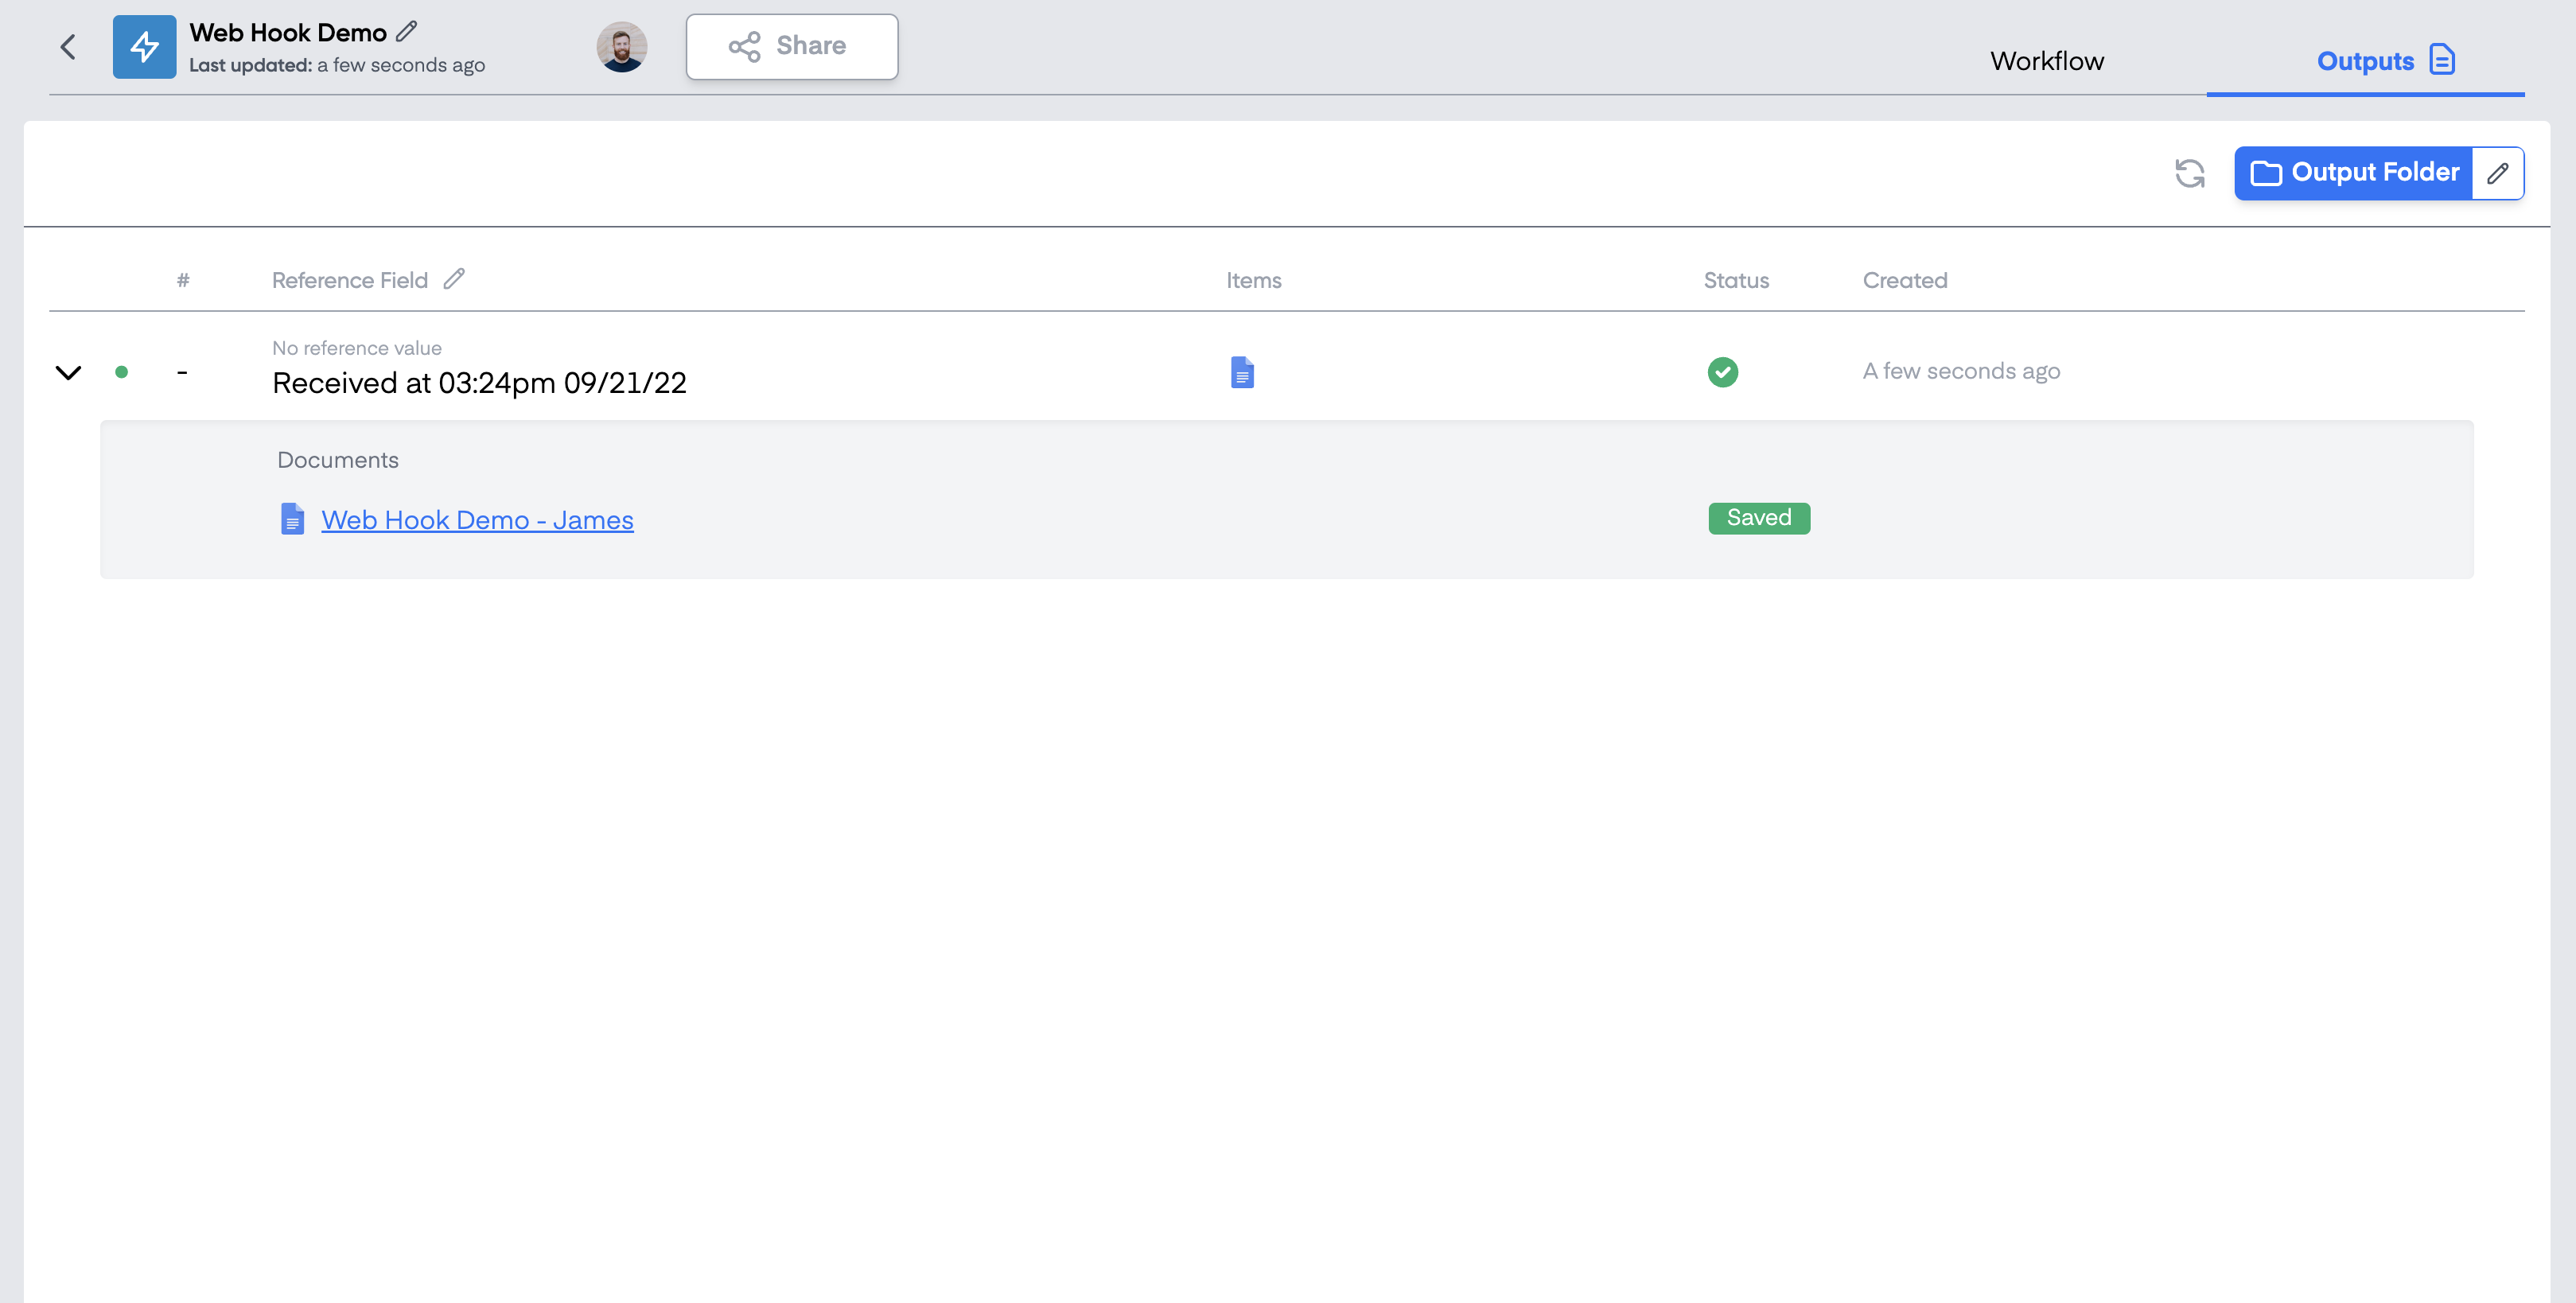
Then when the workflow is live, you will be able to see webhook submissions in the webhook block and expand the submission to see the data:
The created output documents will be displayed in your output tab and saved in a Google Drive folder:
That's all there is to it, you've just set up a document workflow using a webhook as a data source.
#### Feedback and feature suggestions
We created Portant in 2021, and the feedback we have received since then has been very helpful and greatly appreciated. If you have any feedback, please feel free to send us an email at
---
# Agent Instructions: Querying This Documentation
If you need additional information that is not directly available in this page, you can query the documentation dynamically by asking a question.
Perform an HTTP GET request on the current page URL with the `ask` query parameter:
```
GET https://docs.portant.co/portant-docs/sources/webhooks.md?ask=
```
The question should be specific, self-contained, and written in natural language.
The response will contain a direct answer to the question and relevant excerpts and sources from the documentation.
Use this mechanism when the answer is not explicitly present in the current page, you need clarification or additional context, or you want to retrieve related documentation sections.