Portant Docs
Launch PortantInstall App in Hubspot ↗︎
Portant Docs
Portant Docs
  • 👋Welcome
  • 🟢Product Updates
  • 🌱Getting Started
    • How to Sign up
      • Sign-up without a Google account
    • Quickstart
    • Ask for Help
      • Support Tickets
      • Support Codes
      • Screenshots
      • Developer Console
      • 400 Error
      • Resolve: API developer key is invalid error
      • How to request a transfer of your Portant account
    • Templates
    • Delete Multiple Workflows at Once
  • How to Set Up Your Account's Global Formatting Settings
  • Change Language Settings
  • 💫Personalise Documents
    • Adding Hyperlinks
    • Adding Images
    • Use custom tag names
    • Tag Formulas
      • Global tags
      • Tag Formulas
      • Tag IF Statements
    • Invalid Tags
    • Portant AI Content
    • Dynamic Google Sheets Charts
    • Tag Checker
    • Add online payment links
    • Add Stripe Payment Links to Your eSign Portal
  • 🌐Sources
    • Google Forms
      • Add formula fields to your Google Form workflow
      • {{tags}} for Google Forms
    • Google Sheets
      • Google Sheets Auto-create
      • How to source data from multiple Sheets
      • Saving Document Links to your Sheet
      • Data Grouping
    • HubSpot
      • How to install the Portant App in HubSpot
        • How to Add Portant App Cards to HubSpot
      • Create a Document in HubSpot
      • How to manage and select HubSpot Properties
        • Full list of available HubSpot Properties
      • Trigger HubSpot Workflows from Portant
      • Add a Portant Action to a HubSpot Workflow
      • How to view created documents in HubSpot
      • Add multiple line items into a single document
      • Add Deal Tags using Portant document statuses
      • Portant eSignatures + HubSpot
      • Review documents using the Review Block in HubSpot
    • Zapier
    • Glide
    • Webhooks
      • Webhook Data Grouping
    • Xero
    • Copper
      • Installing the Copper integration
      • Create your first Copper workflow
      • Generating your first document from Copper
    • Typeform
    • Tally
  • 💡Use Cases
    • eSignatures Requests
    • Incident Report
    • Quarterly Business Reviews
    • Invoices
    • Convert Form Responses to PDFs
  • ✒️eSignatures
    • Getting Started
    • Request Signatures (without a source)
    • Request Multiple Signatures
    • Customise Signature Request Email
    • Create Preview Links for Signature Requests
    • Resend signature requests
    • Cancel Signature
    • Add Audit to eSignatures
    • Request Info On Signing
    • eSigning Laws & Compliance
      • United States: E-SIGN Act and UETA ✅
      • Canada: PIPEDA and Electronic Transactions Act ✅
      • EU: eIDAS Regulation for Electronic Signatures ✅
      • UK: eIDAS Regulation and Electronic Communications Act 2000 ✅
      • Australia: Electronic Transactions Act (ETA) ✅
      • New Zealand: Electronic Transactions Act (ETA) 2002 ✅
      • Israel: Electronic Signature Law 2001
  • ⚡Automation
    • Workflow Filters
    • Re-run an automation
    • Review Block
    • Converting docs to different file types
      • Microsoft Word (.docx)
      • Microsoft Powerpoint
      • Create PDF outputs
      • Save an output as a Microsoft Excel file (.xlsx)
  • ✉️Emails
    • Share a Doc via Email
    • Email Tracking
    • Send from aliases
    • Send Outlook Emails
    • Customize Your Email Content with HTML Editing
  • 📄Outputs
    • Customize Output File names
    • Auto-filing Output Files
    • Changing Output Folder
    • Search and filter your outputs
  • Deleting Outputs in Portant
  • 🎁Portant Add-ons
    • Data Merge
      • How to set-up a Google Sheets source
        • Data Merge Settings for Google Sheets sources
        • Automatically create documents
      • How to set-up a Google Forms source
        • Data Merge Settings for Google Forms
        • Automatically create documents
        • Edit Response and Pre-filled Response Links
      • Inserting Images
      • Advanced Settings
        • Editing tag names
        • Timezone, date and time format settings
        • Editing the Output Folder
        • Conditional logic for emails
        • Conditional Logic for Data Merges
        • Data Grouping in Portant Data Merge
    • Document Merge - Trello Power-up
  • 👥Teams
    • Creating Your Team
    • Sharing Workflows
    • Creating Folders in the Workflows Tab
    • Managing team permissions
    • Whitelabeling eSign Portal
  • 💳Billing
    • Update Billing
  • Developer
    • Build with Portant
Powered by GitBook
On this page

Was this helpful?

  1. Teams

Whitelabeling eSign Portal

How to customize the signing portal, including editing the branding, logo, and the forwarding URL (Teams users only)

PreviousManaging team permissionsNextUpdate Billing

Last updated 5 months ago

Was this helpful?

Did you know that Teams users have the option to personalize their signing portal by customizing elements such as branding, logo, and the forwarding URL? 🤠

In this article, you will learn how to:

  1. Customize the singing portal, including the branding and logo

  2. Customize your signing portal with a forwarding URL

Customize the signing portal, including editing the branding, logo, and forwarding URL (Teams users only)

Go to your settings page:

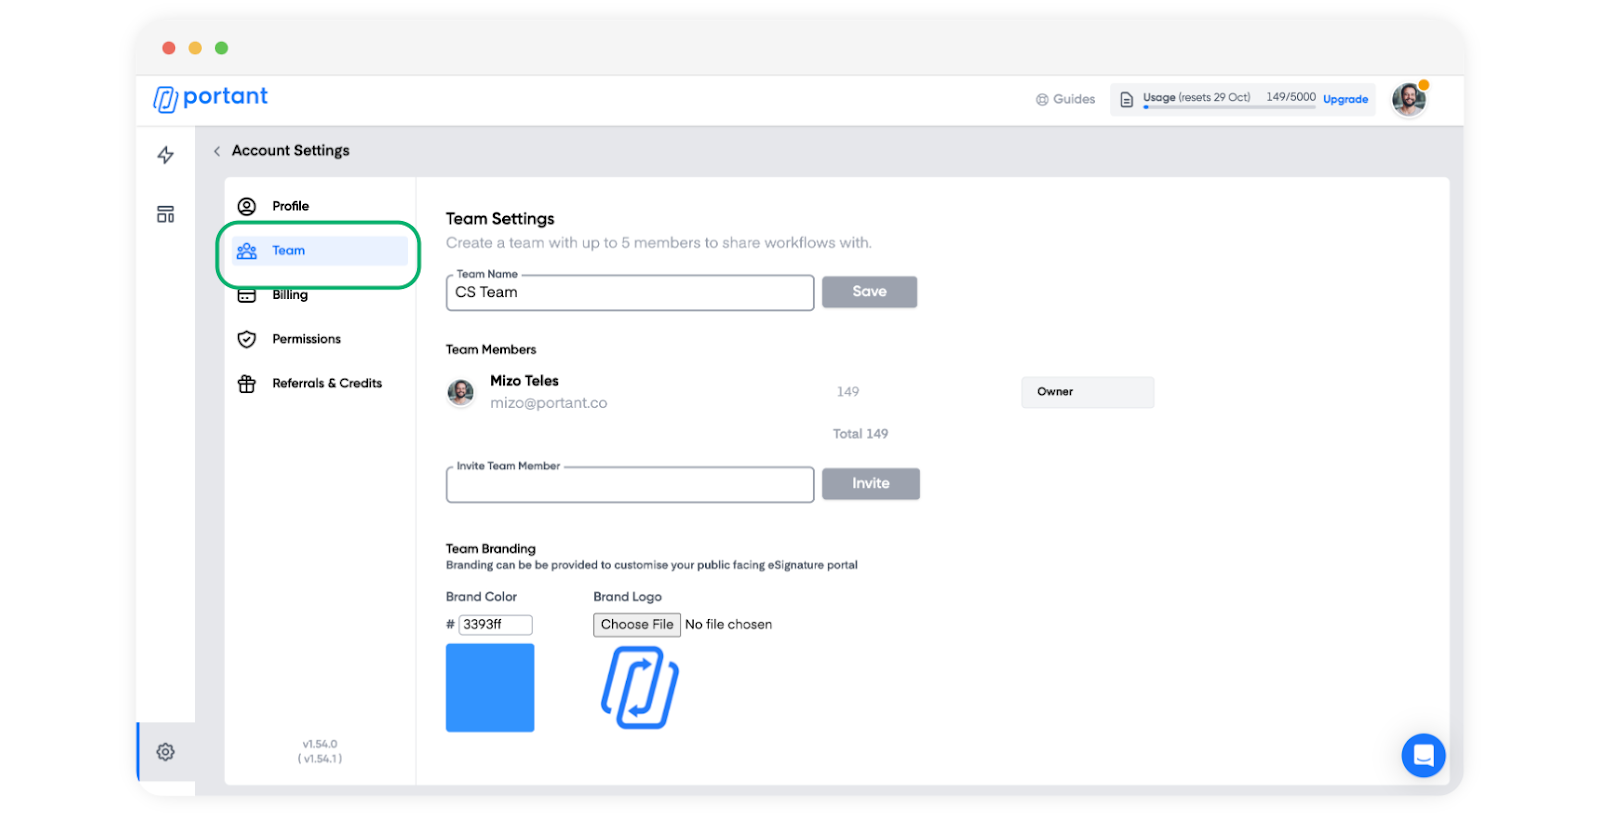
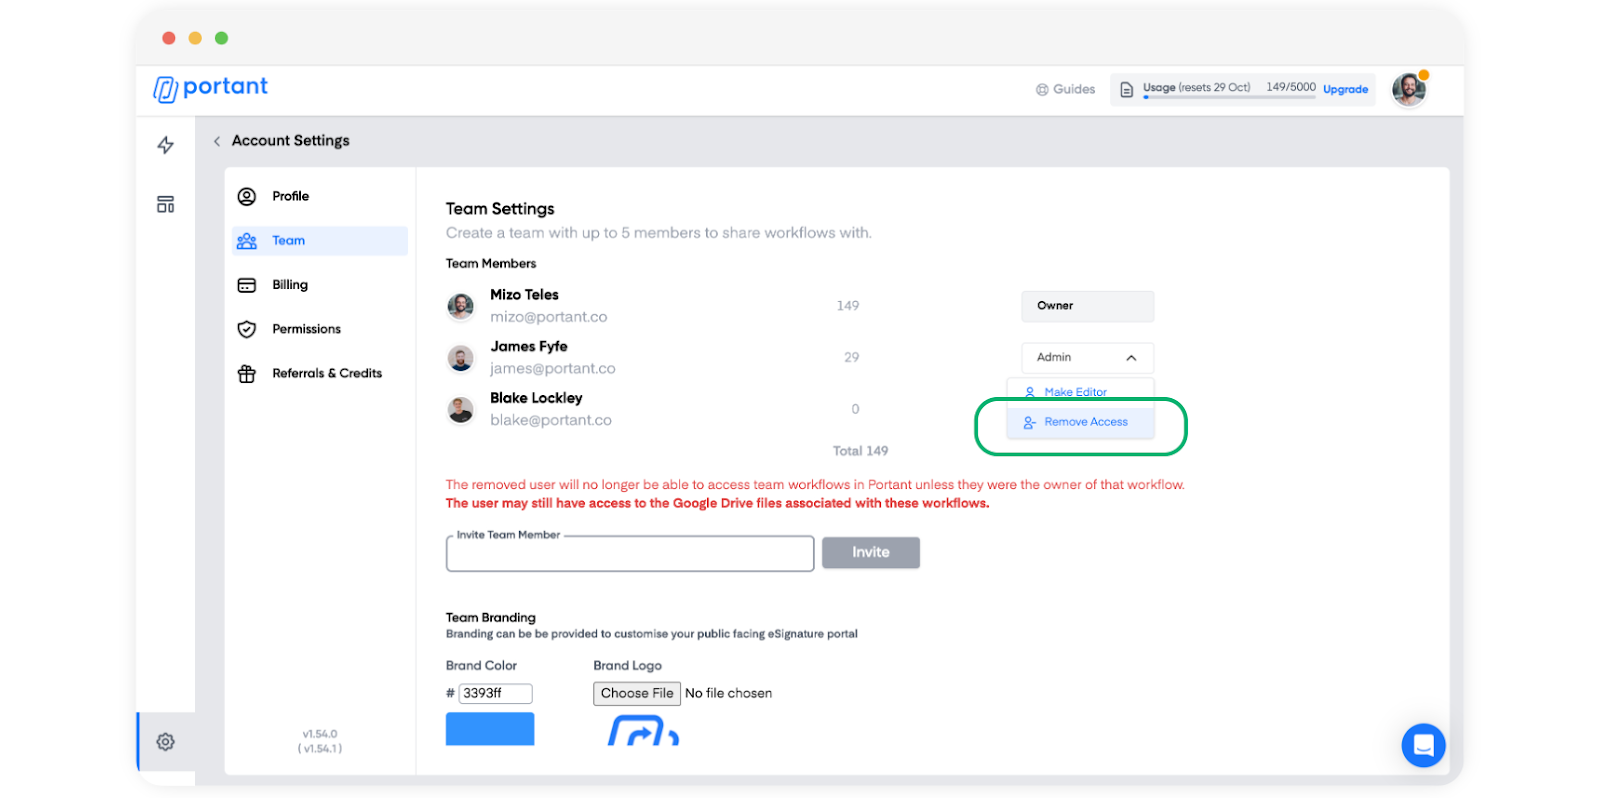
Select the "Team" tab:

Note: You can also access your settings page by opening the signature request block in your workflow and clicking on "Custom eSign Portal Branding" here:

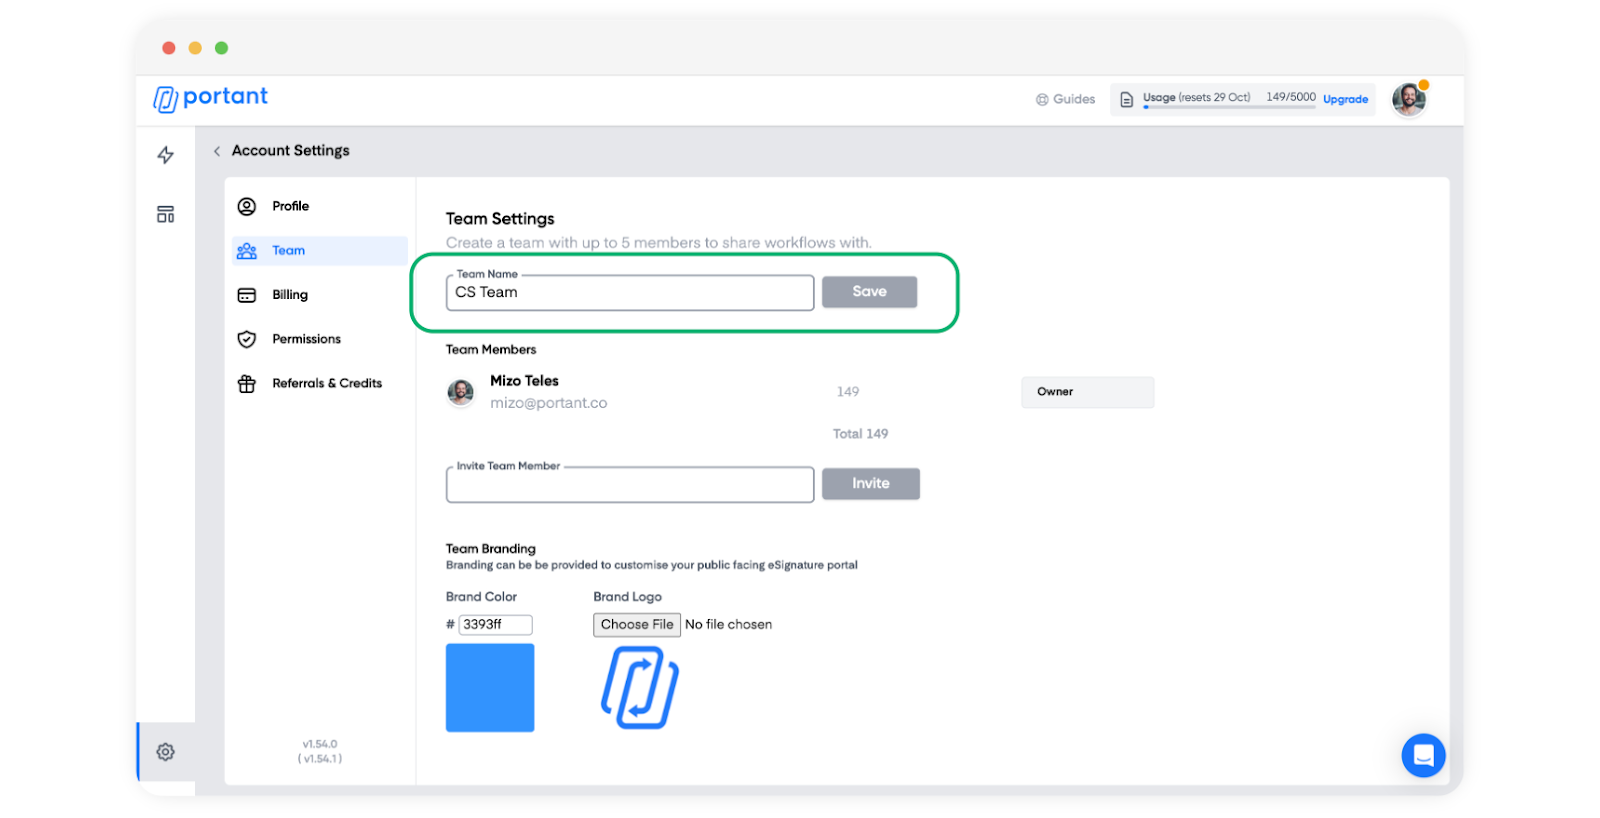
The first option you will see is the selection of your team name. In this field, insert the team name you want and click "Save":

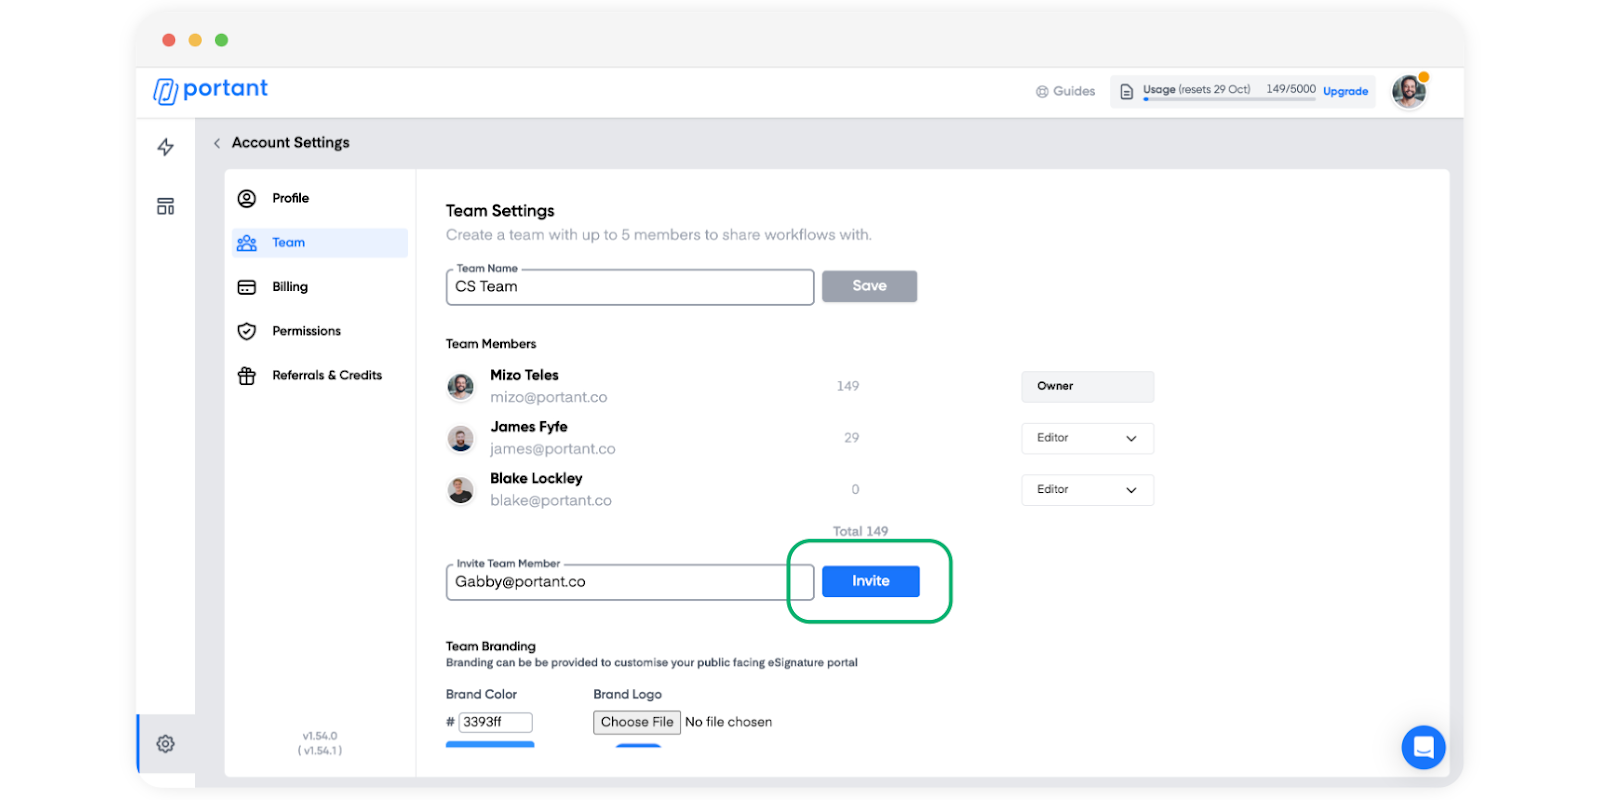
Once you've designated your team name, you can proceed to invite up to 5 members by entering their email addresses in this field:

After you added your team member's email address, click "Invite":

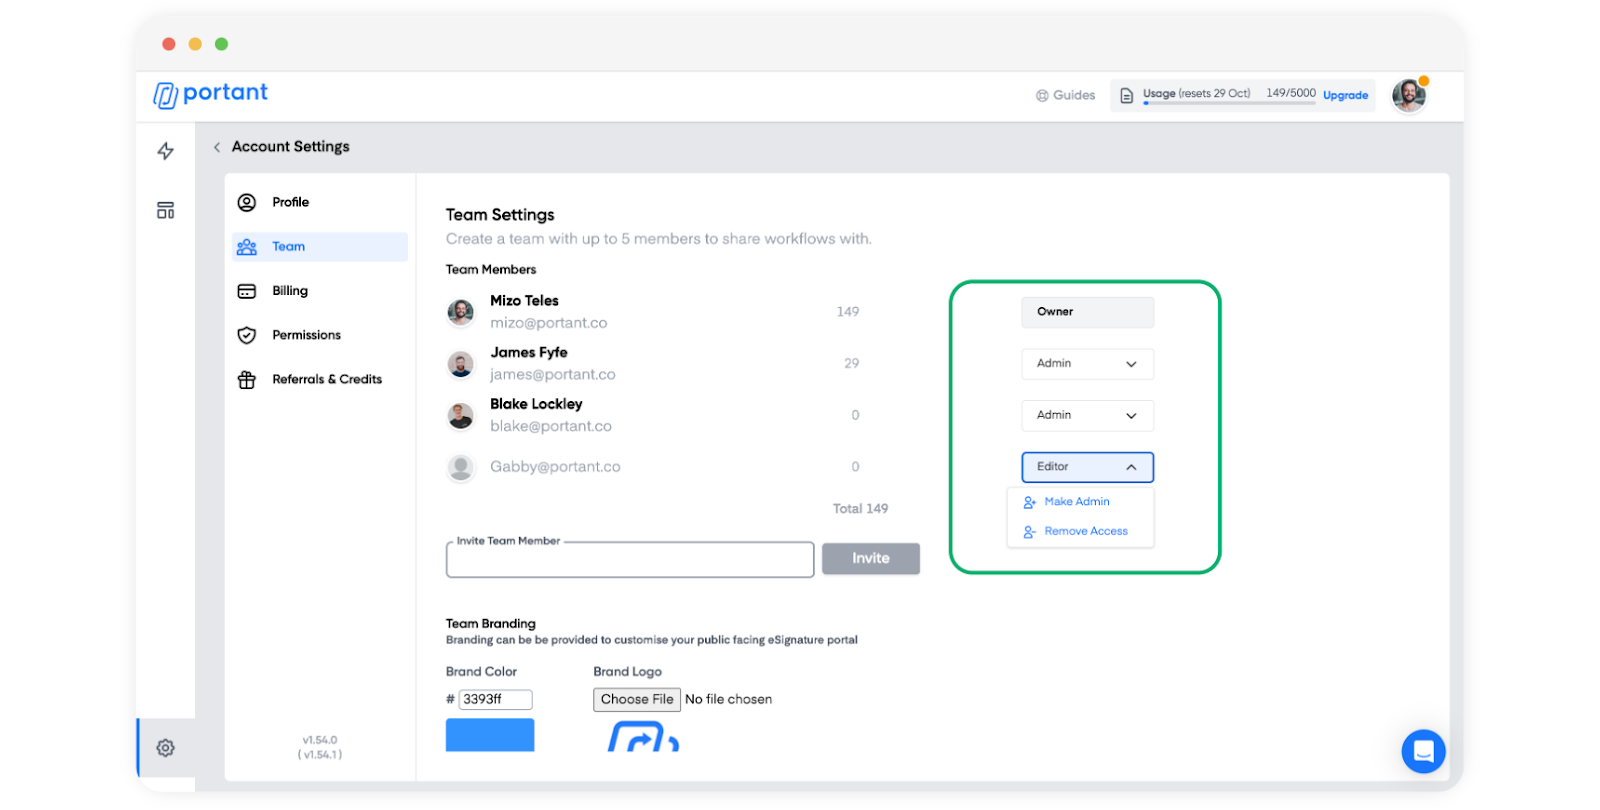
Choose the level of access for each team member. You have the option to designate them as either administrators or editors:

In case you need to remove a member, simply click on "Remove Access":

Next, choose your brand logo:

Once your recipients receive a signature request, your branding will be prominently displayed on the signing portal like this:

‍

Customize your signing portal with a forwarding URL

Open your signature request block:

On the right-hand side of your screen, you will see a "Custom Confirmation Page" field:

Enter the URL where you want your users to be redirected, and then click "Enter."

Note: Have in mind that the URL must include "https://" for it to function correctly.

You're done! 🥳 🎉 From now on, each time your recipient signs a document from your signing portal, they will be automatically redirected to the URL you've chosen.

‍

‍

Feedback and feature suggestions

We created Portant in 2021, and the feedback we have received since then has been very helpful and greatly appreciated. If you have any feedback, please feel free to send us an email at contact@portant.co

You can now personalize your team branding, which will determine the appearance of your signing portal. To begin, select your brand color. If you're unsure about the specific color code you want to use, you can find it at this :

👥
link