Add tags with Microsoft add-in
The Portant add-in puts your source fields in a sidebar next to your document, so you can add tags to a Word file or a PowerPoint deck without leaving it. It replaces copying tags from the source table in a second window, which is still how Google Docs and Slides templates work.
The add-in is where you build the template. The rest of the workflow, the source, the automation, the signing and the sending, stays in Portant and HubSpot, so nothing about it changes because you used Word instead of Google Docs.
Before you start
You need three things in place:
- A Portant account with Microsoft connected, so Portant can read your templates and save outputs to OneDrive or SharePoint
- A workflow with a Microsoft Word or Microsoft PowerPoint template
- A source connected to that workflow, so there are fields to insert. HubSpot is the most common one
Install it from the Marketplace
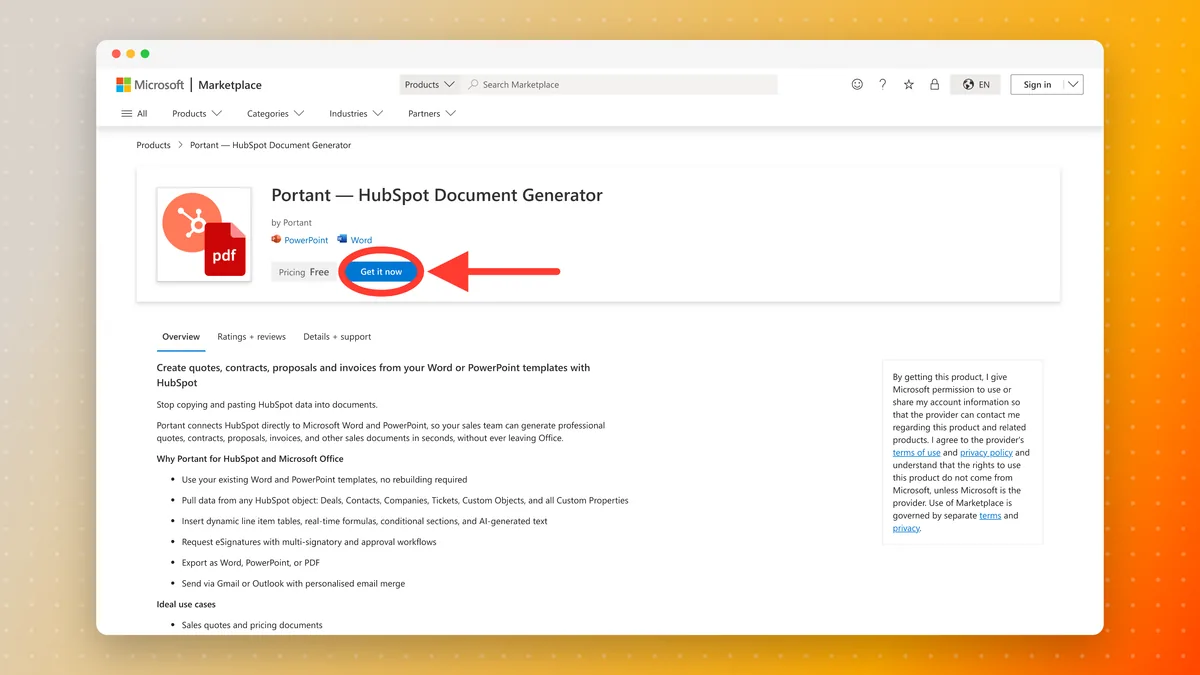
The listing is Portant, HubSpot Document Generator on the Microsoft Marketplace. Click Get it now and follow Microsoft's prompts. It covers both Word and PowerPoint, so you install it once, and it is free.
Note: The first time you use a Microsoft template, Portant asks for permission to reach your files in OneDrive. The template guides above cover that step.
Open the add-in
Open your template in Word and open the add-ins list from the toolbar (search for "add-ins" in the search bar at the top of the window if you cannot see it). Once the Marketplace install is done, Portant is listed under My Add-ins. Click it.
The pane opens on the right, beside your document, titled HubSpot Data Connector, and lists your workflows.
Important: Allow pop-ups from app.portant.co. The add-in signs in through a pop-up window, and a blocker stops it from connecting.
Pick your workflow
Select the workflow whose template you have open. The pane then shows two tabs, Merge tags and Signature fields, and lists every field available from that workflow's source.
Each field shows the tag Portant will use, in the same {{Field name}} form as everywhere else. See tags for what the tags themselves can do.
Insert a tag
- Click in your document where you want the value to appear
- Click Insert next to the field you want
The tag lands at your cursor. You can also copy a tag with the copy button and paste it wherever you like, which is quicker when you are adding the same field in several places.
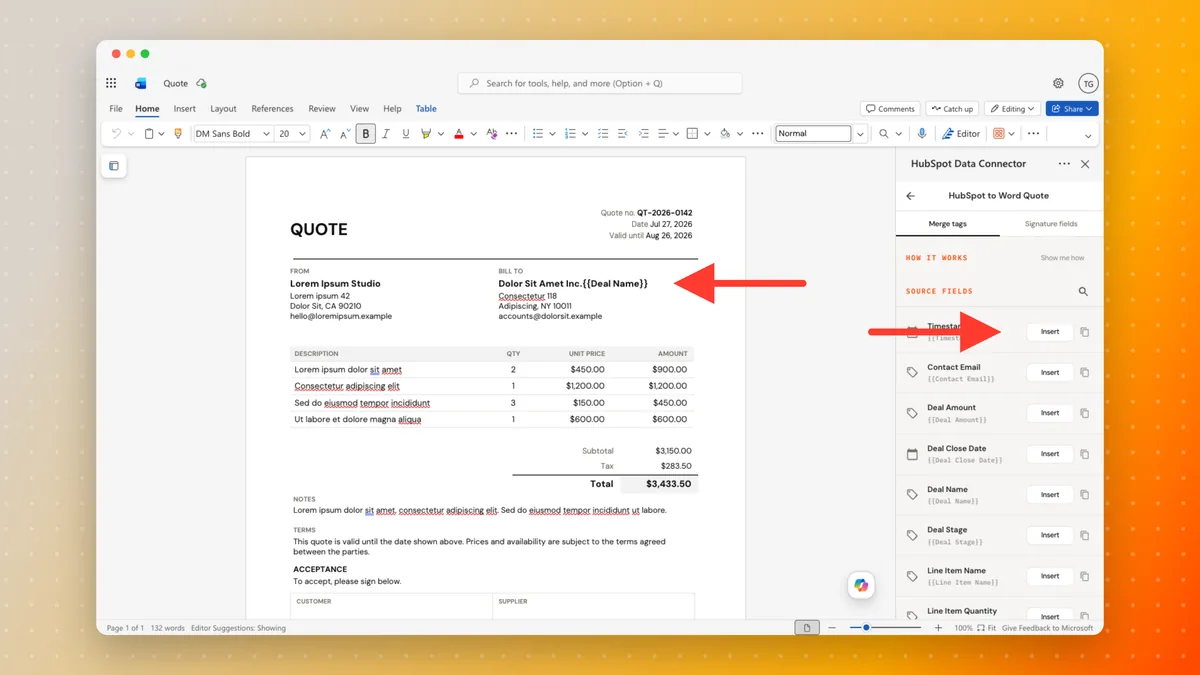
Because the tag is just text in your own file, you style it with Word's own formatting tools. Set the font, size, weight and colour on the tag and the merged value inherits it.
What you can pull into a template
Anything the workflow's source exposes, which for HubSpot means the whole record:
- A deal, contact, company, ticket or custom object, and the objects associated with it
- Standard and custom properties, picked per workflow. See manage and select HubSpot properties
- Line items as a repeating table row, so a quote grows or shrinks with what is being sold
Add signature fields
Switch to the Signature fields tab for the places a signer needs to sign or date.
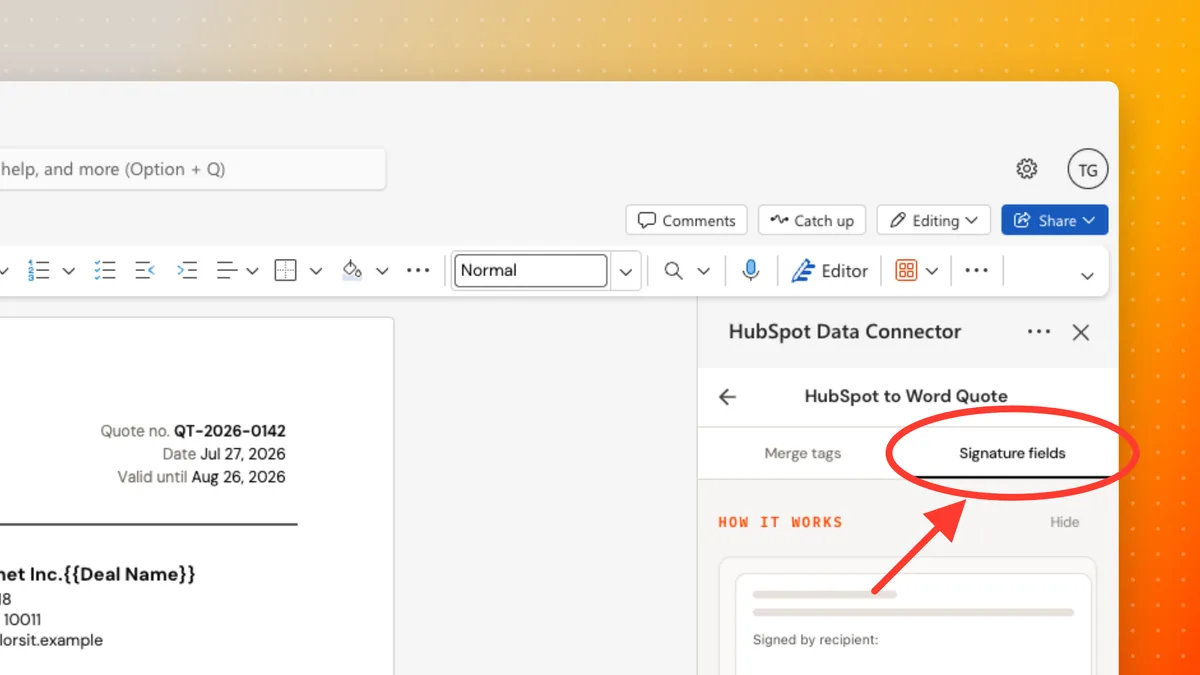
These work by copy and paste rather than by insert:
- Click Copy on the field you want, Signature or Date
- Click into your document where the signer should complete it
- Paste, and the signer field appears
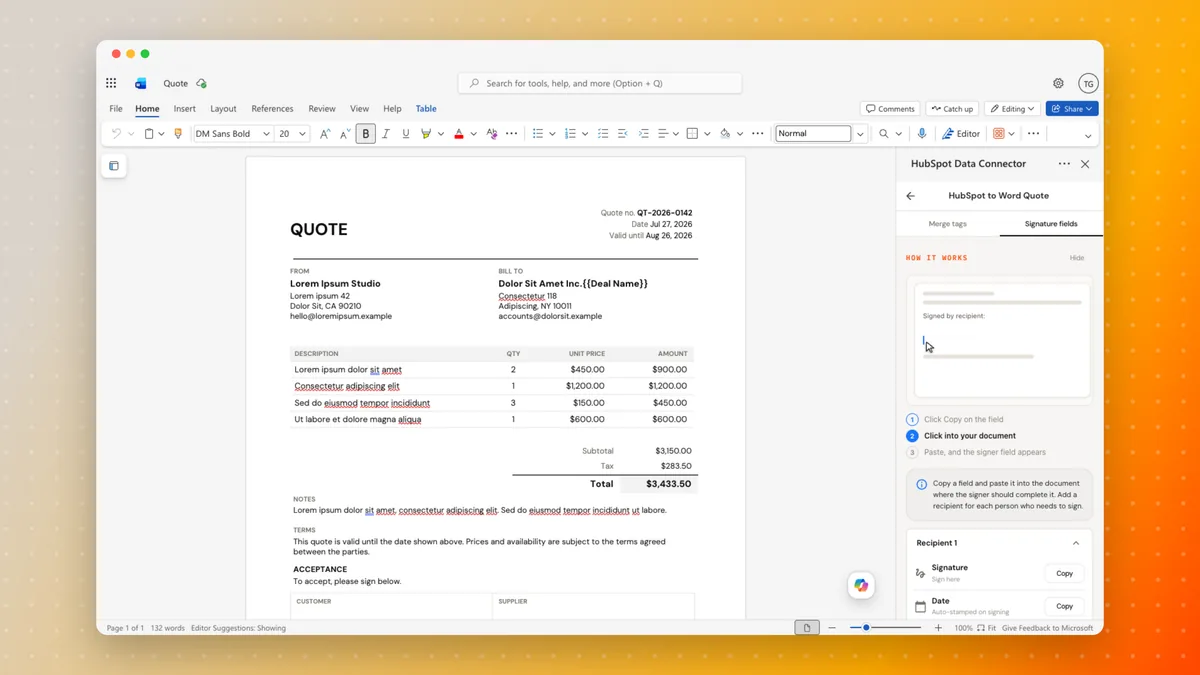
Fields are grouped per signer, starting with Recipient 1, so add a recipient for each person who needs to sign and paste their fields where they belong. Date is stamped automatically when that person signs, so you do not fill it in yourself.
Everything else about signing happens in Portant, not in the add-in:
- eSignatures for how signing works, who signs in what order, and what the signer sees
- Request multiple signatures when more than one person has to sign
- Review and approve documents to hold a document for an internal check before it goes out
- Portant eSignatures and HubSpot for picking the signer off the HubSpot record
Do the same in PowerPoint
The steps are identical for a deck. Open the .pptx, open the connector, pick your workflow, and insert tags onto your slides. Tags work in text boxes, tables and speaker notes.
What else you can put in a tag
The add-in inserts plain field tags. Everything the tag language can do still applies, and is set up in Portant rather than in the add-in:
| If you want to... | See |
|---|---|
| Use a shorter, friendlier name than the field name | Custom tag names |
| Do maths, format dates, sum values | Tag formulas |
| Show different content based on the data | Tag if statements |
| Show or hide a whole section based on the data | Conditional logic |
| Write a paragraph from the record instead of merging a field verbatim | AI |
| Insert a value that applies in every workflow | Global tags |
| Repeat a table row per line item | Line items and tables |
| Catch a typo before you send | Tag checker |
What happens to the finished document
- File format. Keep it as Word or PowerPoint when the recipient needs to edit it, or save it as a PDF when it is final
- Sending. Email it from Gmail or Microsoft Outlook, personalised with the same tags
- Storage. Outputs are saved back to OneDrive or SharePoint
- HubSpot. Every document becomes its own Document record in HubSpot, so you can filter, report and automate on it like any other object
Make it automatic
Once the template is built, you do not have to open Word again:
- Add a Portant action to a HubSpot workflow to generate a document from a deal stage change, a form submission or a ticket update
- Create a document in HubSpot to run it by hand from the record
- Workflow filters to skip the records that should not produce a document
What teams build this way
- Quotes and pricing documents
- Proposals and pitch decks
- Contracts with multiple signers
- Invoices and order confirmations
- Quarterly business reviews
If something is not working
- The pane cannot see your files. If Portant cannot reach your OneDrive or SharePoint files, see Microsoft permissions issue
- Your organisation blocks the add-in. If you are stopped before you can sign in, see Approve Portant in Microsoft 365 (Entra ID)
- Workflows stop part way through. The Microsoft connection has probably dropped. See Reconnect Microsoft
Related
- Microsoft Word templates and Microsoft PowerPoint templates
- Tags, the full tag reference
- Microsoft Word (.docx) output, for the file the workflow produces
- Create a document in HubSpot, to run the finished workflow from a record